
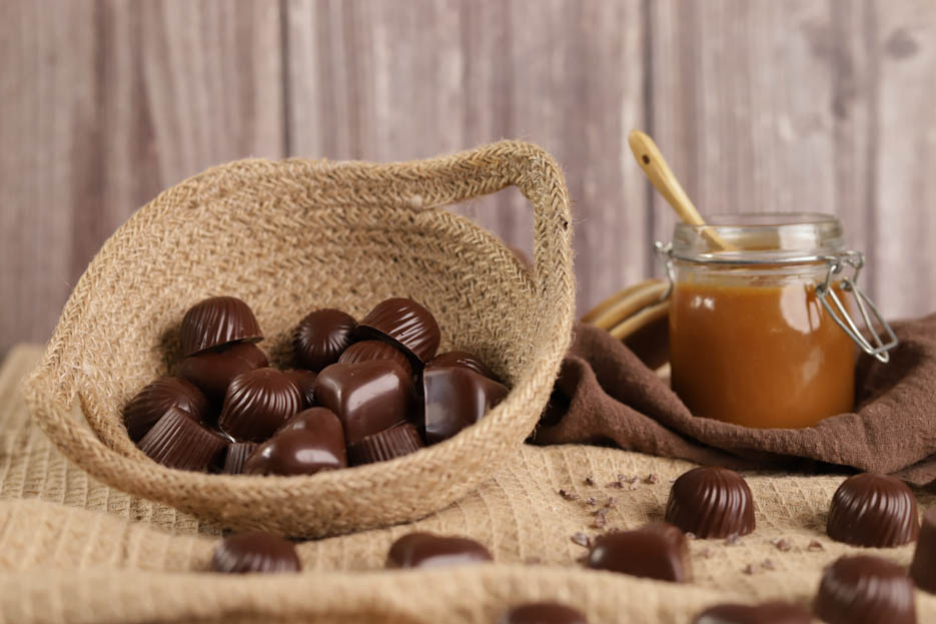
Homemade Chocolates
Hey there, food lovers!
This morning, I'm sharing a recipe that's a little more technical than the previous ones, but I promise it's completely doable and you only need a little equipment to make beautiful homemade chocolates. :o)
Here is a recipe on tempering chocolate, to achieve lovely shiny shells. I also prepared a cocoa nib ganache and a salted butter caramel. Yes, I have a serious sweet tooth!
Here's the result! ;-)

The recipe will give you about 63 chocolates. I advise against making a smaller quantity of chocolate, as it would cool too quickly and you would have to reheat it several times, which is not ideal...
Go follow the blog recipe HERE.
1x the salted butter caramel recipe will be enough.
- 340gr milk chocolate
- 150gr heavy cream
- 2 tsp cocoa nibs
- 20gr butter
- 375gr dark chocolate
- 125gr dark chocolate
- 3 chocolate moulds
- 1 grid and tray set
- A little cotton wool
- 1 chocolate spatula
- 1 thermometer
First of all, you need to prepare the ganache and the salted butter caramel, which will go inside our chocolate shells.
You'll find the salted butter caramel recipe on the blog. Click on this link: Salted Butter Caramel.
Salted Butter Caramel
You'll need about 150gr of caramel, so you can make half the blog recipe if you don't want leftovers. Personally, I always make the full recipe so I always have caramel in the fridge. :o)
You can prepare your caramel a few days in advance if you wish. On the day, place about 150gr of caramel in a small piping bag and set aside at room temperature while you make your shells.

Next, we'll prepare our cocoa nib ganache.
Cocoa Nib Ganache
Start by pouring 340gr of milk chocolate into a glass bowl.
Heat it in the microwave at 600Watt for one minute. Take it out and stir it with a spatula.
Put it back in the microwave, still at 600Watt for an additional minute.
This time, it has started to melt. Stir again so that the heat is distributed evenly and the chocolate continues to melt. Mix for about one minute.
Put the chocolate back in the microwave one last time at 600Watt for 20 to 30 seconds. This time, it will be completely melted. Set aside.


In a saucepan, pour 150gr of heavy cream with 2 tsp of cocoa nibs.
Cocoa nibs are pieces of cacao bean. They are very often used as decoration and can also be incorporated into ganaches to add a little crunch and zing.
Bring the heavy cream and cocoa nibs to a boil.


Pour a small portion (about 1/3) into your melted chocolate and stir.
Add a small amount of cream again to your chocolate and mix with a whisk.


Finally, pour in the rest of your cream, making sure to collect the cocoa nibs, then mix with the whisk.
This way, we've created an emulsion! The chocolate will be shiny and have a perfect texture. If you pour your cream all at once, you risk splitting (graining) your ganache...
Let the ganache cool to 35°C-40°C at room temperature. Check the temperature with a thermometer.


Finish by adding 20gr of butter to your ganache.
Whisk vigorously! You can blend it with a Bamix to perfect the emulsion, if you wish.
Here, I didn't do that, as it was already perfectly smooth.
Then place your ganache in a piping bag and set it aside at room temperature while we make our chocolate shells.


Let's get started on our chocolate shells! :o)
Chocolate Shells
Start by cleaning your chocolate moulds with cotton wool. Do not rinse them under water before using them!
A simple piece of dry cotton wool will remove any last little bits of dirt and limescale marks.
If you don't do this, you risk having marks on your chocolates, which would be a real shame!


To begin, you should know that if you melt chocolate without respecting a very precise temperature, your chocolates will have white spots and/or won't come out of the mould.
It is essential to follow the indicated temperatures to the letter so that your chocolates unmould easily and shine brilliantly!
There are several tempering methods. Sometimes very special equipment is needed, such as a marble slab to cool the chocolate. That can put a lot of people off…
Personally, I temper my chocolate differently. The rule is simple: melt a quantity of chocolate in the microwave at 600Watt and bring the temperature up to 45°C. Then add a third of unmelted chocolate to the melted mass and let it cool down to about 31°C before using it.
For example, for 450gr of melted chocolate, add 150gr of unmelted chocolate. It's really very easy! But let's go through this with pictures so you understand it well.
To work with chocolate, you'll need good quality chocolate! Not bar chocolate please, but proper professional chocolate.
Personally, I work with Callebaut, Valrhona and Carma. These are three brands I'm particularly fond of. Bar chocolate is not of good quality and does not contain as many cocoa crystals as pistoles. Plus, pistoles melt much more quickly. Anyway! Use good chocolate to make great homemade chocolates!
So pour 375g of dark chocolate into a glass bowl (glass helps distribute the heat evenly).
Place your bowl in the microwave at 600Watt (never hotter, otherwise the chocolate burns and seizes) and heat for one minute.
Take out the bowl, stir with a spatula so that the already melted chocolate mixes with the part that hasn't melted yet, then put the bowl back in the microwave (still at 600Watt) for one additional minute.
This time, take out the bowl and stir gently and calmly so the chocolate finishes melting. Don't overheat it! Give it time to melt gradually.
If you're not sure whether or not to reheat it, stir your chocolate well and check the temperature with a thermometer.
Your chocolate must be at 45°C.
If it's still too cold, add 10 to 20 seconds of heating. However, be careful that the chocolate does not exceed 48°C, because at 50°C it burns and crystallises, and at that point it's unrecoverable...


Once your chocolate is completely melted and at 45°C, add 125gr of dark chocolate unmelted.
Then be patient. Let the chocolate melt gently. It's normal for everything not to melt instantly, you need to give it time.
Adding unmelted chocolate pistoles will introduce cocoa crystals and allow the chocolate to shine when unmoulded. It is therefore essential not to reheat your chocolate during this step.
The chocolate will cool down to 31°C-32°C. That's the perfect temperature to use it. If you use it too warm, your shells won't be thick enough, and if you use it below 29°C, they'll be too thick. 32°C for dark chocolate is ideal. :o)


Prepare your equipment:
- Your moulds cleaned with cotton wool
- A grid with a tray underneath to collect the excess chocolate
- A chocolate spatula
- Plenty of baking paper to protect your work surface because chocolate stains!
We have enough for 3 moulds but focus on one mould at a time!
Pour the chocolate into a large piping bag and grab a mould.


Fill the cavities of the mould, then tap it on the table to bring up any air bubbles. This is very important! If you don't tap your moulds, there will be bubbles on the surface of your chocolates when you unmould them.
Pour the excess chocolate back into the bowl. Use your spatula and tilt the mould well so that the surplus can drain off properly.


Scrape well with your spatula so that your mould is as clean as possible.
Then place your mould upside down on the grid and leave it for at least 5 minutes.


Scrape again with the spatula so the mould is completely clean.
Then place the mould in the freezer for 5 minutes.
Grab your cocoa nib ganache and salted butter caramel.
Start with the caramel, fill each cavity with 2gr of caramel.


Then add the ganache on top of the caramel.
Be careful not to fill right to the top of the mould! Leave 2 mm free so you can seal it with chocolate.
Place the mould in the freezer for 10 minutes.


Come on, last step! :o)
Pour chocolate (not ganache, but pure chocolate) into all the cavities. If your chocolate has cooled too much, you can heat it for 10 seconds in the microwave at 600Watt.
Scrape again so the mould is perfectly clean.
Place the mould in the freezer one last time for 10 minutes.


And now, it's time to unmould!
If you tempered your chocolate correctly, your chocolates will come out all by themselves! I only had to turn the mould over for all the chocolates to fall out.
If your chocolates don't fall out on their own, simply tap the mould against the table and they'll come out without any trouble. I promise, your mould won't break. It's very sturdy.


Ta-dah! They're beautiful and wonderfully shiny! :o)
I hope you enjoyed this recipe and that you'll give making your own homemade chocolates a try!
Have a lovely Sunday, food lovers!
Karin
P.S.: All the equipment used can be found at the bottom of the recipe.


Related posts
 Juicy Matcha Muffins with Pecan Nuts & White Chocolate
Matcha Iced Latte & Coconut Variant
Pull-apart bread with fresh wild garlic pesto
Mini Banana Bread with Chocolate Chips
Juicy Matcha Muffins with Pecan Nuts & White Chocolate
Matcha Iced Latte & Coconut Variant
Pull-apart bread with fresh wild garlic pesto
Mini Banana Bread with Chocolate Chips
Leave a comment