
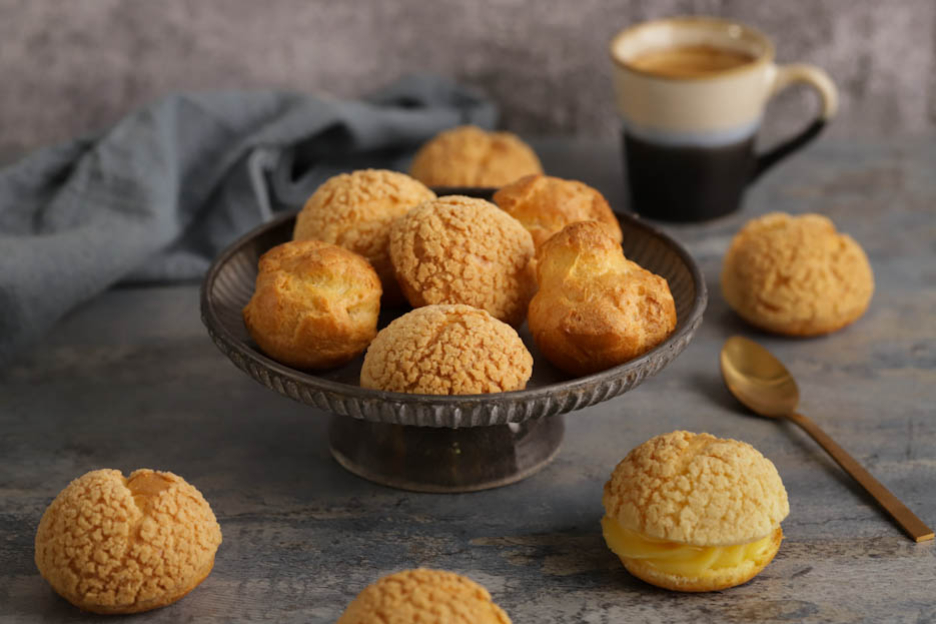
Choux Pastry
Hello food lovers!
Today I'm sharing a new base recipe... choux pastry!
With this recipe, you'll be able to create ultra indulgent desserts. You may have already seen it in the blog posts for chouquettes, Paris-Brest, raspberry éclairs, etc... In short, as you can tell, we love choux pastry! ;-)
You'll also discover the craquelin recipe. It's what makes the choux puff up evenly and gives them a delicious crunch. :-)

With this recipe, you can make (approximately) either 60 chouquettes, 20 large éclairs, or 50 medium choux.
- 82g butter
- 100g brown sugar
- 100g flour
- 110g whole milk
- 110g water
- 100g butter
- 120g flour
- 4g sugar
- 1 pinch of salt
- 4 eggs (220g)
We'll start with the craquelin recipe.
This step is optional but personally I prefer the look of the choux with it. It helps achieve a nice, evenly shaped choux. At the end of the recipe, you'll be able to see the difference with and without. ;-)
Craquelin
In a large bowl, combine all the ingredients: 82g butter, 100g brown sugar and 100g flour.


Mix by hand to form a nice ball of dough.
Place the dough on a sheet of baking paper.


Cover the dough with another sheet of baking paper to prevent it from sticking to the rolling pin when you roll it out.
Place 1.5 mm biscuit bars on each side of the dough to ensure an even thickness.
Roll out the dough using a large rolling pin, then place it in the freezer while you prepare the choux pastry.


The Choux Pastry
Preheat your oven to 180°C, fan-assisted.
In a saucepan, pour 110g whole milk, 110g water and 100g butter cut into pieces.


Add 1 pinch of salt and weigh out 4g sugar. Use a digital spoon scale to be precise with quantities.
Bring everything to a boil over medium heat.


Then add 120g flour off the heat.
Heat everything over medium heat while stirring vigorously with a spatula for about 2 minutes. A ball of dough will form and you'll see a thin white film appear on the bottom of the saucepan.
The dough is ready when it pulls away from the sides of the saucepan.


Transfer the dough to your stand mixer bowl, attach the flat beater (K) and mix on low speed for 2 minutes to cool the mixture down.
Beat 4 eggs with a fork so you can add them in 4 additions to the mixture.


Incorporate the eggs while continuing to mix. You'll get a smooth and shiny dough.
The choux pastry is ready — time to pipe it!


How to pipe and bake choux
If you want to make medium-sized choux, transfer your choux pastry into a piping bag fitted with a ROUND tip of 12 mm or 13 mm.
To fill the bag neatly, place it in a pitcher.


For even baking, use a perforated mat and a perforated baking tray! The perfect combo for choux pastry! :-)
In addition, you'll find impression mats in our range — perfect for piping perfectly even choux.
For medium-sized choux, use the small circles as a guide.
To pipe evenly shaped choux, hold your piping bag perfectly straight.


Take the craquelin out of the freezer and cut out rounds using a cookie cutter.
The craquelin round should extend about 2 mm beyond each side of the choux.
Place a craquelin circle on top of each choux.


On half of the tray, we placed a craquelin round, while the others were left as is. After baking, you'll notice the difference. :-)
Bake for 25 minutes in the middle of the oven preheated to 180°C; baking time will depend on the size of the pieces.
Do not open the oven door before 20 minutes of baking, otherwise the choux may go completely flat.
And here's the result, with and without craquelin. Your choice! :-) Personally, I have a slight preference for with.


How to pipe and bake éclairs
Start by preheating your oven to 220°C, fan-assisted. You'll see that baking éclairs is a little different from baking choux.
If you want to make éclairs, transfer your choux pastry into a piping bag fitted with a STAR tip of 12 mm or 13 mm.
To fill the bag neatly, place it in a pitcher.


Just like for choux, absolutely use a perforated mat and a perforated baking tray. It's the key to perfect baking! :-)
Here we used a plain mat (without impressions) to make mini éclairs.
If you want to make large éclairs, we have impression mats for choux or éclairs (see second photo below).
Pipe the éclairs to the size you want and don't forget... they will puff up during baking. ;-)


If you'd like to add craquelin on top of the éclairs, that's possible too. Simply cut rectangles with a knife and carefully place them on top of the éclairs before baking.
Just like with the choux, we placed a craquelin rectangle on some éclairs and left the others as is. You'll be able to see the difference after baking. :-)
Pay attention, what follows is very important for baking éclairs!
Place the éclairs in your oven preheated to 220°C. Then turn your oven completely off for 15 minutes.
The éclairs will bake in the preheated but switched-off oven for 15 minutes.
Turn your oven back on to 170°C fan-assisted for an additional 15 minutes.
In summary, the éclairs will bake for 30 minutes (15 minutes in the oven turned off and 15 minutes in the oven at 170°C).
This method ensures perfectly even éclairs.
And here's the result, with and without craquelin. Your choice! :-P


If your choux collapse after baking, it means they weren't baked long enough. If your choux are not hollow or have cracked in the oven, it means you didn't dry out the choux pastry enough before adding the eggs.
Discover how to pipe with a star tip
Once the choux/éclairs have cooled, don't forget to fill them with pastry cream, diplomat cream, or simply sweetened whipped cream with fruit. ;-)
Baked choux pastry keeps for 2 days in a well-sealed box at room temperature. It also freezes very well in a zip bag, for about 6 months.
I hope you enjoy this new base recipe! :-)
Wishing you a wonderful day, food lovers.
Karin
P.S.: All the equipment used can be found at the bottom of the recipe.


Related posts
 Juicy Matcha Muffins with Pecan Nuts & White Chocolate
Matcha Iced Latte & Coconut Variant
Pull-apart bread with fresh wild garlic pesto
Mini Banana Bread with Chocolate Chips
Juicy Matcha Muffins with Pecan Nuts & White Chocolate
Matcha Iced Latte & Coconut Variant
Pull-apart bread with fresh wild garlic pesto
Mini Banana Bread with Chocolate Chips
Leave a comment
Comments
Question de Mélanie
By: Mélanie D. On 2024-07-30Merci beaucoup! Je vais retenter! Bel été ;-)
Réponse à Mélanie
By: Karin On 2024-07-29Merci pour votre message. Il y a deux possibilités, soit vous n'avez pas assez séché votre pâte soit vous avez mis trop d'œuf. Nous vous conseillons de bien sécher votre pâte à choux dans votre casserole, cela prend bien 2-3 minutes puis lorsque votre pâte à refroidie, ajoutez les œufs petit à petit. Dès que vous obtenez une belle pâte bien lisse, c'est que votre pâte à choux est prête même s'il vous reste de l'œuf ;-) Nous espérons qu'avec ces quelques astuces, votre prochain test sera réussi :-) Belle journée et bonne pâtisserie
Question de Florence
By: Florence H. On 2024-05-20Bonjour, j'ai une question par rapport au tapis perforé, pas spécifique à cette recette. Parfois les biscuits collent au tapis perforé. Dans quels cas puis je utiliser le tapis perforé et dans quels cas ne devrais je pas? Merci bien.
Replied by: Karin On 2024-05-21