
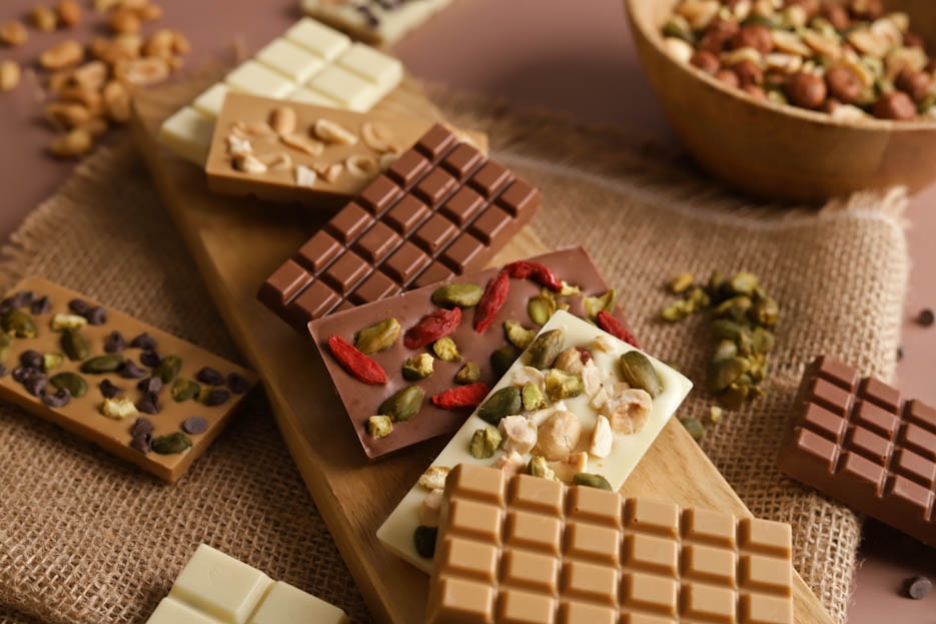
Chocolate bars
Hey chocolate lovers!
We're entering chocolate season! It's true we were already in chocolate season at Christmas, but Easter is also very very popular when it comes to chocolate. :o)
Here are some lovely chocolate bars to give as gifts or to share. Very easy to make, you could even consider a workshop with your children.

To make 10-12 mini chocolate bars, you will need:
- 120gr milk chocolate
- 120gr white chocolate
- 120gr dulcey chocolate
- 50gr nuts (pistachios, hazelnuts, peanuts)
- Goji berries or candied fruits according to your preference
- Dark chocolate chips
- Chocolate pearls
- Cotton wool
- 2 or 3 mini chocolate bar moulds

Start by preheating your oven to 150°C, fan-assisted.
On a perforated baking tray lined with a perforated mat, spread 50gr of nuts. I used hazelnuts, pistachios and peanuts. So 50gr in total. :o)
Roast your nuts for 15 minutes at 150°C, fan-assisted.


While our nuts are cooling down, let's start tempering the chocolate.
I've already done 2 or 3 tutorials on chocolate tempering so I'll go a bit faster this time. :o) You can always check my other blog posts where everything is explained very very precisely with all the details.
Here is a link if you would like more explanations: TEMPERING
Start by cleaning your chocolate moulds with a little cotton wool. This will prevent marks on your chocolates when unmoulding.
For small moulds with edges like bar moulds, I sometimes use cotton swabs. :o)


Let's start the tempering.
I'll show you with milk chocolate, but you can do the same with dark, white or dulcey chocolate.
Melt 90gr of chocolate in the microwave or over a bain-marie. Personally, I put it in the microwave for 1 minute at 400Watt, stir, then add 30 seconds to 1 minute depending on the chocolate (dark melts faster than white or dulcey).
The goal is to reach a temperature of 42-45°C.
Be careful not to exceed 50°C... Your chocolate would burn and seize up.


Once the chocolate is well melted and at 42-45°C, add the remaining 30gr of unmelted chocolate to the melted chocolate.
Gently stir with a spoon and let the chocolate melt completely, stirring occasionally.
Your chocolate will drop back down to around 31-32°C. Perfect!
Set your chocolate aside for a few minutes.


Crush your nuts. To do this, I use a freezer bag, pour my nuts in and run a rolling pin over them. Since the nuts have been roasted, they are harder and break more easily.
Don't forget to peel your hazelnuts by rubbing them between your hands. It doesn't matter if not everything comes off. Just remove the skins that come off on their own. :o)


There we go, my nuts are crushed. I've prepared several small bowls with my nuts, goji berries, chocolate pearls… And my tempered chocolate.


Pour chocolate into each cavity. I measured 35gr for the classic mini bars and 25gr for the heart bars.
The amount of chocolate will give you between 3 and 4 bars per chocolate (dark, white and dulcey) depending on the mould used.
We have a huge range of chocolate bar moulds in our assortment. :o)
Once your mould is filled, tap it on your work surface so that the air bubbles rise to the top. Tap it firmly about ten times. This is extremely important if you don't want little holes when unmoulding.
Once the moulds are well tapped and the bubbles have risen, decorate your bars with your ingredients. :o)


Have fun with it! :o)
Personally, I made the following combinations:
- Pistachios and goji berries
- Hazelnuts and dark chocolate chips
- Peanuts and hazelnuts
- Peanuts and dark chocolate chips
- Peanuts and chocolate pearls
Feel free to use whatever ingredients you like! :o)
Once your moulds are filled, place them in the freezer for a good 15 minutes.


Once the 15-20 minutes are up, take your moulds out of the freezer and turn them over onto your work surface.
Caution! The chocolates may fall out on their own, so don't turn your mould from too high up…
If the chocolates don't fall out on their own, don't panic! :o) Tap your mould at an angle on your work surface. One or two taps are usually enough to unmould them. If they really won't come out, put your moulds back in the freezer for an additional 10 minutes. But normally, if you've followed the tempering instructions correctly, there shouldn't be any problem.
And there you have it! Our lovely bars are ready to be enjoyed.
I hope you enjoy this tutorial and that you give it a try.
Children will have a lot of fun making these chocolates with you. They'll especially love loading them up with lots of ingredients and decorations. :o)
Wishing you a lovely Sunday!
Karin
P.S.: All the materials used can be found at the bottom of the recipe.


Related posts
 Juicy Matcha Muffins with Pecan Nuts & White Chocolate
Matcha Iced Latte & Coconut Variant
Pull-apart bread with fresh wild garlic pesto
Mini Banana Bread with Chocolate Chips
Juicy Matcha Muffins with Pecan Nuts & White Chocolate
Matcha Iced Latte & Coconut Variant
Pull-apart bread with fresh wild garlic pesto
Mini Banana Bread with Chocolate Chips
Leave a comment