
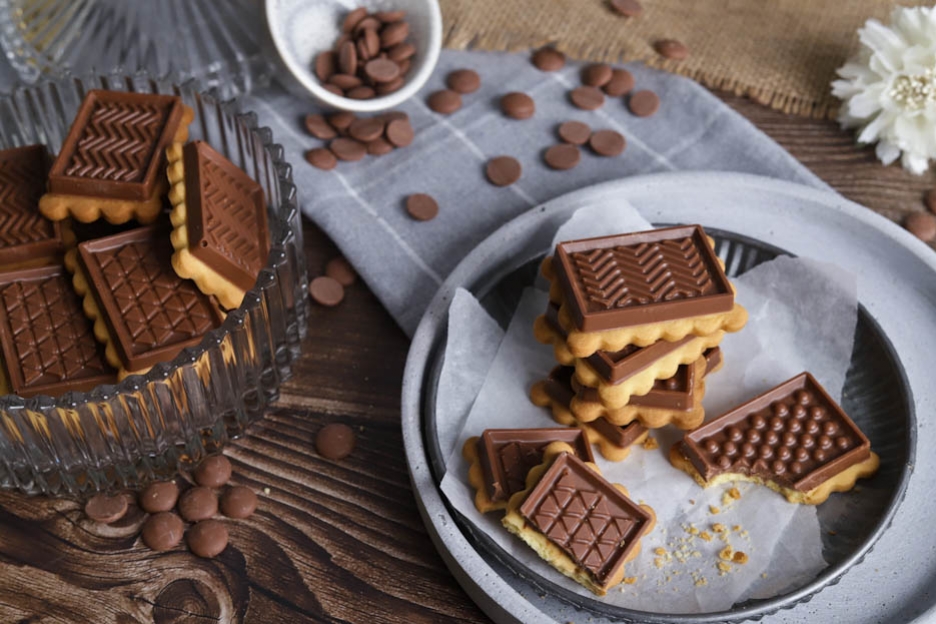
Petit Beurre Cookies
Hey foodies!
Today, I have a recipe for you to make with the family! :o)
Who doesn't love Petit Beurre cookies? In our house, everyone loves them! So we decided to make them ourselves.
Here is the result!

The recipe is super simple!
Here is the list of ingredients for 35 cookies:
Cookie dough
- 75gr butter
- 75gr icing sugar
- 1 egg
- 1 tsp vanilla extract
- 200gr flour
Chocolate decorations
- 225gr milk chocolate
- 75gr milk chocolate
Cookie dough
In a large bowl, pour 75gr of icing sugar and 75gr of butter, then mix with the paddle attachment (K beater) until a crumble forms.
We use icing sugar to get nice smooth cookies afterwards.


Add 1 egg and 1 teaspoon of vanilla extract and mix again with the paddle for 1 minute.


Finally, add 200gr of flour and mix again until the mixture forms a ball.
Be careful not to overmix your dough. If you mix it too long, your cookies will develop small bubbles when baking, due to the gluten. It is better to finish kneading by hand — a dough scraper can help you. :o)


Place your dough on parchment paper with 3 mm thickness guides. Grab a large rolling pin. Lightly dust the dough with magic powder or flour.


Roll out your dough to a thickness of 3 mm.
Slide it onto a perforated baking tray and then place your dough in the freezer for 15 minutes. This way, your cookie dough will be much easier to cut out.
Preheat your oven to 170°C, fan setting.


The dough will allow you to make approximately 35 cookies.
Cut out the cookies and place them on a perforated baking tray lined with a perforated mat. This way, the baking will be optimal! :o)
I used the "Petit Beurre Classic" kit by Decora — I love these moulds!
In our range, we have them in all themes (Halloween, Easter or even Christmas).
The Silikomart ones are a little larger, so with those moulds you can make 18 cookies.


Prick the cookies 2 more times with a fork, then bake them for 10 to 12 minutes at 170°C (fan setting).
And here is the result! Beautiful little Petit Beurre cookies. :o)
Let them cool at room temperature.


Chocolate decorations
In a large bowl, pour 225gr of chocolate and in another small bowl, pour 75gr of chocolate.
Melt the 225gr of chocolate (large bowl) in the microwave for 1.5 minutes at 600W.
Once the 1.5 minutes are up, mix the chocolate well so it melts evenly. Check with a thermometer that it is at around 45°C. If not, heat the chocolate again in bursts of 30 seconds.
Add the 75gr of unmelted chocolate to the melted chocolate at 45°C. Mix with a spatula until everything is melted.
Do not reheat the chocolate! This is called tempering chocolate. :o) This way, it will be nice and shiny when unmoulded.


The chocolate must be at a temperature of 30-32°C before pouring it into the cavities.
Now that the chocolate is at the right temperature, pour a little chocolate into each cavity of the mould.


Spread the chocolate using an offset spatula.
Once the chocolate is well spread, tap your mould on your work surface to bring any small air bubbles up to the surface. This is an essential step to avoid having small holes when unmoulding. :o)
Then scrape off the excess chocolate with your offset spatula to get nice clean little rectangles.
Place the mould in the freezer for about 10 minutes.


After a good 10 minutes in the freezer, carefully unmould your chocolates and place them on a plate or a board.
Repeat the step 2.5x to get 38 chocolate pieces. :o)
If your chocolate drops below 30°C, reheat it in the microwave for 20 seconds to keep it at the right temperature.


Once all your chocolates are ready and your cookies have cooled, it's time for assembly.
Place a little melted chocolate on your cookie, then press your chocolate piece onto the cookie!
Ta-da! Here are homemade cookies that kids and adults will love. :o)


Don't hesitate to make these cookies with your children. It's super fun! :o)
Note that the chocolate melts faster than store-bought Petit Beurre cookies... So remember to keep them either in the fridge or in a cool room.
They keep perfectly well for 1 to 2 weeks, but I doubt they'll last that long. :o)
I wish you a very very lovely Sunday!
See you soon!
Karin
P.S.: All the equipment used can be found at the bottom of the recipe


Related posts
 Juicy Matcha Muffins with Pecan Nuts & White Chocolate
Matcha Iced Latte & Coconut Variant
Pull-apart bread with fresh wild garlic pesto
Mini Banana Bread with Chocolate Chips
Juicy Matcha Muffins with Pecan Nuts & White Chocolate
Matcha Iced Latte & Coconut Variant
Pull-apart bread with fresh wild garlic pesto
Mini Banana Bread with Chocolate Chips
Leave a comment