
Homemade Pim's
Hey foodies!
This week, I'm sharing my homemade Pim's recipe which, in my opinion, will delight kids and adults alike. ;o)
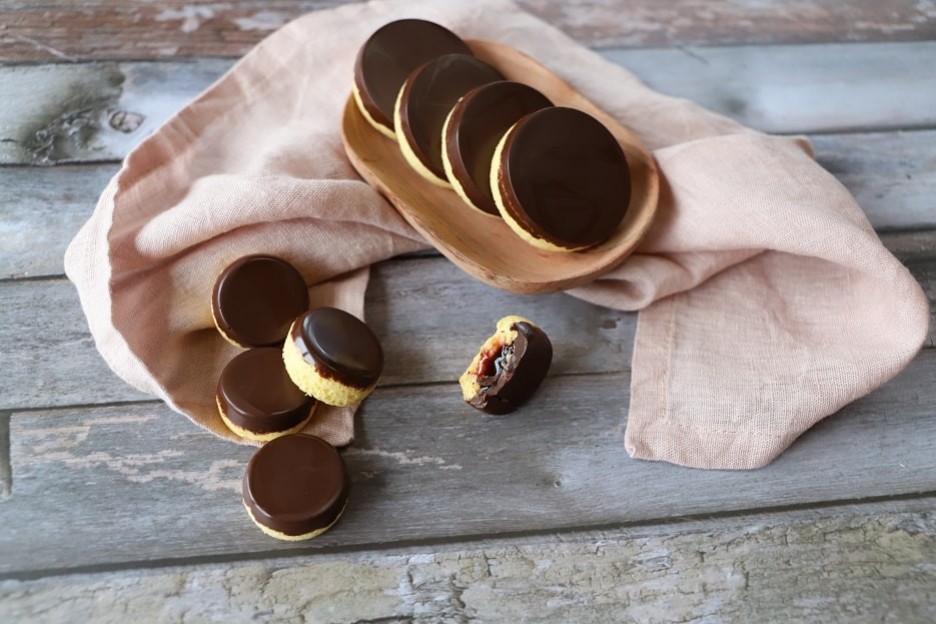
Here are my Pim's.

Here are the ingredients to make 16 Pim's of 6 cm or 30 mini Pim's of 4 cm:
- 2 eggs
- 50gr of sugar
- 50gr of flour
- 1 tsp vanilla extract
- 120gr of jelly (raspberry, strawberry, quince...etc)
- 2gr of fish gelatin
- 145gr of dark couverture chocolate
- 2 molds of 4 cm or 2 molds of 5 cm
Or even 1 mold of each (so one of 4 cm and one of 5 cm).
Let's go!
Prepare all your ingredients. It's always easier to weigh everything before you start.
Preheat your oven to 150°C, fan-assisted.
In a large bowl, pour 2 egg whites (60gr) and 50gr of sugar.
Whisk the mixture at medium speed.


Your meringue will take some time to whip up, that's normal.
It needs to be nice and firm. Once you see a firm bird's beak shape, it's ready!
Add 2 egg yolks (40gr) to the meringue. And whisk for 10 seconds at medium speed. No longer, so the meringue doesn't deflate.


Sift 50gr of flour in 3 additions.
And mix well with a spatula between each addition.
Be careful not to deflate the meringue. Fold gently. ;o)


Then add 1 tsp of vanilla extract and fold again with the spatula.
Grab two round molds. As mentioned above, either the 6 cm or the 4 cm ones. Or like me, one of each. ;o)


Spray your molds well with release spray because, without it, it will be impossible to unmold your biscuits afterwards.
Then pour the biscuit batter into all the cavities. This is enough for 2 molds.
Bake your molds for 12 minutes in your preheated oven at 150°C.


Once the 12 minutes are up, your biscuits will be quite pale. That's normal! If you bake them longer, they will become brittle... We want to keep their soft texture.
Take them out of the oven. Then immediately out of the oven, press them down using a small white wine glass or Moroccan tea glass for the large ones, and a teaspoon for the mini ones.
It's important to do this right out of the oven, as they will hold their shape better.
Let them cool on a cooling rack.


Meanwhile, we are going to prepare the fruit jelly.
In a small bowl, weigh 2gr of fish gelatin, using a precision spoon scale.
Then add 10gr of very cold water. Stir lightly with a spoon and let it sit for 10 minutes.


After 10 minutes, pour the fruit jelly of your choice into a saucepan. Here, I used quince jelly.
Bring it to a boil. Once the jelly is boiling, remove the saucepan from the heat and add the gelatin.
Mix everything well so that the gelatin melts into the whole mixture.


Pour the jelly into the cavities of your biscuits.
The jelly is enough for both molds.
Let the jelly set for 30 minutes before continuing.


Once the jelly is fully set, we'll prepare our chocolate.
Grab two bowls. In the first one, pour 110gr of dark couverture chocolate and in the other 35gr of the same chocolate.
Melt the 110gr of chocolate in the microwave at 600Watt for 2 minutes. After 2 minutes, stir the chocolate well with a spoon and put your bowl back in the microwave for 1 to 2 additional minutes. Your chocolate should be completely melted and its temperature should be around 45°C.


Add the 35gr of unmelted chocolate to the melted chocolate. This is called tempering. Your chocolate will be nice and shiny this way.
Let the chocolate melt gently into the melted chocolate. This may take 1 or 2 minutes. But above all, do not reheat your chocolate.
Take your molds back and pour a spoonful of chocolate into each cavity.


Spread the chocolate at the bottom of the cavities with a spoon, then take your biscuits and place them in your cavities.
Jelly side facing down of course. ;o)
Press lightly on your biscuits so they stick well to the chocolate.


Once your molds are filled, place them in the freezer for 20-30 minutes.
After 30 minutes, gently unmold your biscuits.
Having placed them in the freezer will make unmolding easier.


And here's the result! Homemade Pim's, utterly indulgent!
The chocolate shell is a bit thicker than real Pim's but that didn't bother anyone here. ;o)
You can keep them in the fridge for 3-4 days without any problem. If you can keep them that long.
Wishing you a lovely Sunday!
Karin
P.S.: All the equipment used can be found below the recipe.


Related posts
 Juicy Matcha Muffins with Pecan Nuts & White Chocolate
Matcha Iced Latte & Coconut Variant
Pull-apart bread with fresh wild garlic pesto
Mini Banana Bread with Chocolate Chips
Juicy Matcha Muffins with Pecan Nuts & White Chocolate
Matcha Iced Latte & Coconut Variant
Pull-apart bread with fresh wild garlic pesto
Mini Banana Bread with Chocolate Chips
Leave a comment