
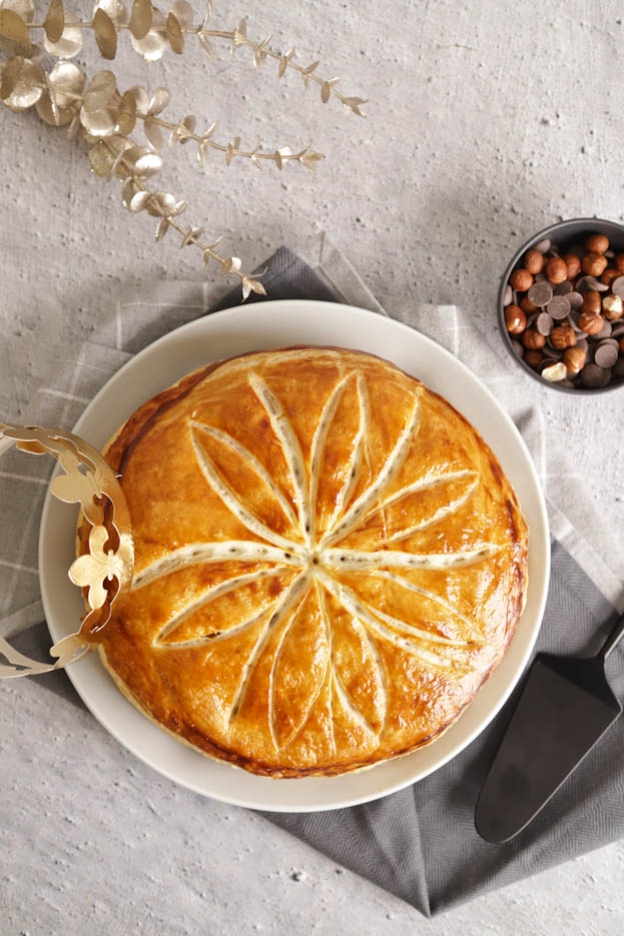
Galette des rois
Hey foodies!
We still have a few weeks before Epiphany, but it's better to be a little early than late...
I know that many people don't enjoy the inside of the almond frangipane... At my place they're quite fussy about it... And then I saw that the great Cédric Grolet had given it a new twist by working with hazelnuts! What a great idea!
I studied what M. Grolet had proposed, then modified and adapted the recipe my own way and here is the hazelnut-chocolate frangipane!

For this recipe, you will need 2 puff pastry sheets of 26 cm in diameter or 500gr of homemade puff pastry.
Either you buy them ready-made (nobody will blame you! lol), or you take the plunge and make your own puff pastry! Check out my tutorial for the reverse puff pastry. It really makes a difference! : Puff pastry
For the filling, you will need the following ingredients:
Gianduja
- 30gr dark chocolate
- 60gr whole hazelnuts
- 50gr icing sugar
Frangipane
- 20gr ground hazelnuts
- 30gr brown sugar
- 10gr almond powder
- 30gr butter at room temperature
- 1 whole egg (55gr)
- 30gr mascarpone
- 40gr heavy cream
- 60gr hazelnut praline
Crumble
- 40gr gianduja (prepared above)
- 35gr ground hazelnuts
Let's go!
Gianduja
Preheat your oven to 150°C, fan-assisted.
Take a perforated baking tray and place a sheet of baking paper on top. Pour 60gr of whole hazelnuts onto the tray and bake for 10 minutes.
Once the hazelnuts are toasted, you will see the skin cracking. Let them cool slightly and rub the hazelnuts in your hands so that most of the skins come off.


Once the hazelnuts are peeled and cooled, pour them into a food processor with the 50gr of icing sugar.
Here I used my blender at first but the quantity was too small... so I had to switch to my small food processor.
Blend until you get a nice paste like in the 3rd photo. Set aside in the food processor.


Melt 30gr of dark chocolate in the microwave at 600Watts for 30 to 40 seconds, then once melted, add it to your hazelnut paste and blend again to obtain a Gianduja. Set the mixture aside.


Hazelnut Frangipane
Pour 20gr of ground hazelnuts, 30gr of brown sugar, 10gr of almond powder and 30gr of butter at room temperature into your mixing bowl and mix with a whisk to obtain a crumble-like texture.


Then add the egg, 30gr of mascarpone and 60gr of hazelnut praline and mix again with a whisk.


Pour 40gr of heavy cream into a jug and whip the cream into whipped cream.
Then add it to the rest and mix with a whisk, just for a few seconds. Then, using a spatula, mix to make sure everything is well combined.


It's time to assemble our frangipane. It is much easier to freeze the mixture before placing it on our puff pastry sheets. This allows for more precision in shaping and prevents anything from leaking during baking. The puff pastry will rise better this way.
Start by mixing 40gr of gianduja with 35gr of ground hazelnuts. Mix roughly with a spoon.
Get an adjustable pastry ring and set it to 22cm. Place the ring on a sheet of baking paper which will be placed on a board or perforated tray.
Then spread the gianduja/ground hazelnut mixture on the bottom of the ring. Smooth it slightly so it covers the entire surface.


Then pour the frangipane mixture on top and smooth it as evenly as possible.
I used a dough scraper as my offset spatula was too large for my 22cm ring... It is much easier to smooth with the scraper.


Finally, get a piping bag, fill it with the gianduja and pipe it over the top of your frangipane. During baking the gianduja will melt into the frangipane mixture so spread it well everywhere but don't worry about aesthetics.
I didn't use a nozzle... I just cut the tip with scissors.
Do not try to smooth it... the gianduja is too firm compared to the frangipane mixture...
ATTENTION! This is the moment when you need to place the lucky charm! Don't forget it like I did... I had to put it in after baking... ahem ahem...
Place this mixture in the freezer for a minimum of 1h. Longer if it suits you.


Your frangipane insert is nicely frozen... Let's move on to the final assembly.
Take 250gr of homemade puff pastry or a 26cm store-bought sheet.
Here I made my reverse puff pastry. I took 250gr of pastry which I rolled out to 3mm thickness to get a roughly circular shape of 26cm (don't worry about the roundness... we'll deal with that later).
Then place the frozen frangipane insert right in the middle of your pastry.
Then using a pastry brush, moisten the entire border of the puff pastry with water.
You don't want to soak the pastry but there needs to be a little water all around so that the two pastry sheets can stick together.


Then place a second sheet of 26cm/3mm thickness on top of the first.
With your hands, press the pastry down against your frangipane insert. Chase out any air that might be trapped and make sure the pastry adheres well to your insert.
Then firmly seal the two pastry sheets together by pressing lightly on the edges.
Finally, set your pastry ring to 26cm and press it lightly onto your pastry to create a mark.


Once the ring mark is made, remove the ring and cut using a sharp knife.
Be careful, the puff pastry needs to be cut cleanly... Otherwise it will have trouble layering during baking.
Personally, I had frozen the top puff pastry for 10 minutes to make it easier to apply and cut.


We will now apply the first egg wash. To make your galette beautifully shiny, mix 1 egg yolk with 2-3gr of heavy cream. The cream is important! This mixture is what will make it shine even once baked.
Mix the two ingredients with a brush and brush the galette on top. ATTENTION! Do not put any on the edges! Otherwise your puff pastry will not rise during baking.
Then place the galette in the fridge for 30 minutes. The egg wash needs to dry a little. This is how your galette will be beautifully shiny.


After 30 minutes preheat your oven to 170°C fan-assisted.
Then repeat the egg/cream wash. This way a beautiful layer will cover the galette.
Then pierce the centre of your galette with a skewer or other sharp object.
To make precise patterns (not being an artist when it comes to drawing...), I used my pastry ring to make the curves. So I gently placed my ring and traced with a knife to make the pattern. Be careful not to cut through the pastry... We just want to make an impression.


Once the patterns are made, make 4 to 5 additional holes in the grooves of your patterns so they're not visible.
I made 5 here. This way you will prevent your pastry from forming a large bubble during baking that will collapse afterwards.


Bake your galette in the preheated oven at 170°C fan-assisted for 50 minutes to 1h.
Your galette should be nicely golden. Do not open the oven before the end of baking. Otherwise your puff pastry might collapse...
This galette can be frozen unbaked if you wish.
I wish you to be the king or queen of this Epiphany!
Have a great Sunday foodies!
Karin
P.S.: All the equipment used can be found at the bottom of the recipe.


Related posts
 Juicy Matcha Muffins with Pecan Nuts & White Chocolate
Matcha Iced Latte & Coconut Variant
Pull-apart bread with fresh wild garlic pesto
Mini Banana Bread with Chocolate Chips
Juicy Matcha Muffins with Pecan Nuts & White Chocolate
Matcha Iced Latte & Coconut Variant
Pull-apart bread with fresh wild garlic pesto
Mini Banana Bread with Chocolate Chips
Leave a comment
Comments
Question de Amandine
By: Amandine M. On 2024-01-07Bonjour, est-ce normal que ma pâte feuilletée soit très collante et très difficile à travailler?
Merci
Replied by: Amandine M. On 2024-01-07
Réponse
By: Karin On 2023-01-02Merci pour votre message.
Nous n'avons pas essayé d'ajouter des pommes dans notre galette car la pomme va rendre de l'eau au moment de la cuisson. Si vous souhaitez tenter l'expérience, n'hésitez pas à nous partager votre résultat :-) Belle journée et bonne pâtisserie ;-)
Question de Svenja
By: Svenja M. On 2023-01-02Bonjour, bonjour ! Merci pour cette recette ! Est-ce qu'il serait bien d'ajouter des pommes afin d'apporter un peu plus de fraîcheur et de légèreté ? Je les ajoute simplement par dessus le mélange de frangipane congelé en dessous de ma deuxième pâte feuilleté lors du montage ? Merci pour vos conseils !!!