
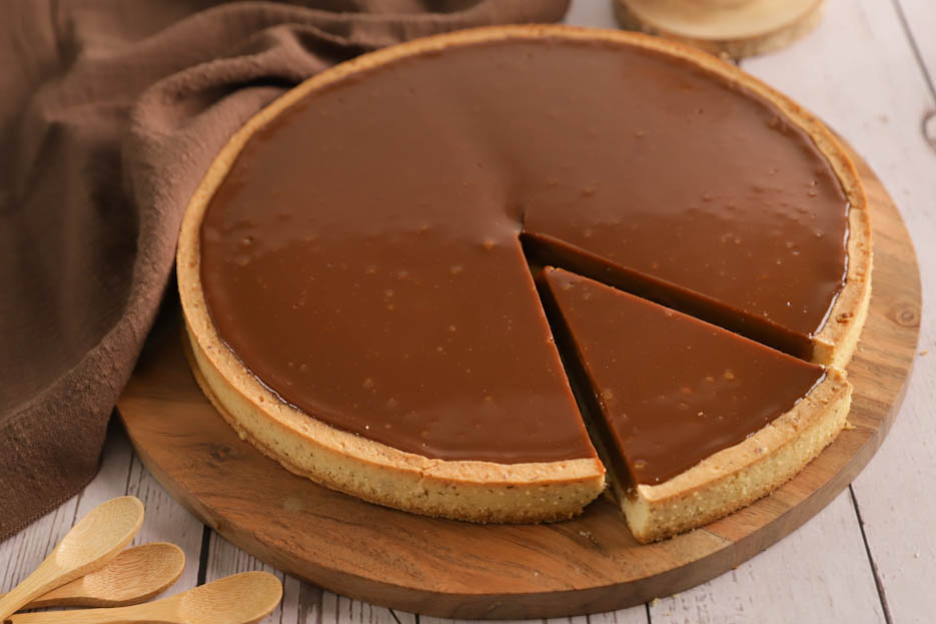
Cooked wine tart
Hey foodies!
I don't know about you, but I grew up with the cooked wine season.
Whether made with pear or apple, cooked wine is a truly Swiss tradition!
Sure, as a child you don't always like it. But having grown older (there have to be some advantages to getting older), I now absolutely love these cooked wine tarts or tartlets.
So here is my cooked wine tart with a hazelnut shortcrust pastry made using our tart ring.

Here is the list of ingredients for a 25 cm tart:
- 250gr flour
- 125gr icing sugar
- 2 pinches of salt
- 50gr ground hazelnuts
- 140gr butter
- 1 egg
- 180gr sweetened condensed milk
- 280gr heavy cream
- 230gr cooked wine
Hazelnut shortcrust pastry
We'll start by making the hazelnut shortcrust pastry. (If you don't like hazelnuts, you can replace them with almond powder for example).
In a large bowl, pour 250gr of flour, 125gr of icing sugar and 2 pinches of salt.


Add 50gr of ground hazelnuts and 140gr of butter.
Mix everything using the flat beater (K beater) at low speed (1 or 2).


You will get a sort of crumble.
Once the crumble texture appears, add 1 egg and mix again with the flat beater at low speed.
As soon as the dough forms a ball or a kind of mass, stop mixing.
It is important not to overmix, as otherwise the gluten may develop too much and cause the pastry to puff up during baking.


Place your dough on a sheet of baking paper, then cover it with cling film.
Use 5 mm thickness guide sticks and roll out the dough with a large rolling pin.
Then place the dough in the freezer for 10-15 minutes. This way, you will have a much easier dough to work with.


For the next steps, I used the following equipment:
- A perforated baking tray
- A perforated silicone mat
- A 25 cm perforated ring
- A band cutter set to 2 cm or a knife
You've probably guessed it, I'm a huge fan of perforated rings! :o) The baking is so much more even and the biscuit result so much crispier! I love it!


After 10-15 minutes in the freezer, your dough will be firm enough (but not too much either).
Cut the base of your biscuit using your perforated ring. Yes indeed, the ring also acts as a cookie cutter. :o)
Place the base and the ring on the perforated baking tray, covered with a perforated mat.
Roll out the remaining dough again, then cut strips of 2 cm width using the band cutter or a knife.


You won't be able to make a single strip. Here I made several strips which I then assembled together.
Place each strip as straight as possible. They must be pressed firmly against the ring and the biscuit base. There should be no gap between the sides and the base.
If your dough softens too much, place it back in the freezer for 5-10 minutes to make it easier to handle.
Pay close attention to the joins. If necessary, run your finger along to smooth the dough and make sure the edges are well sealed together.
Using a knife, cut off the excess dough by running your knife along the edge of the ring and going all the way around.
This way, you will have a neat and clean tart. :o)


Generously dock your dough with a fork.
Then place your biscuit back in the freezer for 15 minutes. This way, the dough won't sink during baking.
It is therefore very important to take the time to freeze it for 15 minutes or more. You can for example prepare the biscuit dough the day before and bake it the next day without any problem. :o)
Preheat your oven to 180°C, fan-assisted.
Once the dough is well chilled and your oven is hot, bake your biscuit for 25 minutes.
Your biscuit is ready when it is nicely golden in the middle and on the edges.
You can also see a small gap forming between the biscuit and the ring. This is a good sign indicating that the biscuit is properly baked. :o)
Let your biscuit cool at room temperature, leaving it on the perforated tray and mat.
Don't turn off your oven! Leave it on at 180°C.


Cooked wine cream
We will now take care of the cooked wine cream.
Nothing could be simpler! In a bowl, pour 180gr of sweetened condensed milk and 280gr of heavy cream.


Then add 230gr of cooked wine and mix using a whisk.
Mix the mixture well until you get a creamy and homogeneous blend.


Remove the ring (it's easier to remove it now) and pour the cream into the tart shell.
Bake your tart at 180°C, fan-assisted for 8 minutes.
After 8 minutes of baking, remove your tart from the oven and let it cool completely.


And here is the result! :o)
Super indulgent! And the hazelnut biscuit pairs wonderfully with the cooked wine cream! Enjoy!
For info: if you are making tartlets, the baking time for the cream will be around 3-4 minutes and the biscuit around 15-20 minutes.
Have a lovely Sunday, foodies!
Karin
P.S.: All the equipment used can be found at the bottom of the recipe.


Check out our recipe in video!

Related posts
 Juicy Matcha Muffins with Pecan Nuts & White Chocolate
Matcha Iced Latte & Coconut Variant
Pull-apart bread with fresh wild garlic pesto
Mini Banana Bread with Chocolate Chips
Juicy Matcha Muffins with Pecan Nuts & White Chocolate
Matcha Iced Latte & Coconut Variant
Pull-apart bread with fresh wild garlic pesto
Mini Banana Bread with Chocolate Chips
Leave a comment