
BOO cake for Halloween
Letter cake made of shortcrust pastry with mascarpone lemon cream and small ghosts
Hello fellow foodies,
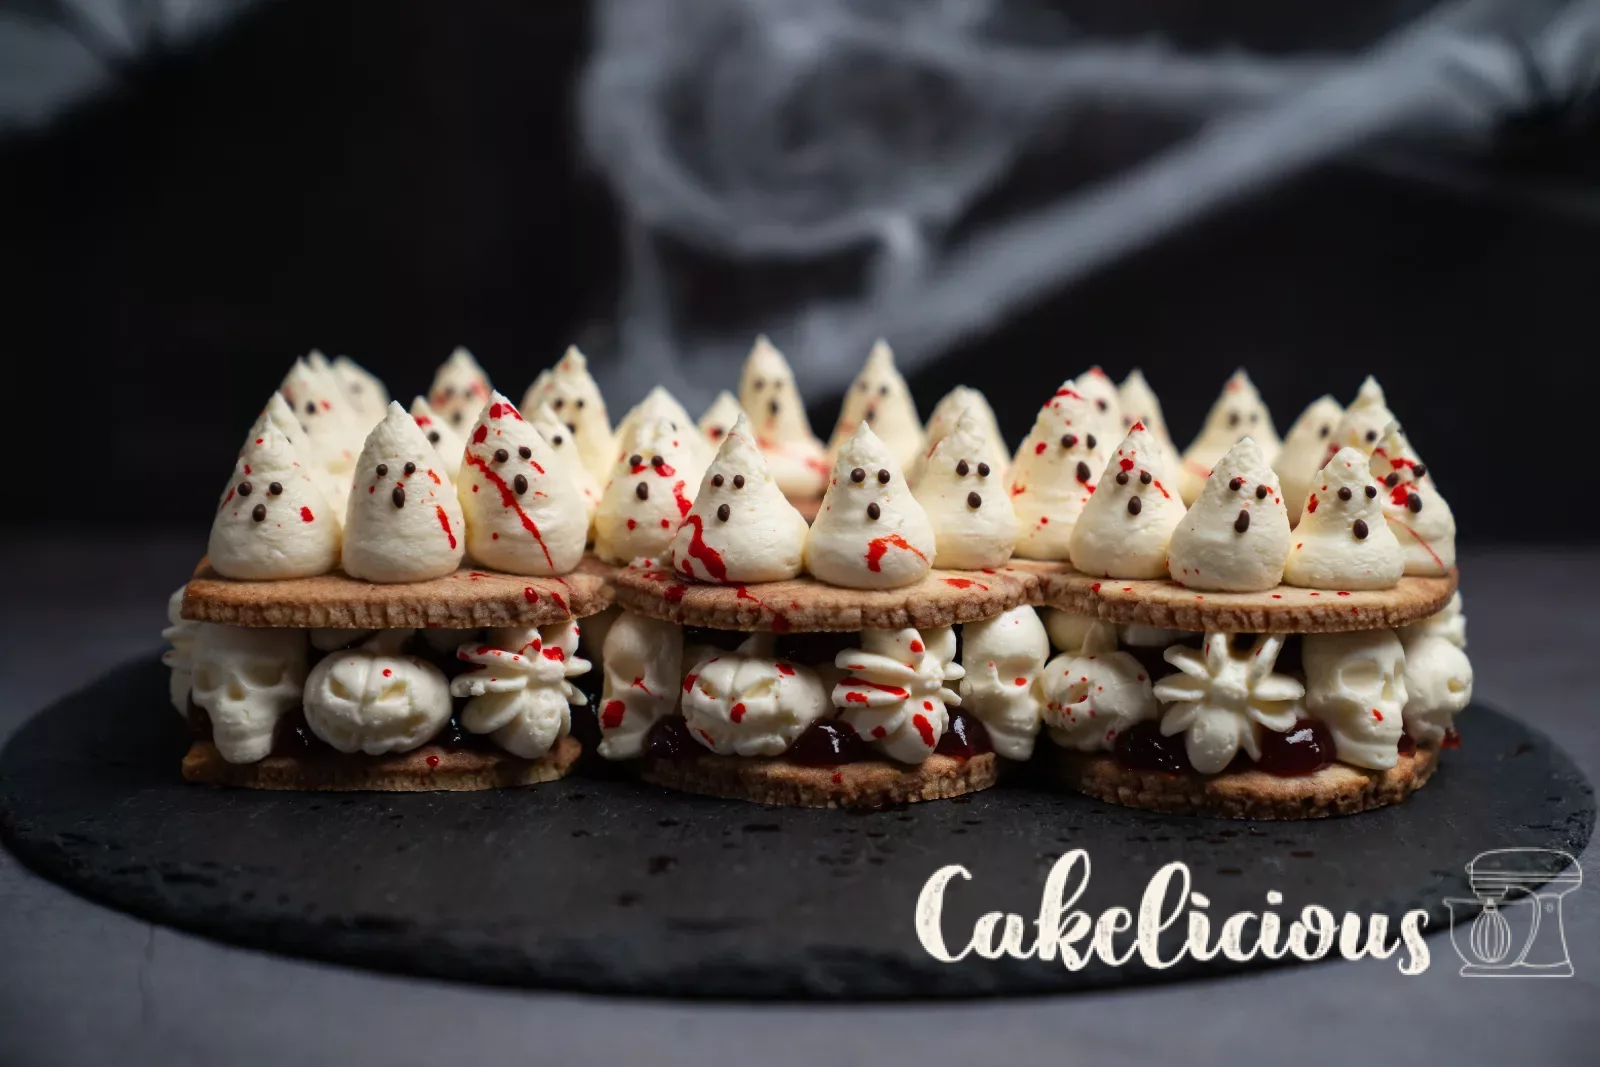
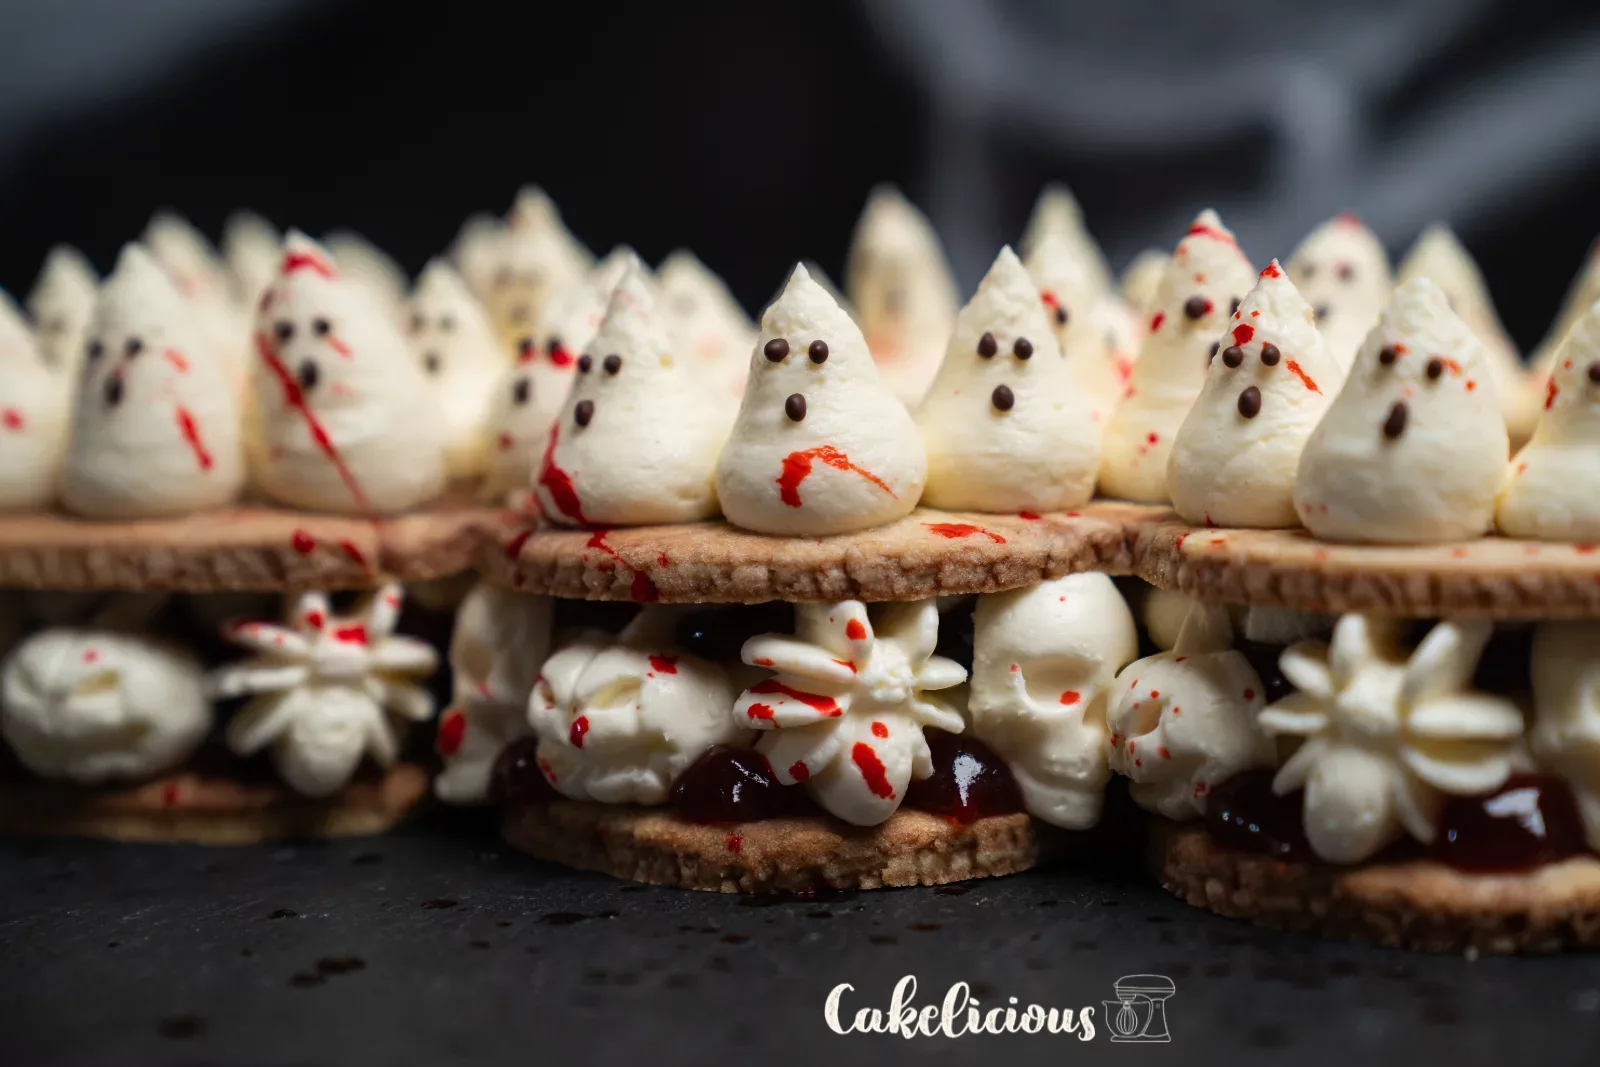
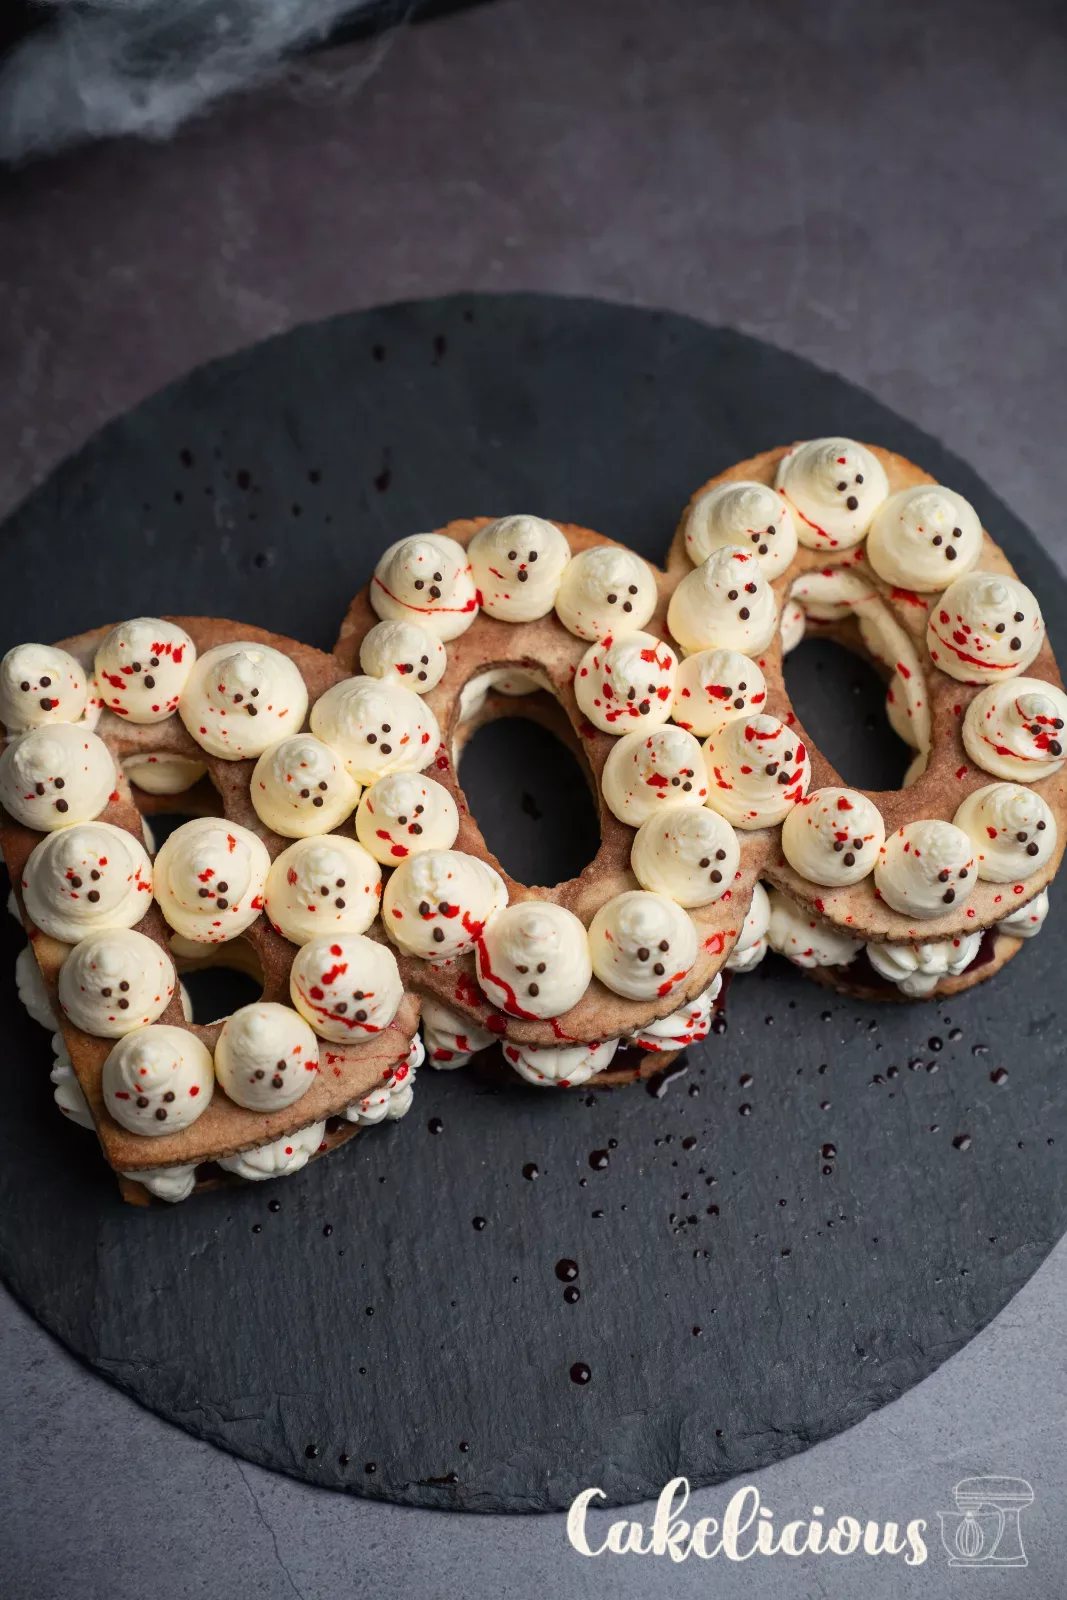
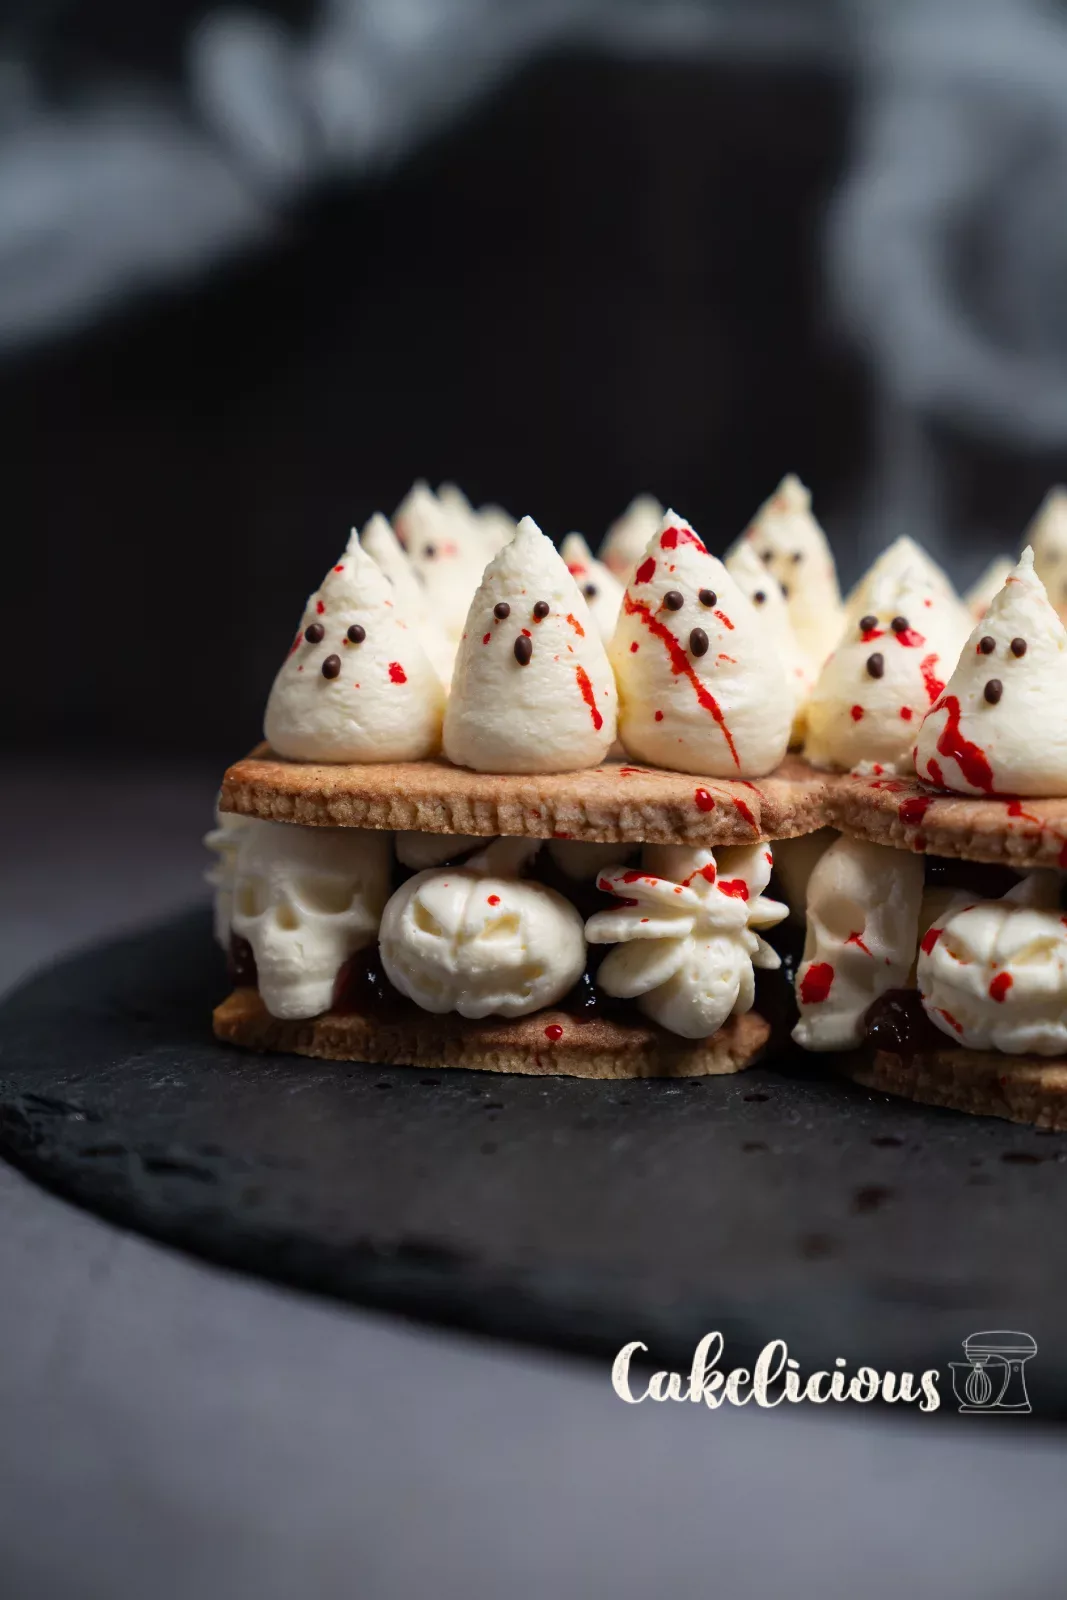
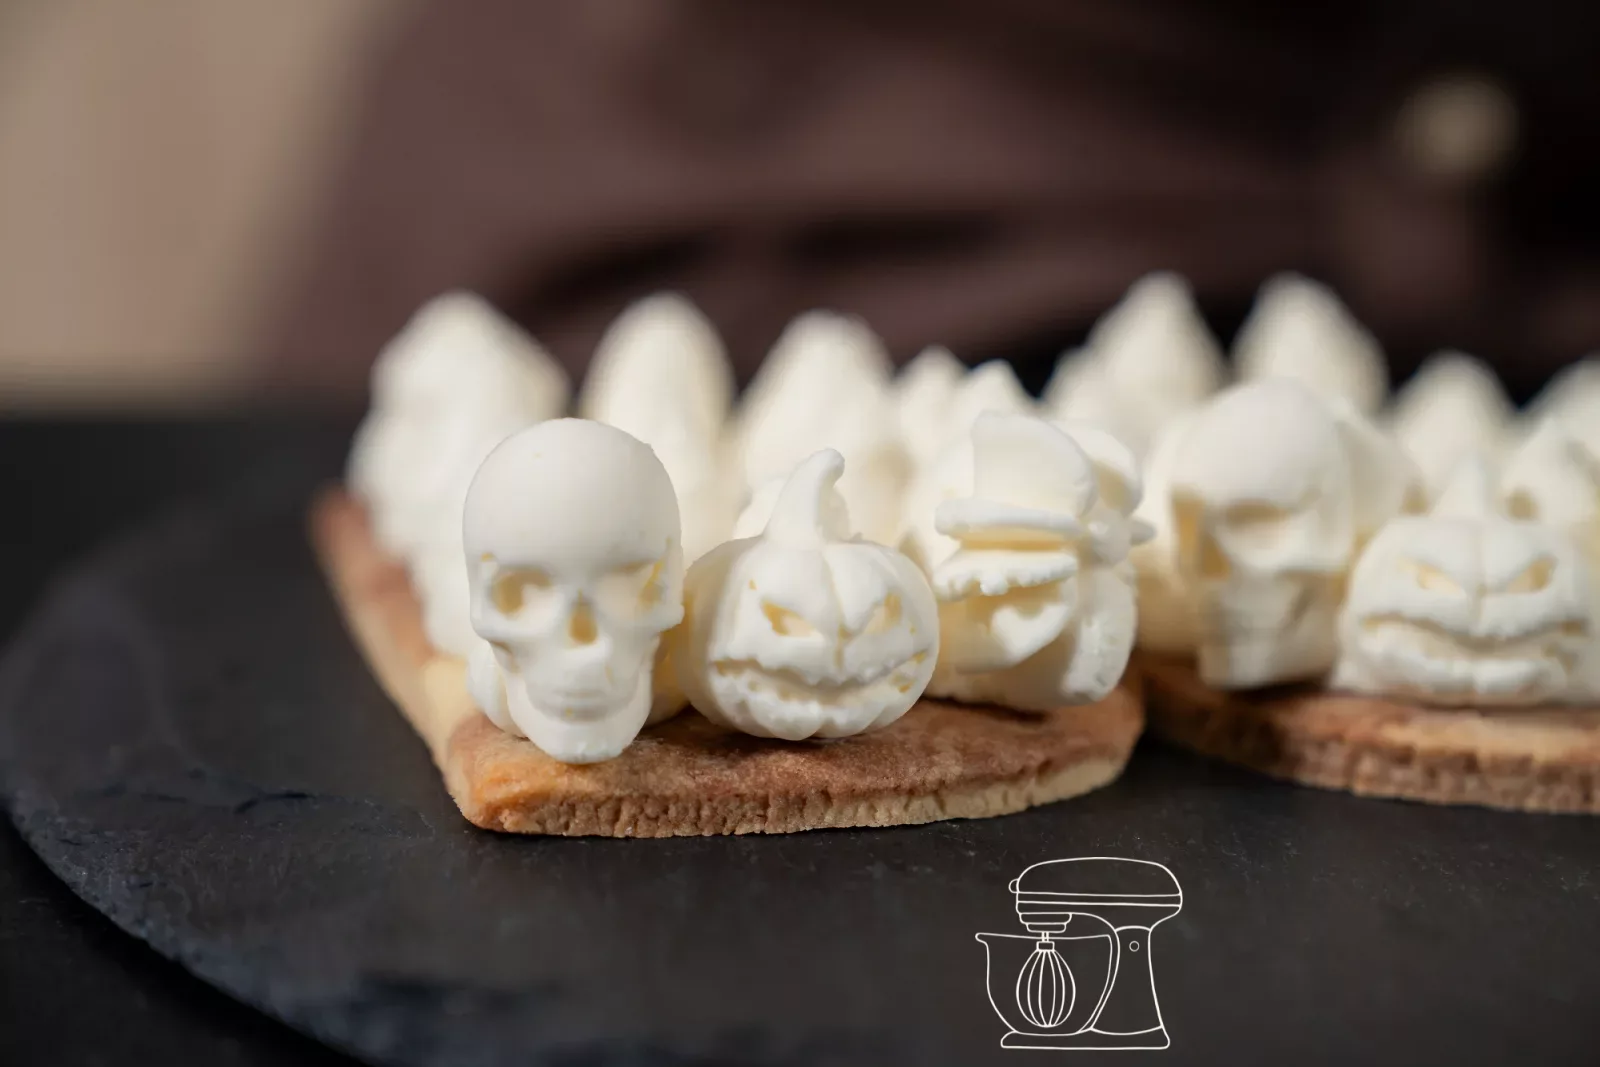
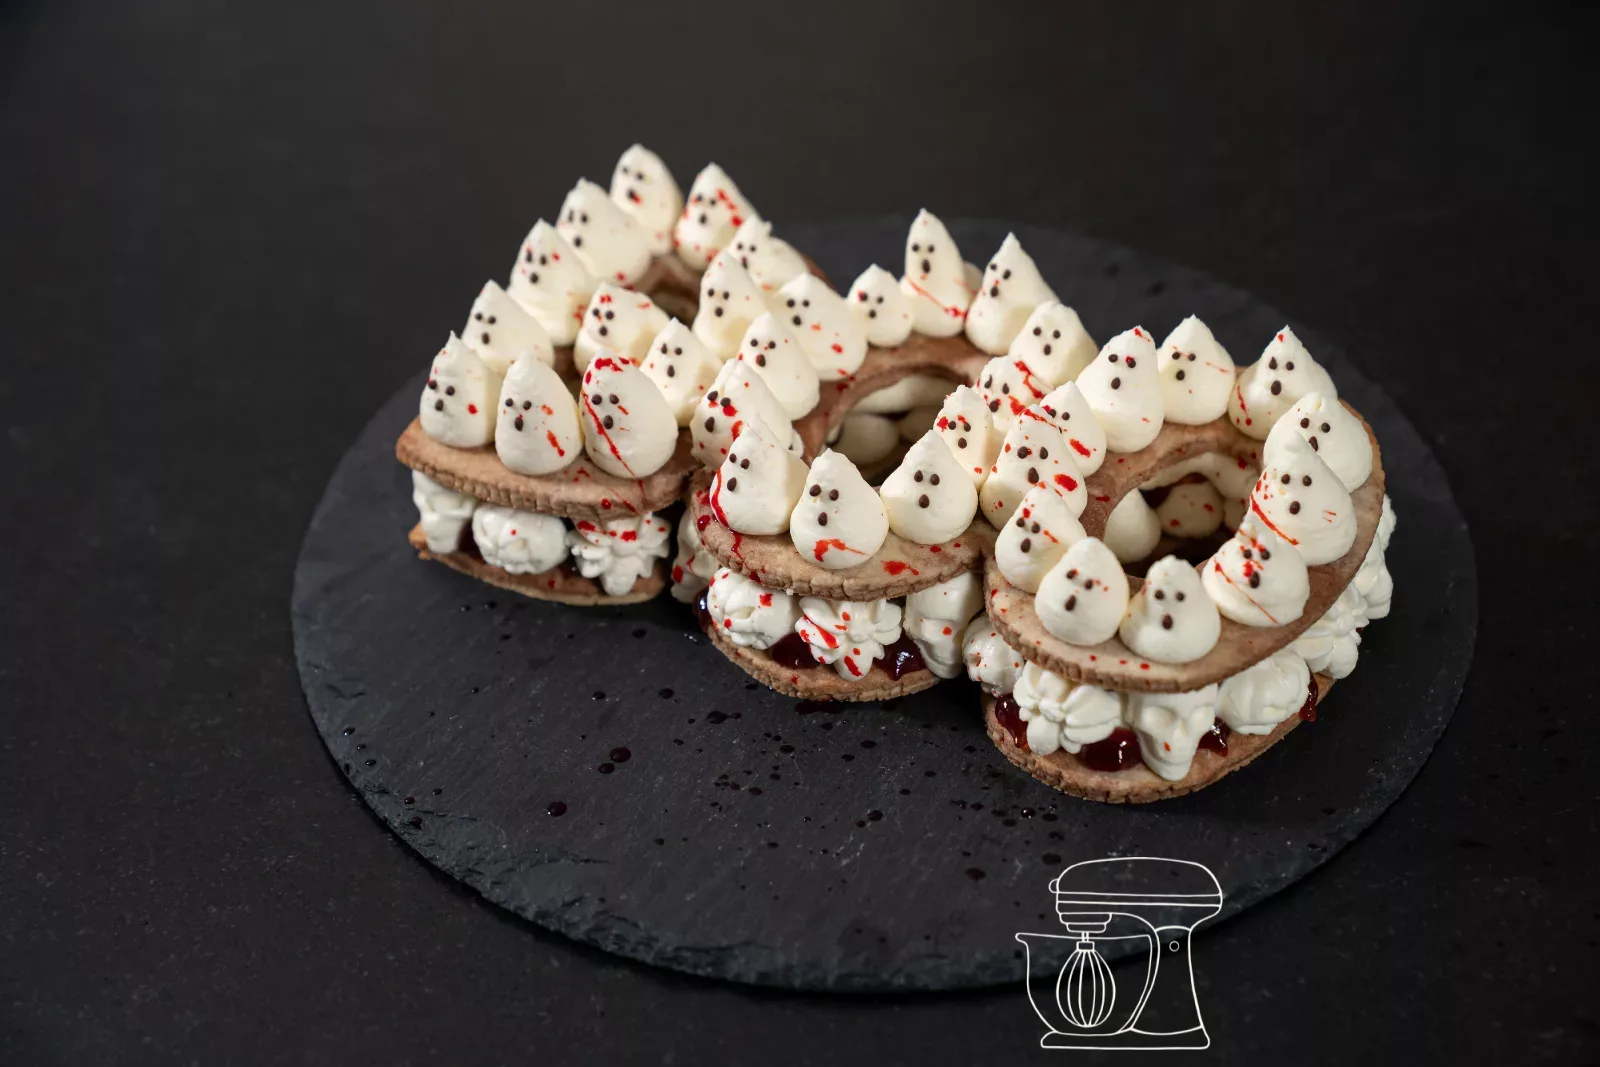
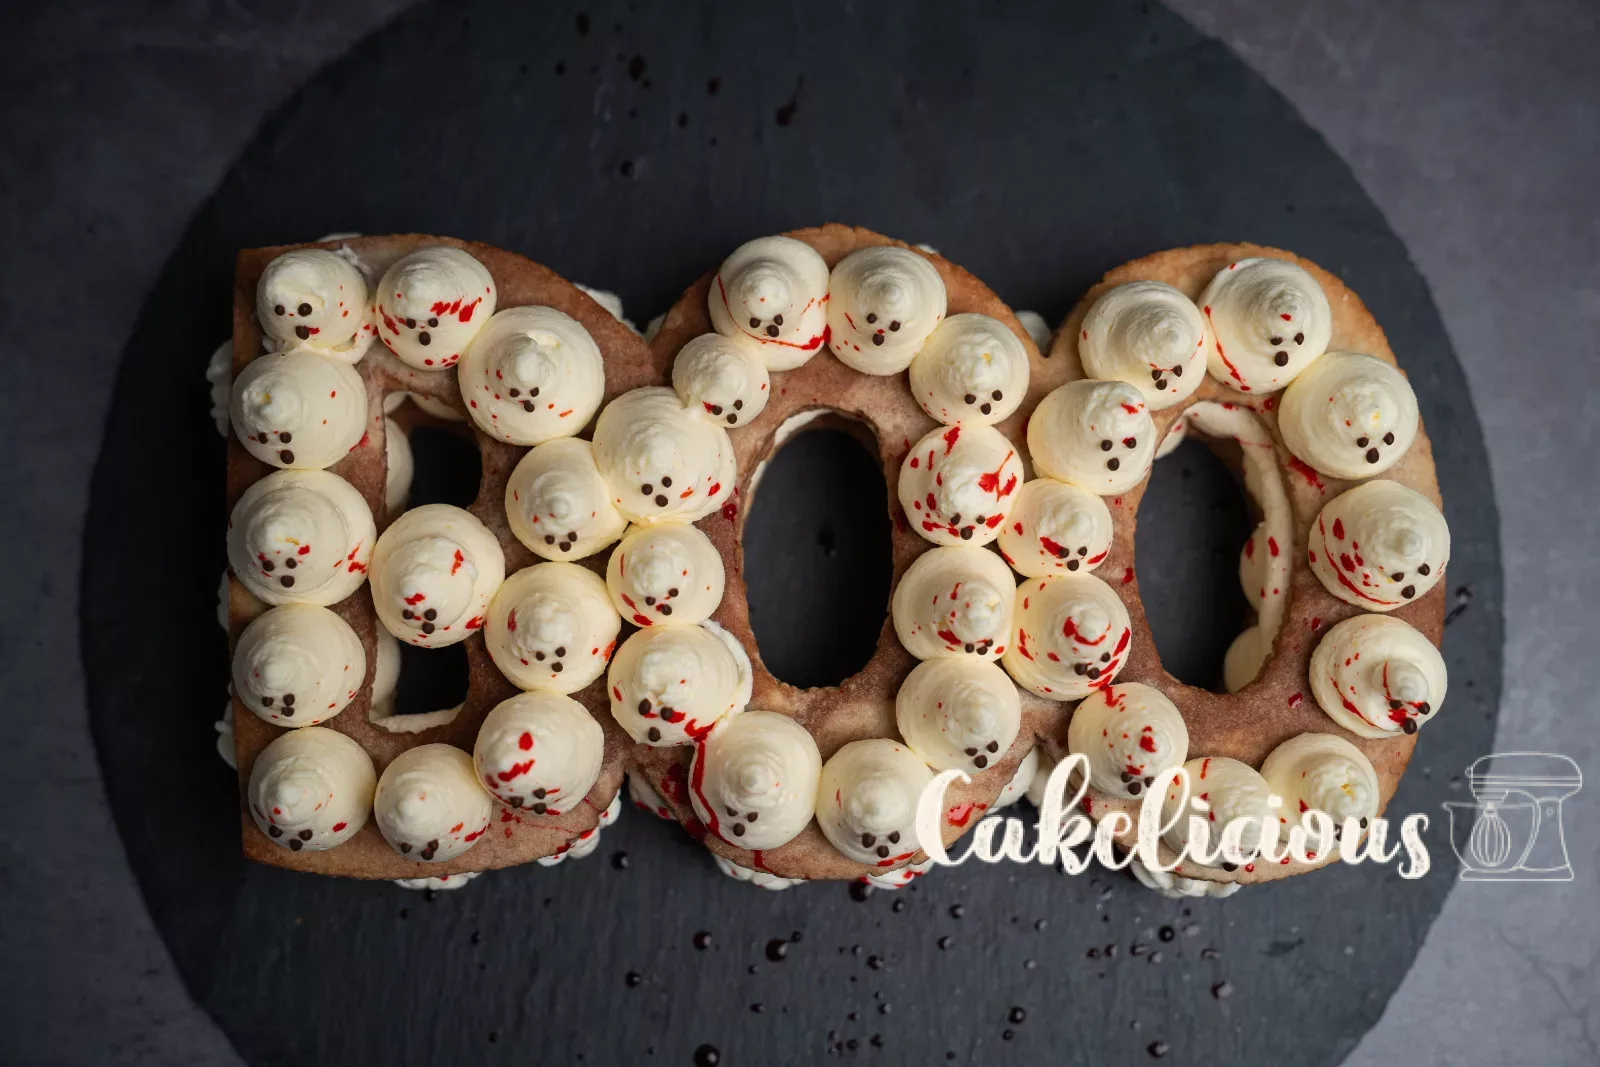
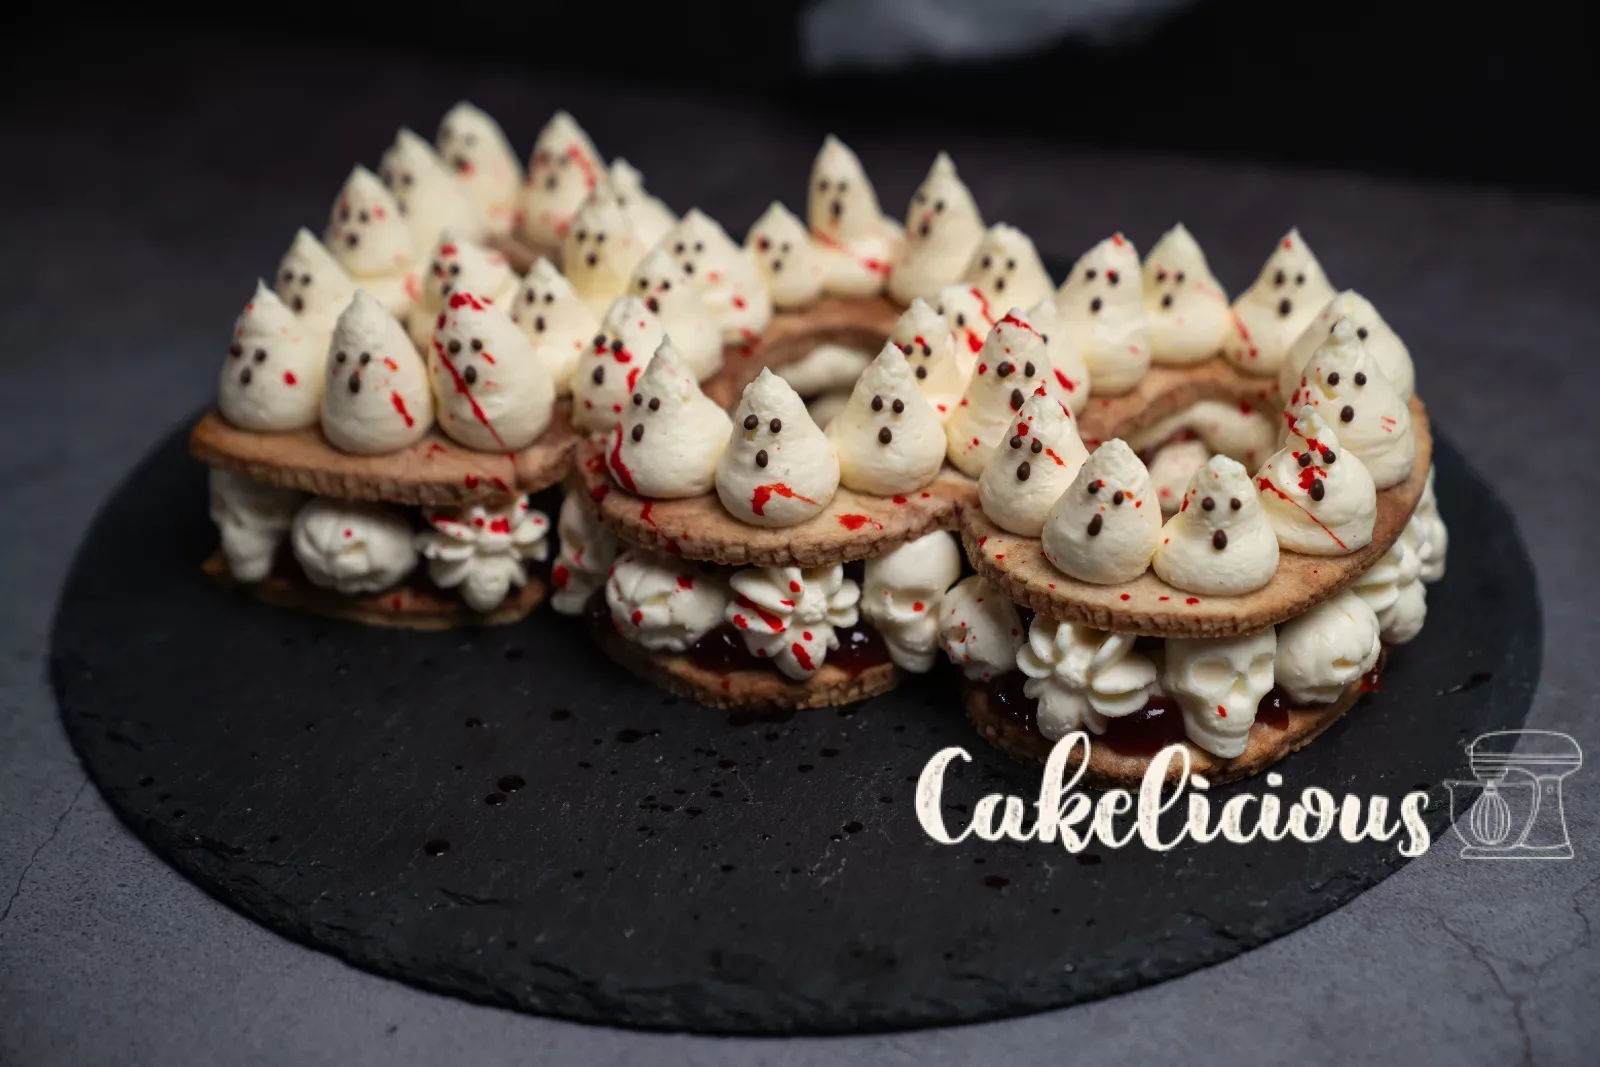
what does a ghost say when it wants to scare you? Exactly: «BOO!» And that is just what this cake says. It is a letter cake, the kind you might know from birthdays, only in the Halloween version: two bases of marbled shortcrust pastry, with fresh mascarpone lemon cream in between, skulls, pumpkins and spiders made of frozen cream, and a little «blood» made of jam.
On top sit lots of small ghosts. They are simply dollops of cream with three dots of chocolate as faces, and suddenly they are looking right at you!
No need to be afraid of the letters: you don't need any special tools. We printed out «BOO», transferred it onto foil and traced it onto the dough with a toothpick. We'll show you step by step how it's done.
Ingredients
Shortcrust pastry, light and dark (approx. 230 g)
Mascarpone lemon cream
For the dots
Step by step
Shortcrust pastry
Prepare the dough and chill it
Beat the soft butter with sugar, salt and vanilla for two to three minutes until fluffy. Slowly add the whisked egg and then fold in the flour just briefly, until no dry flour is visible.
Divide the dough into two halves and knead the cocoa into one of them. Flatten both doughs, wrap them in cling film and put them in the fridge for about an hour.
Schweizer Weissmehl, 1 kg
Cocoa powder, 1 kg
Bourbon-Vanille Samen, 5 g
Beech wood cutting harp set, 6 pieces (3/5/10 mm)
Marble and roll out
You need 110 g of dough for each base. Place a piece of light and a piece of dark dough on top of each other, cut the stack and press it back together until you like the marbling. Please don't knead it, or everything will turn brown!
Roll the dough out 5 mm thick on baking paper. Use 5 mm cutting harp strips on the left and right so the thickness is even everywhere.
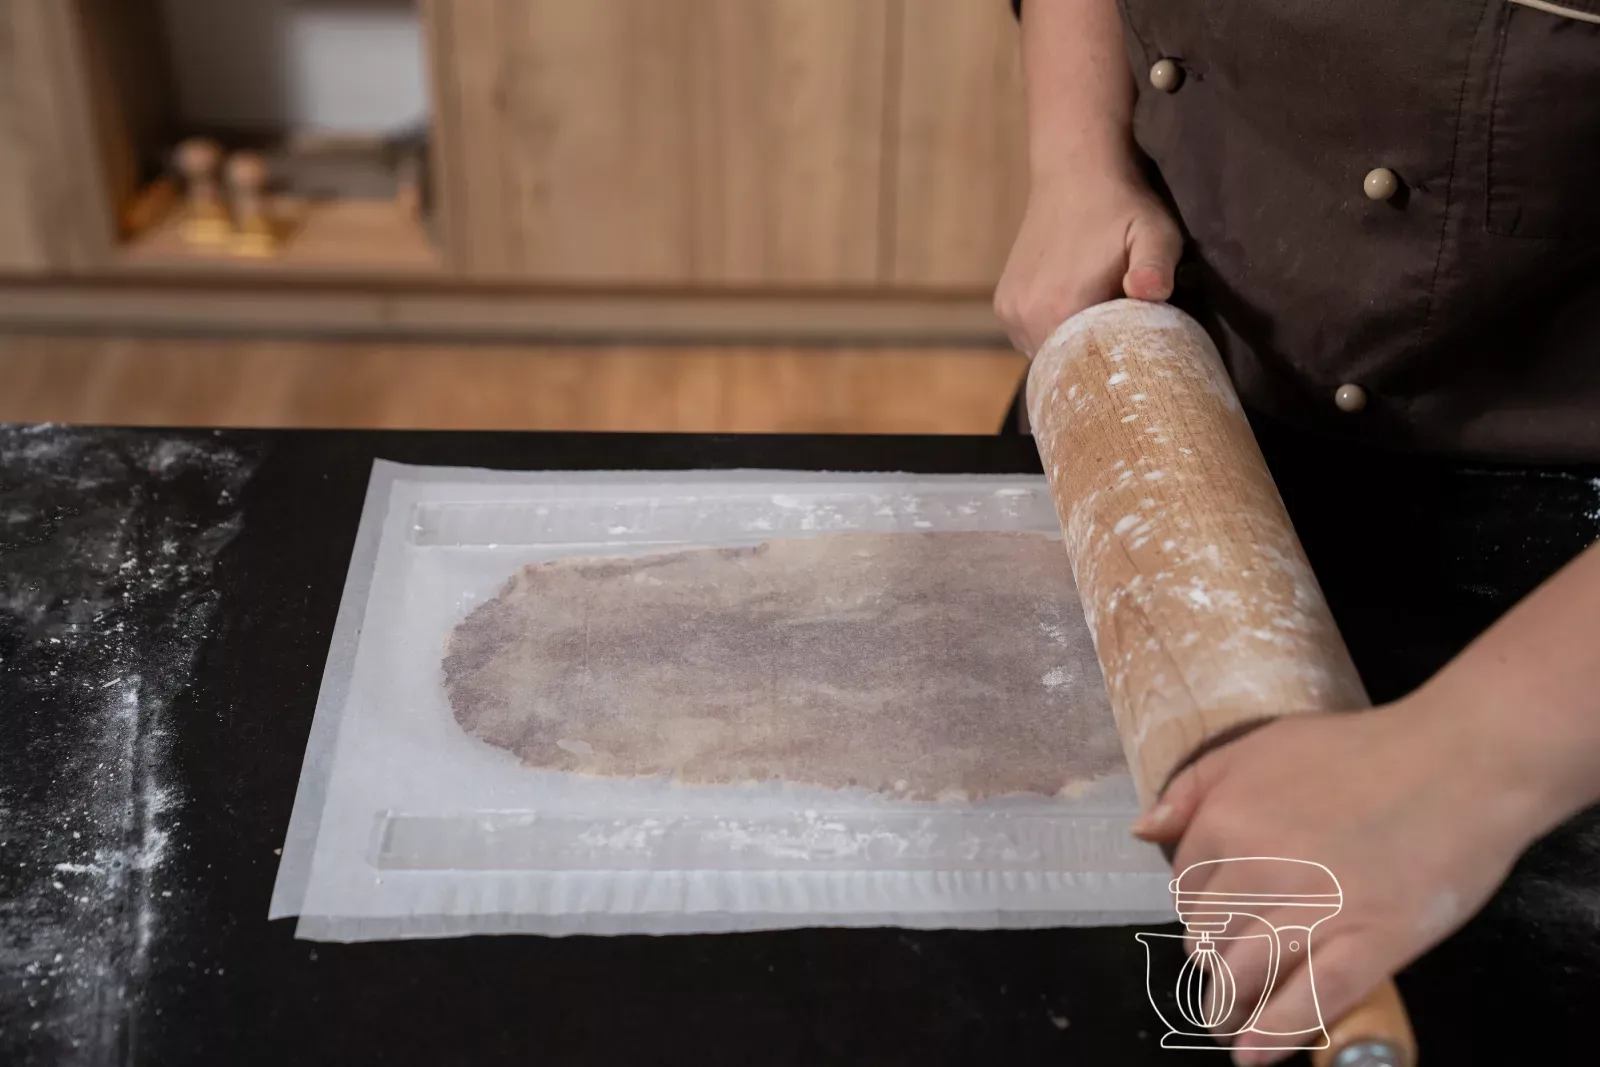
BOO bases
Transfer the template
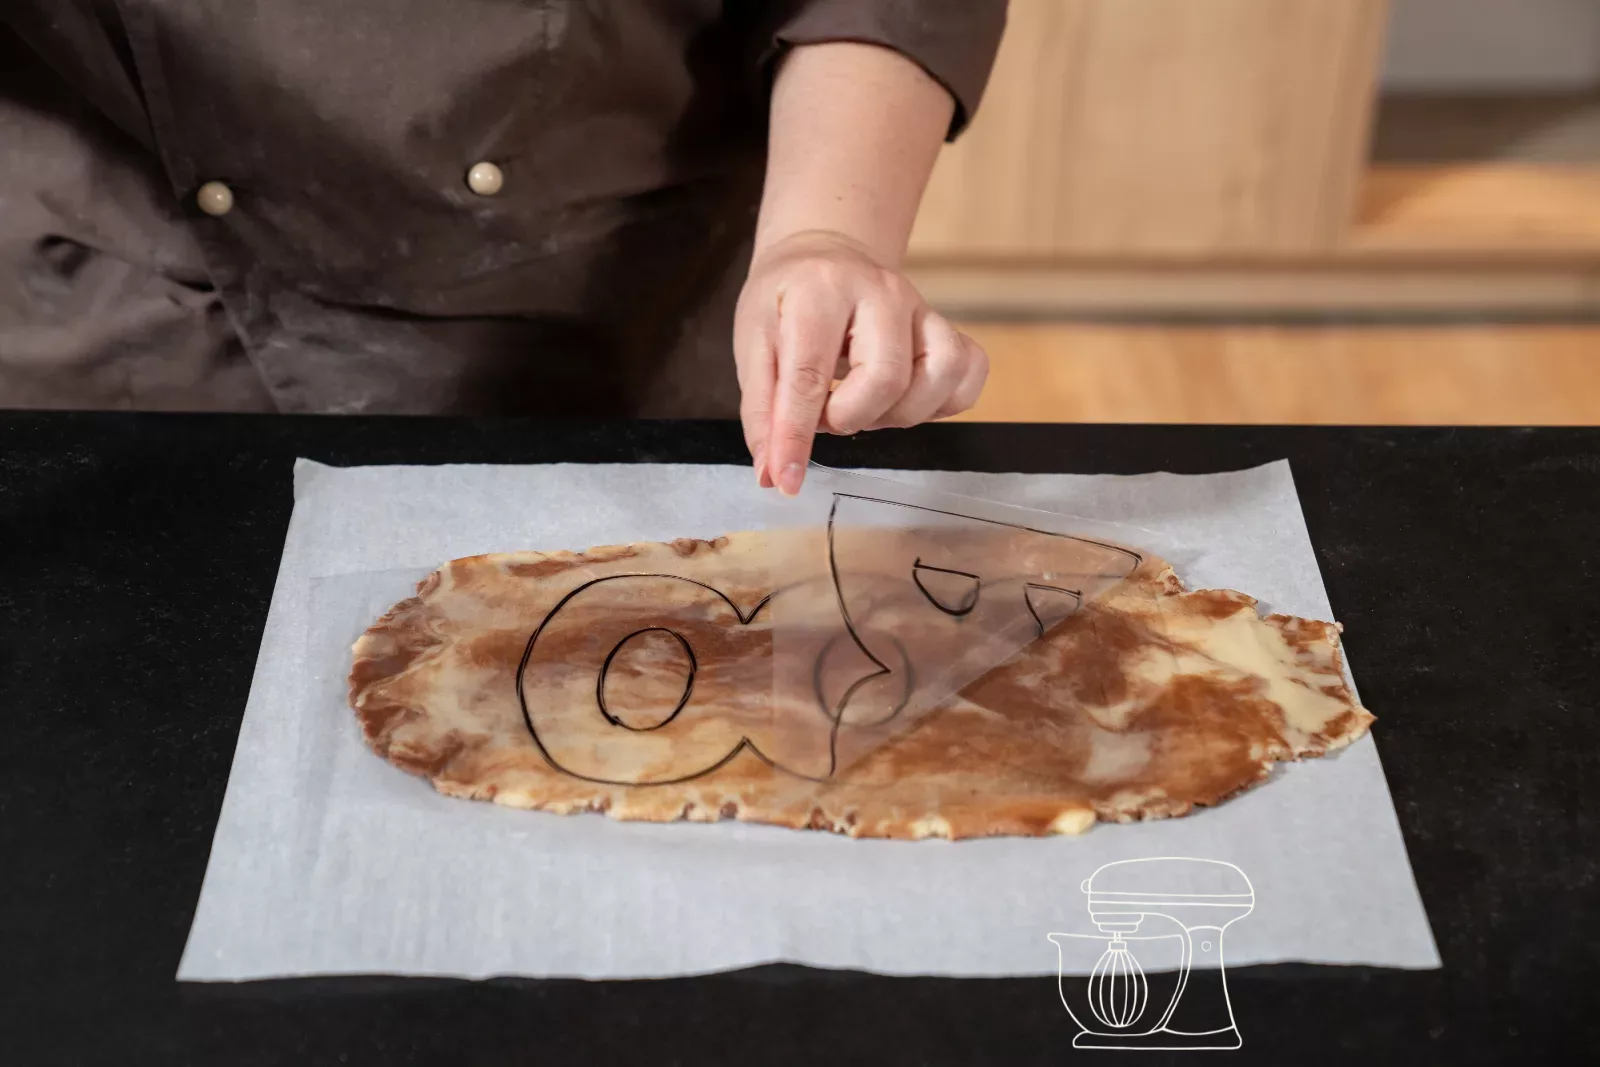
Print the word «BOO» so that it is 28 cm long and 13 cm high. Place a transparent sheet on top and trace the letters with a foil pen.
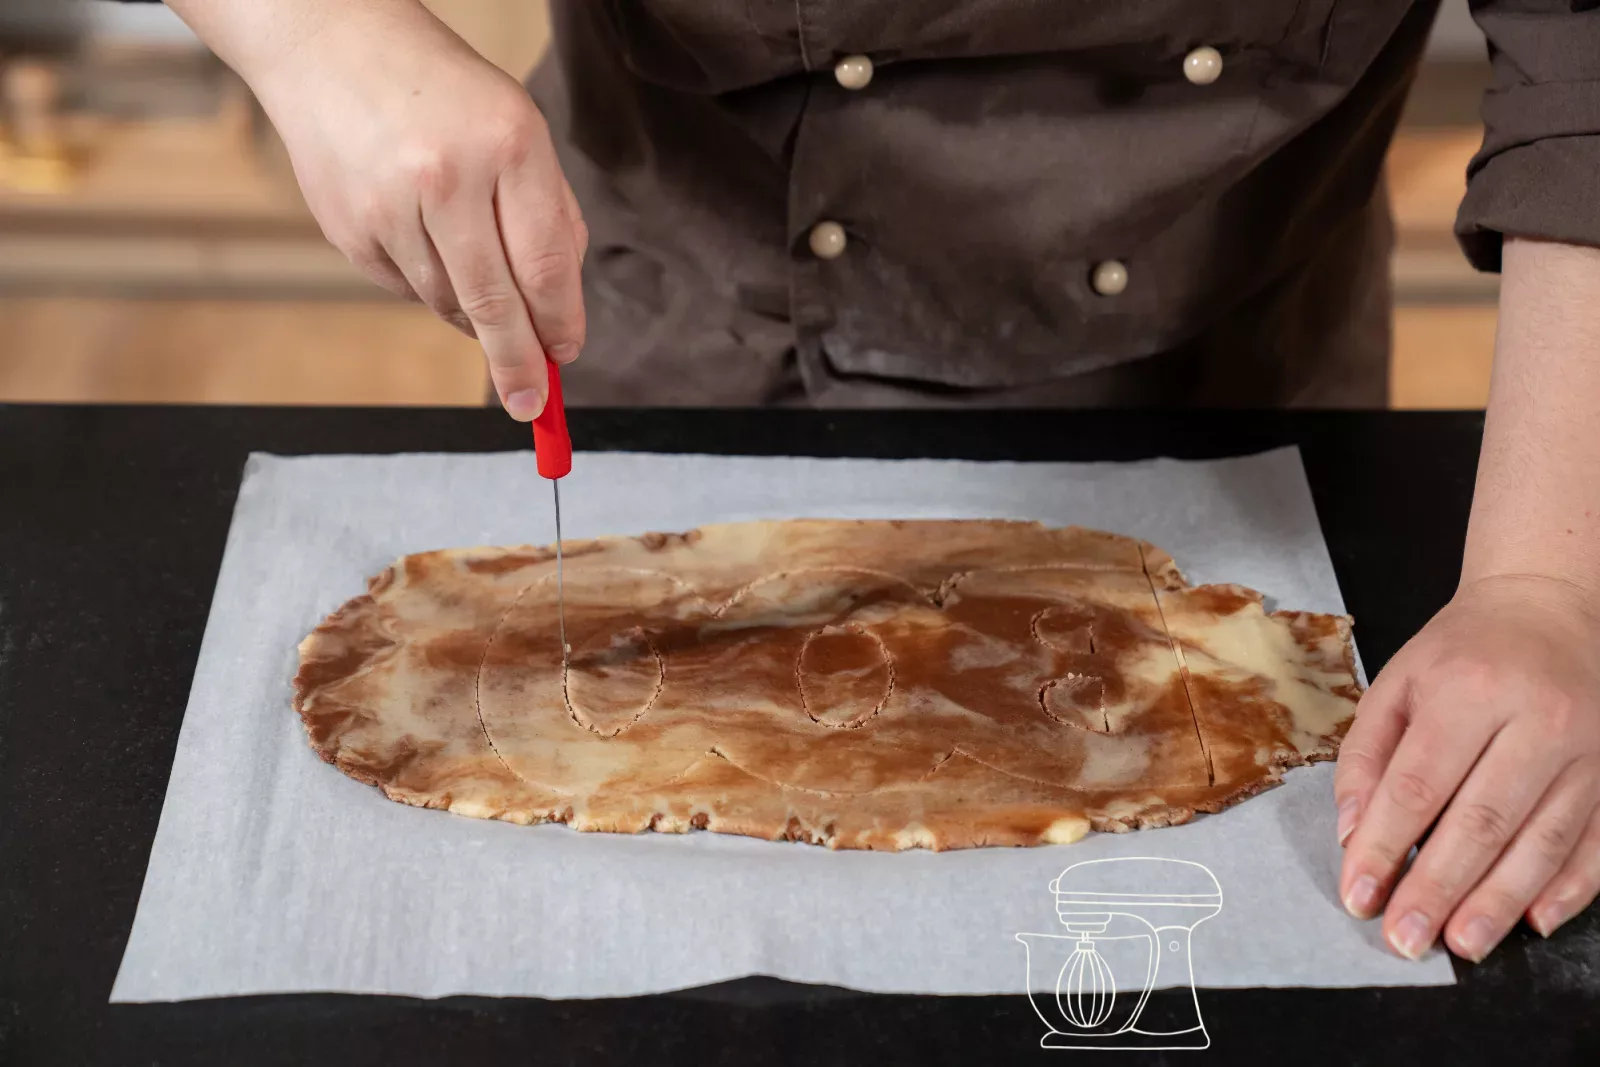
Lay the sheet on the rolled-out dough and run a toothpick along the lines. This presses the letters finely into the dough.
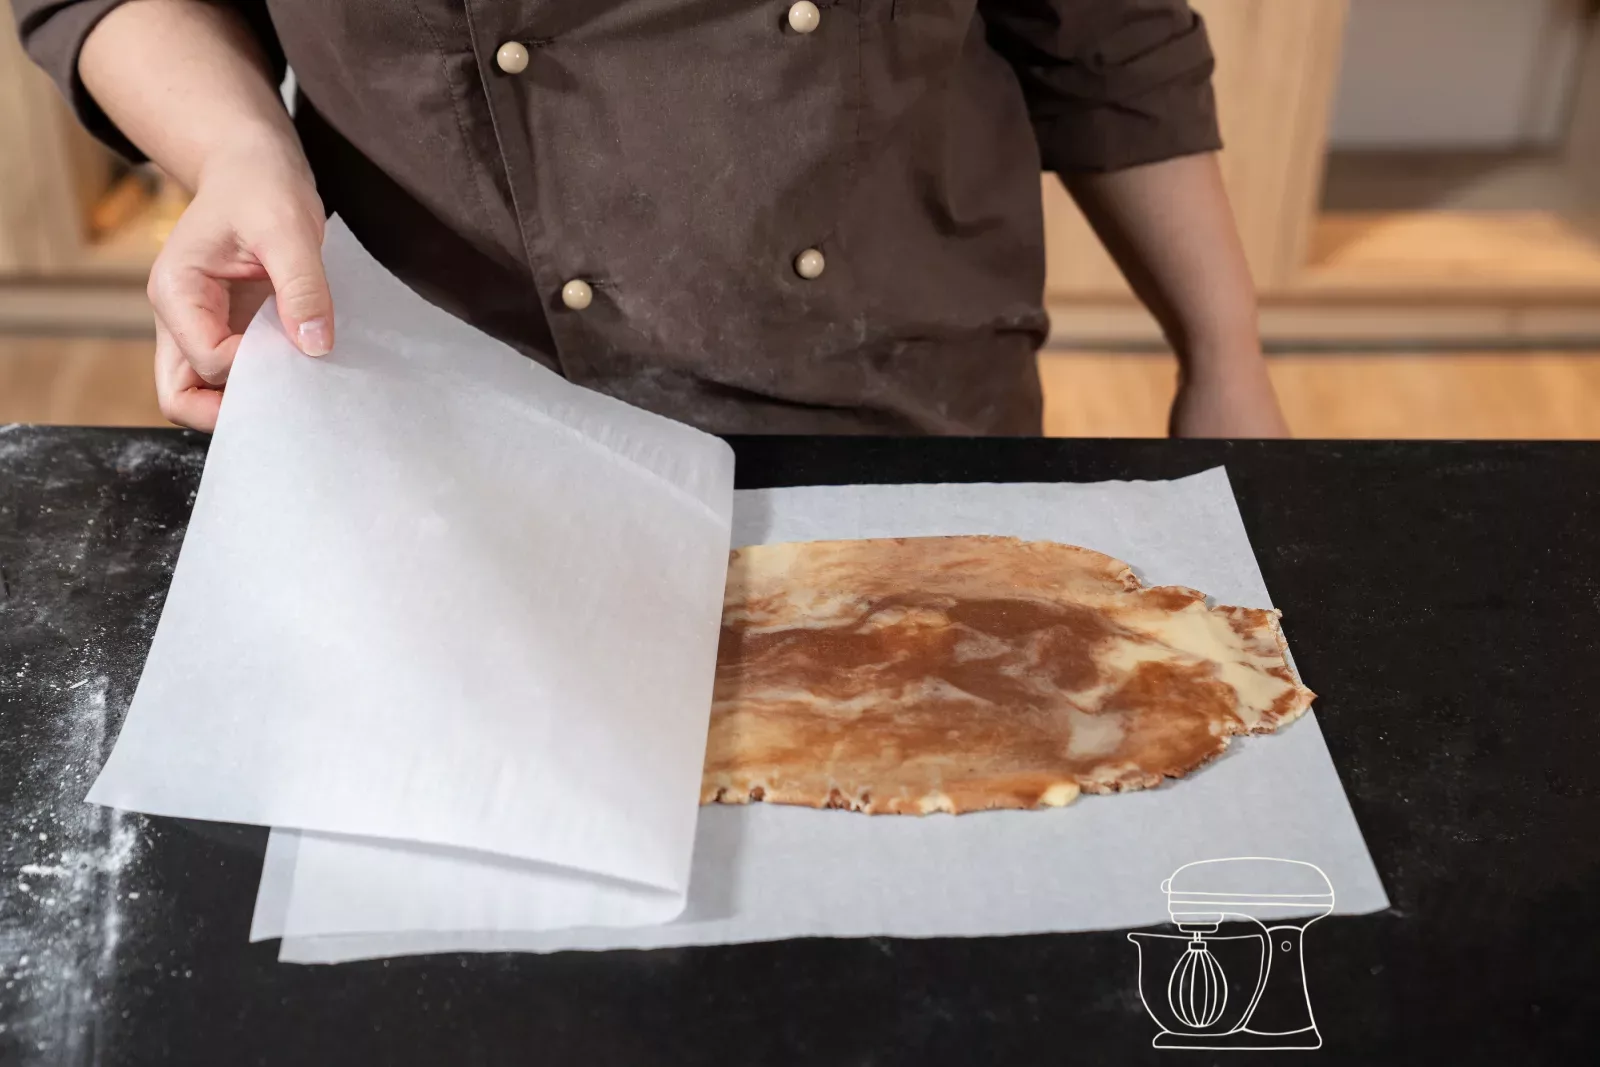
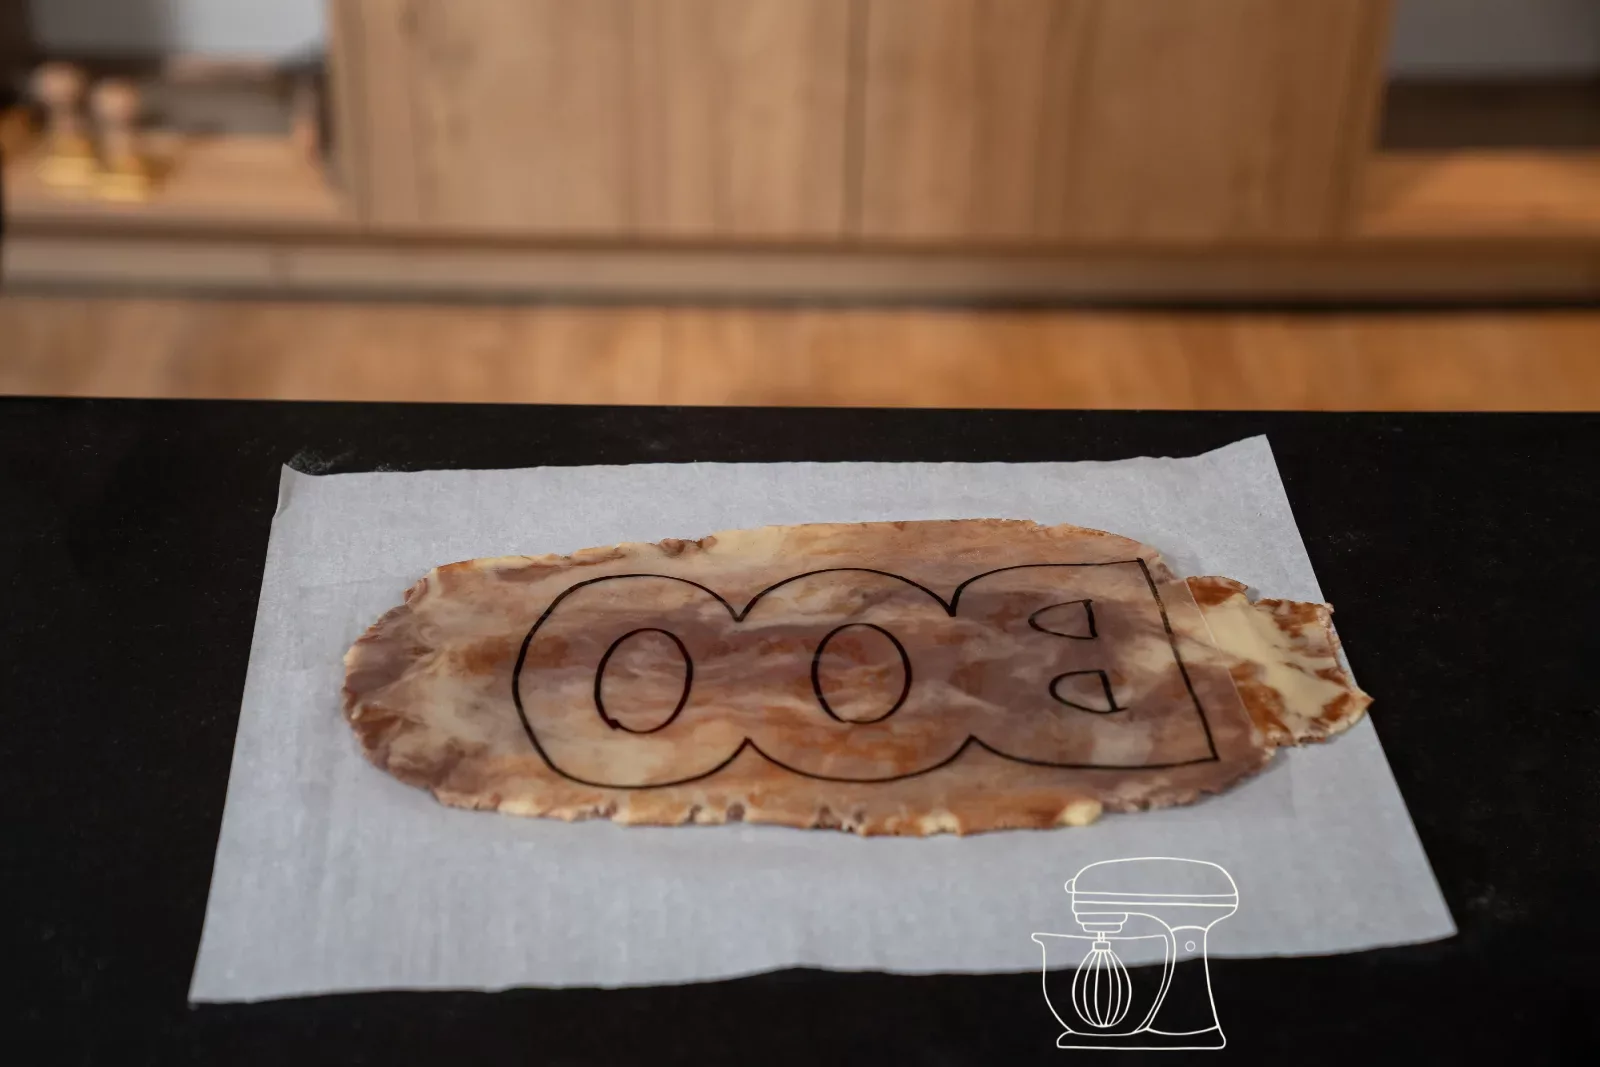
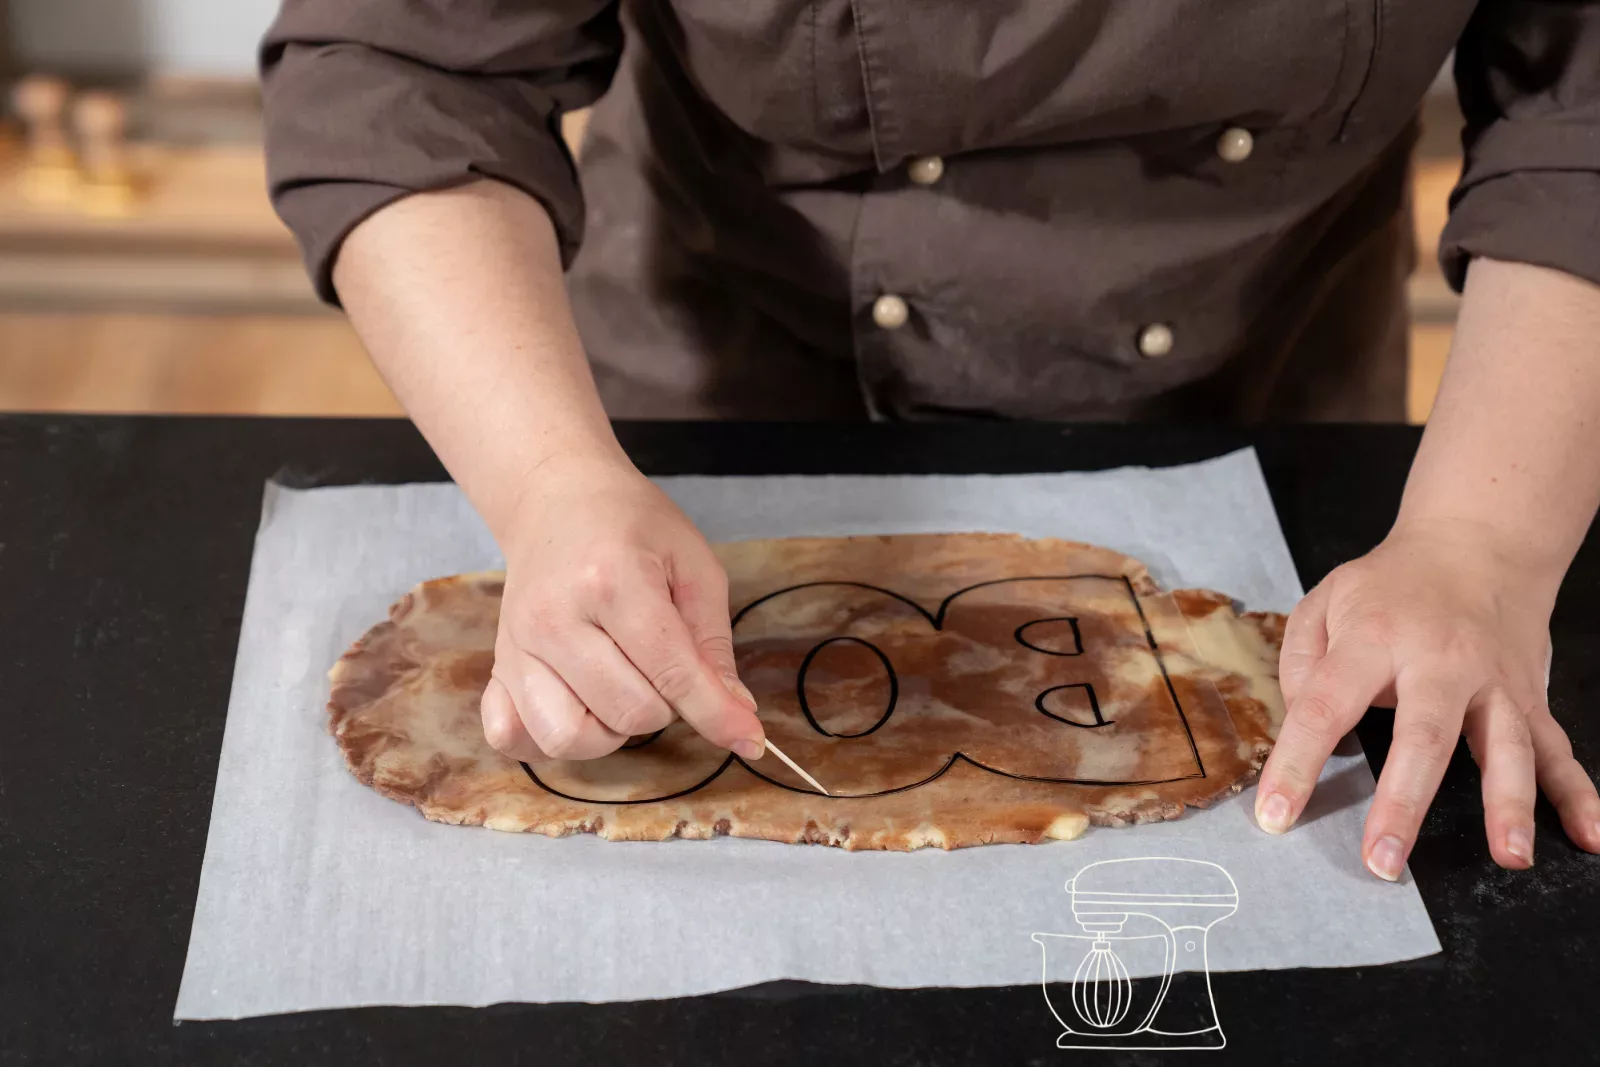
Cut out the letters
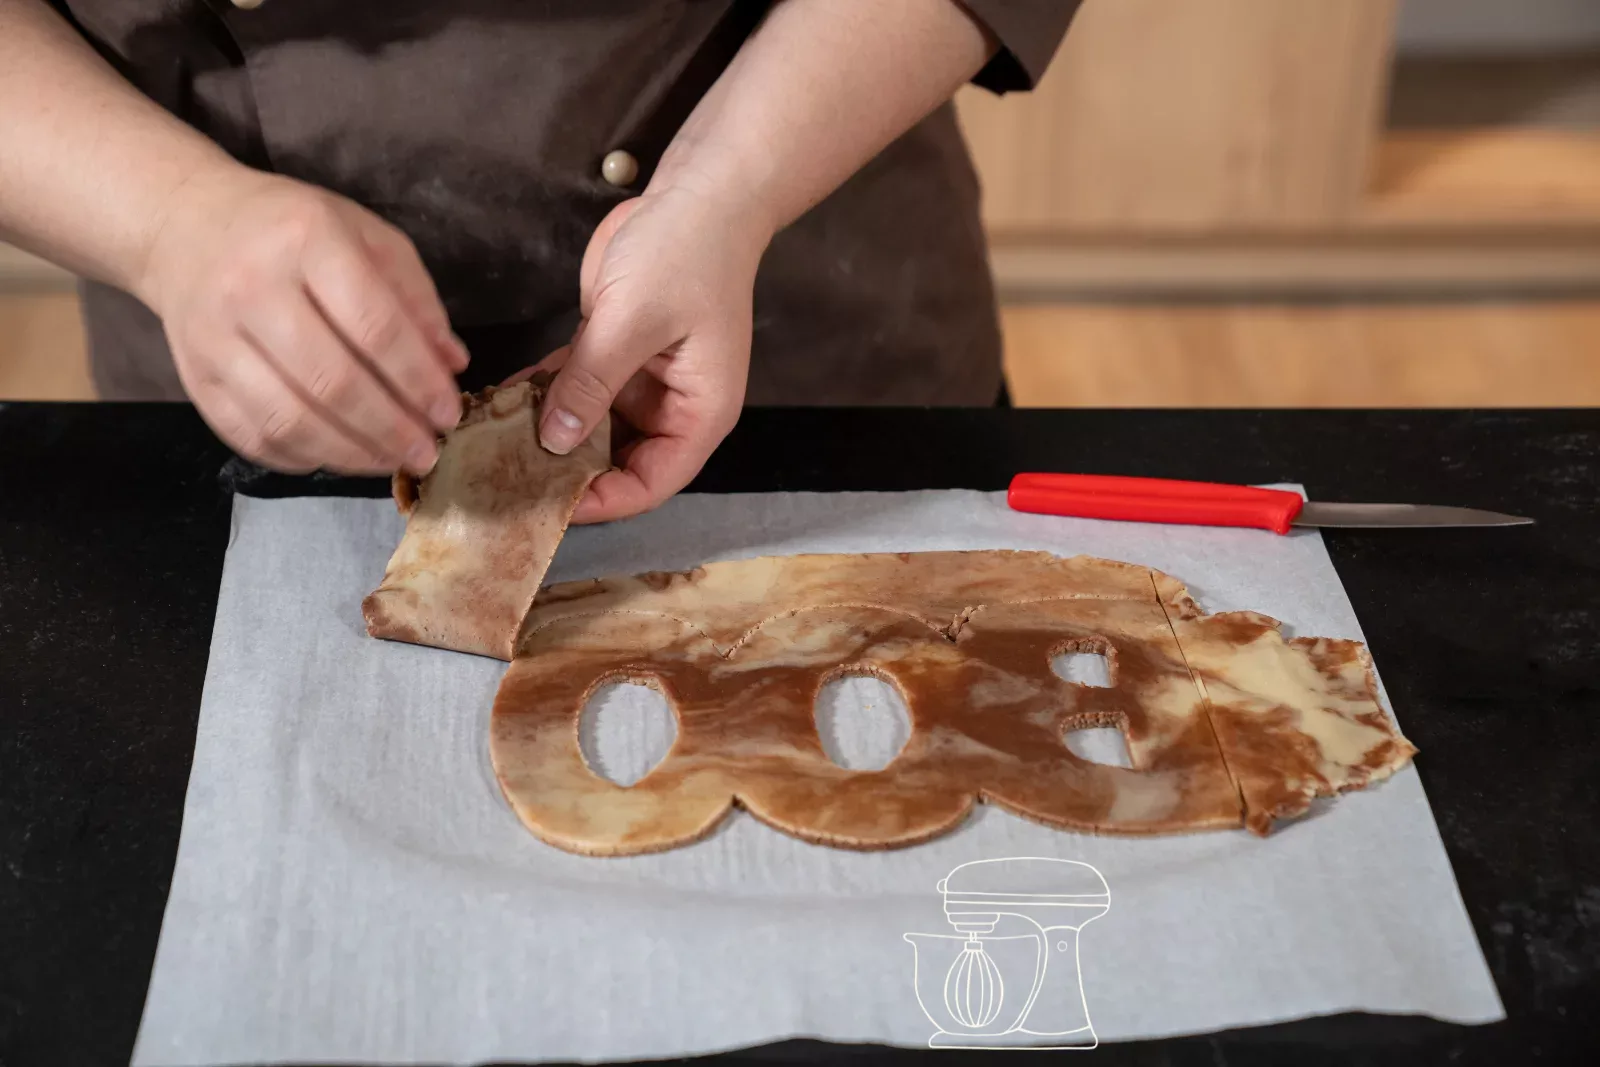
Remove the sheet and cut along the lines with a small, sharp knife. Don't forget the holes in the two Os! Carefully pull the dough away all around. You can use the leftovers straight away for our Halloween biscuits with a chocolate coating.
Repeat the process for the second base.
Bake
Bake both bases on the baking paper for 12 minutes at 190 °C fan oven. Let them cool completely on the tray: while warm, the letters are still soft and break easily.
Mascarpone lemon cream
Whip the cream
Whip the 200 g heavy cream until stiff and chill it briefly.
Mix the cream
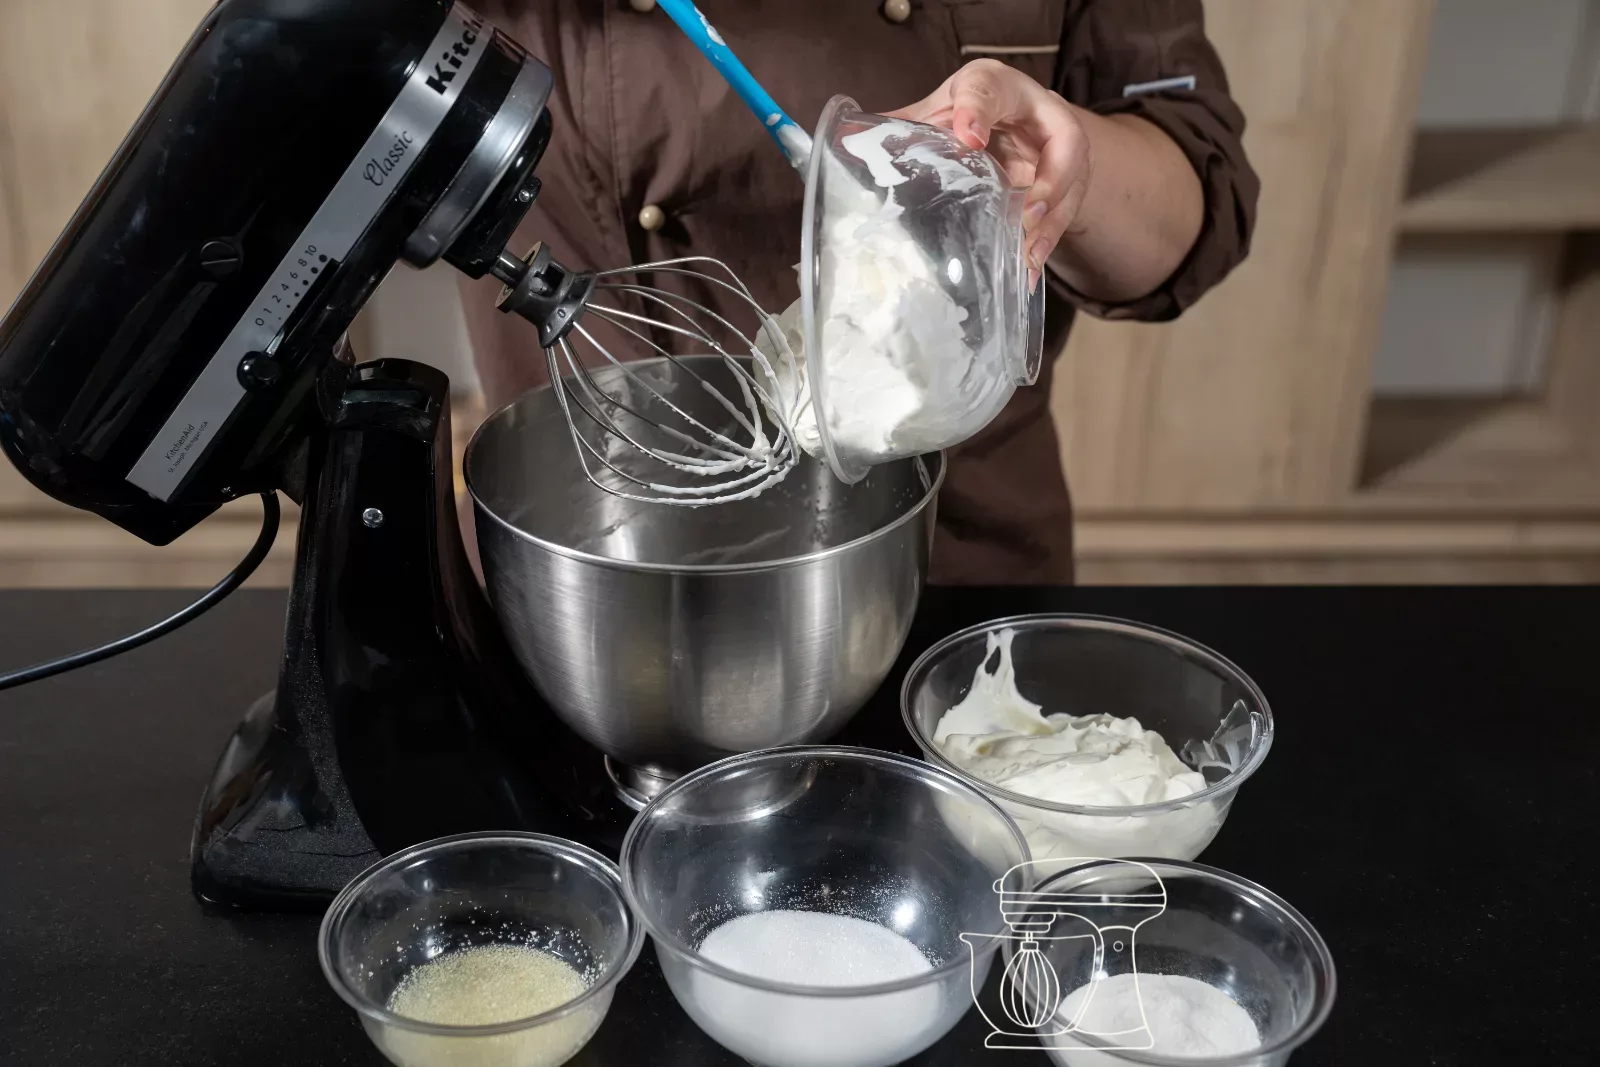
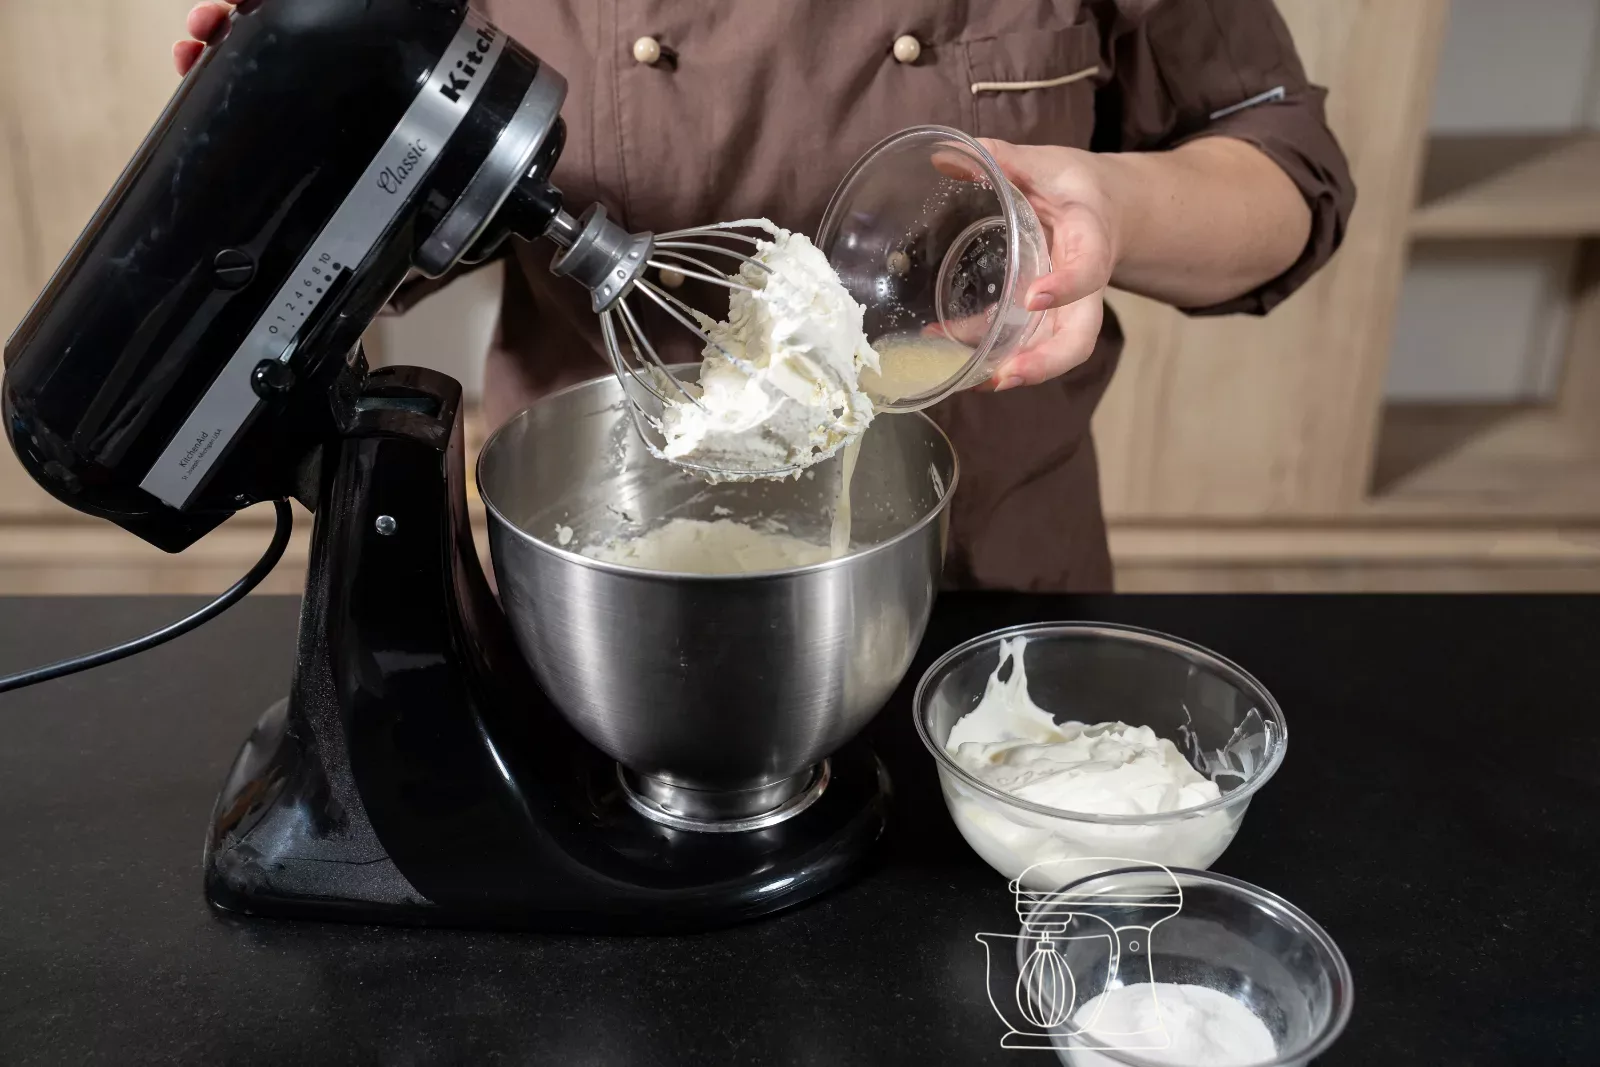
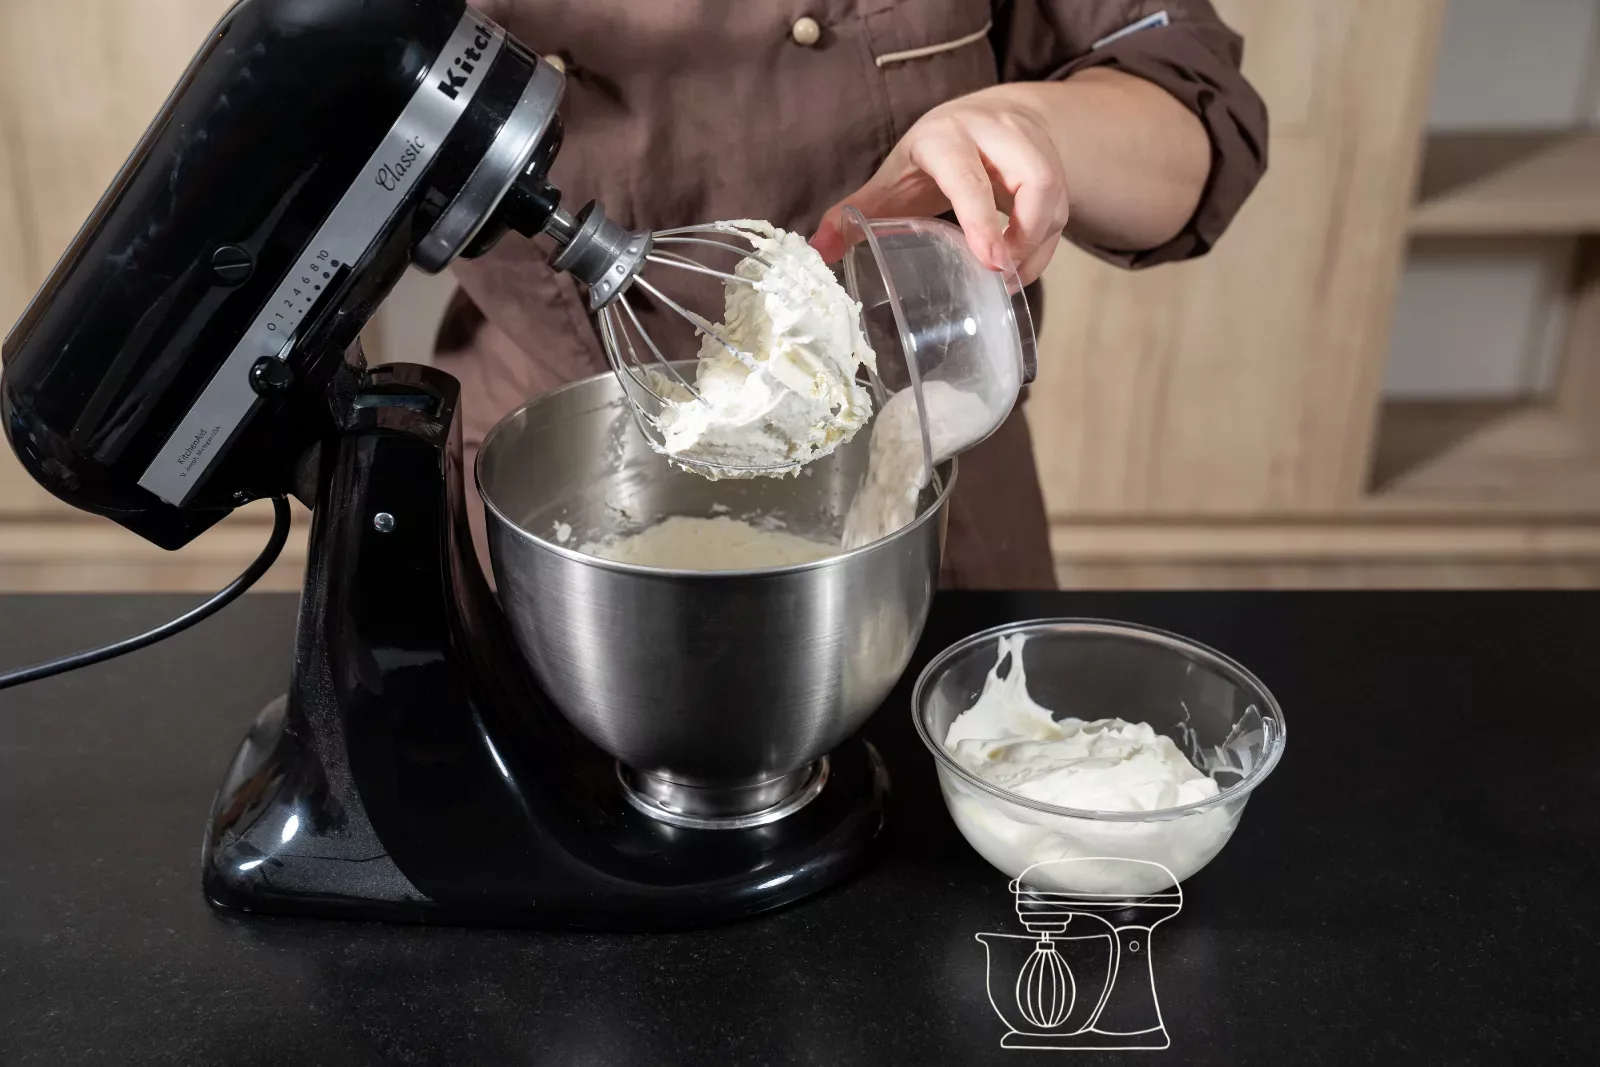
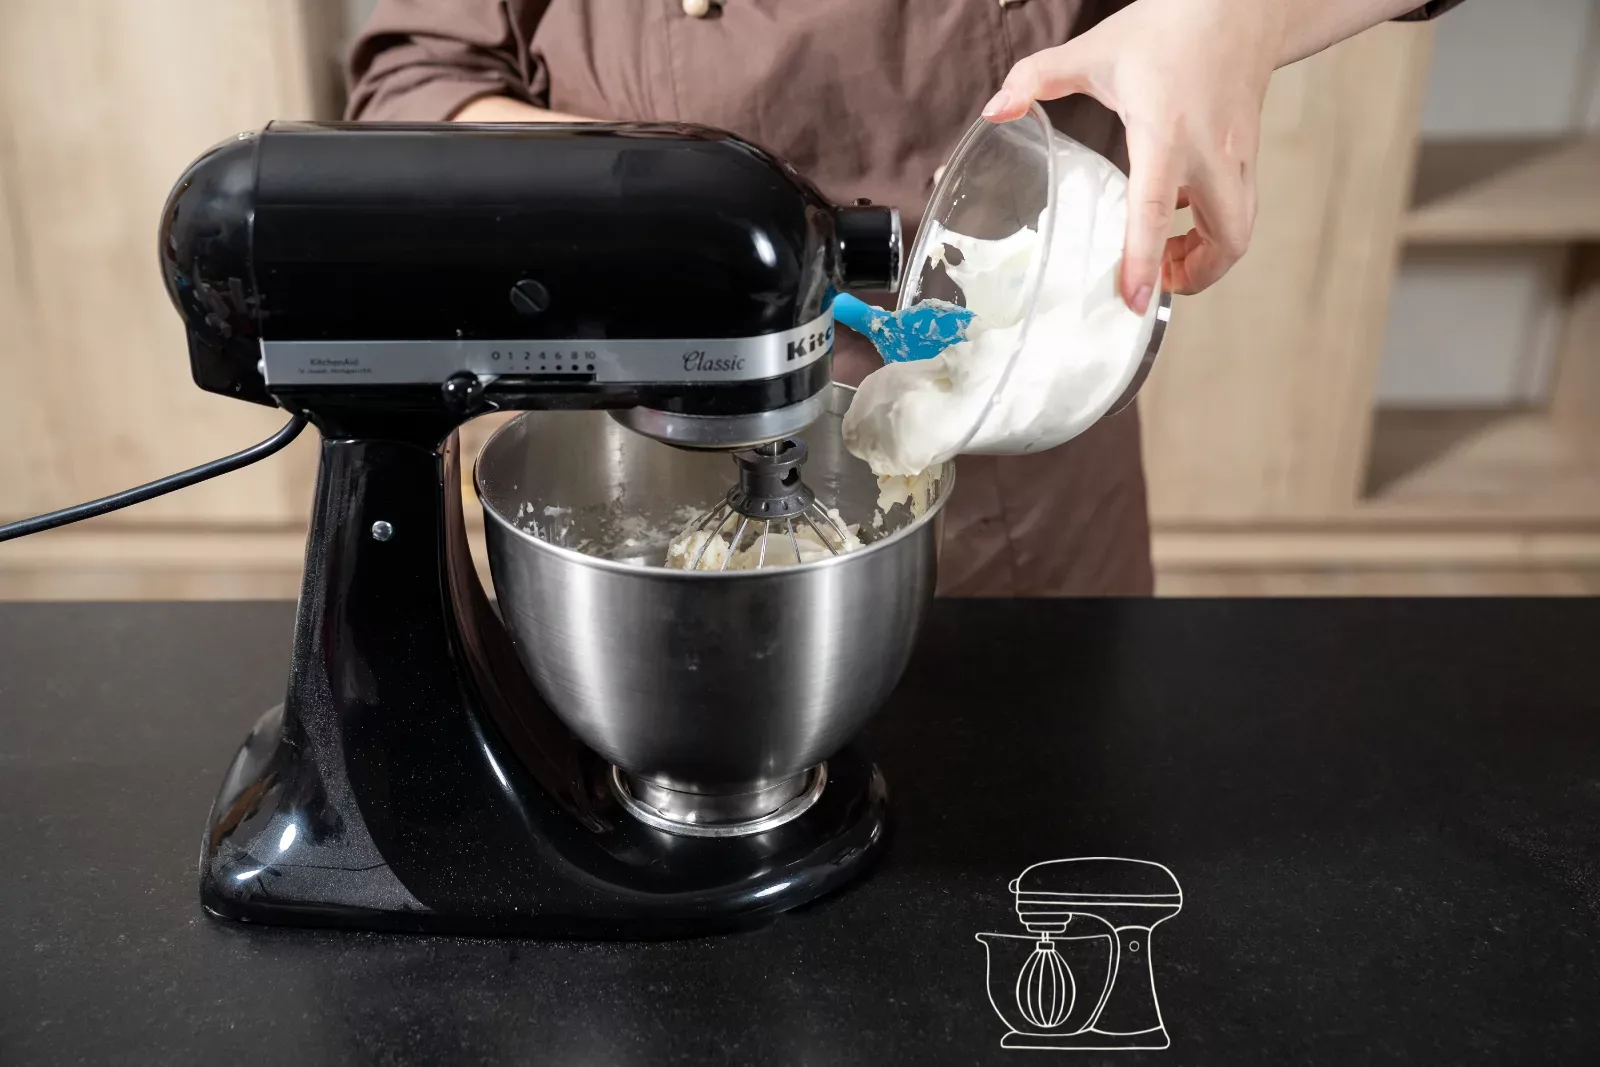
Stir the mascarpone with the sugar until smooth. Add the lemon juice, lemon zest and the vanilla cream powder and mix everything well. Finally, gently fold in the whipped cream so the cream stays nice and airy.
Vanilla cream powder, 120 g
Halloween candy silicone mold
Disposable piping bag - 41cm - 24 pcs
Stainless steel angled spatula
Halloween figures
Fill the molds and freeze
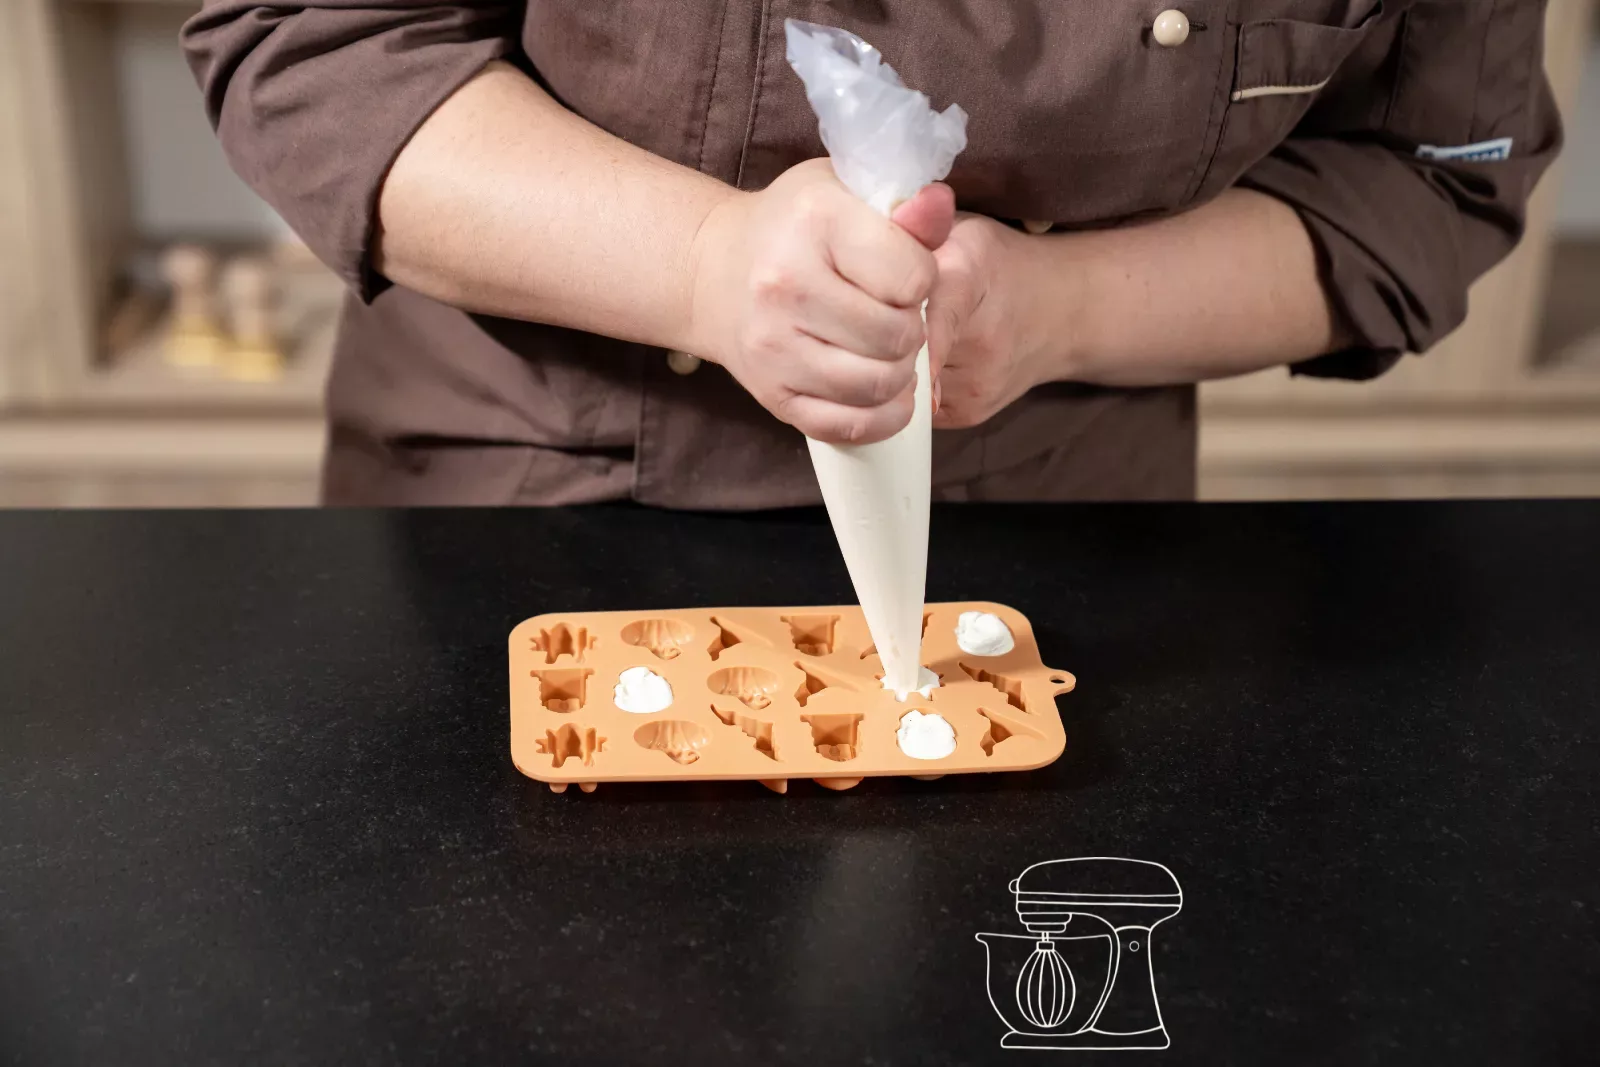
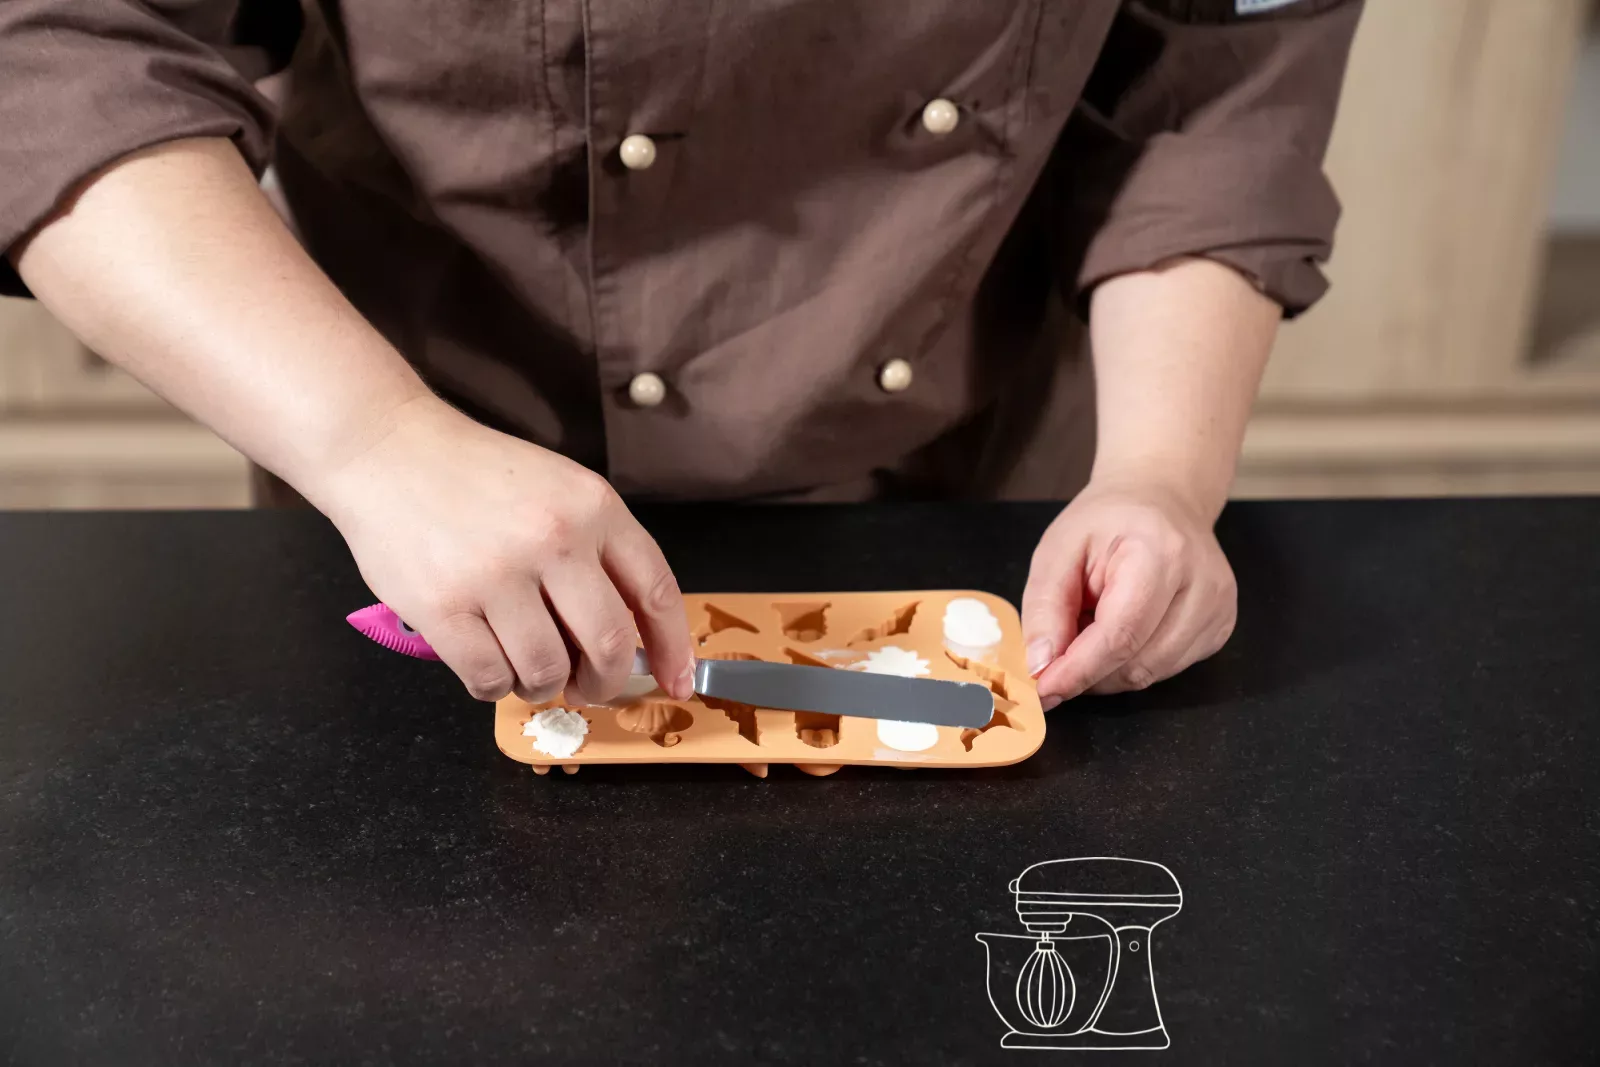
Put some of the cream into a piping bag and pipe the cavities of the silicone mold full with pumpkin, skull and spider shapes. Smooth the surface with the angled spatula and place the mold in the freezer for 20 minutes.
For 9 cavities you need about 50 g of cream. For our cake we made 36 figures, so either 4 molds at once or four rounds in a row.
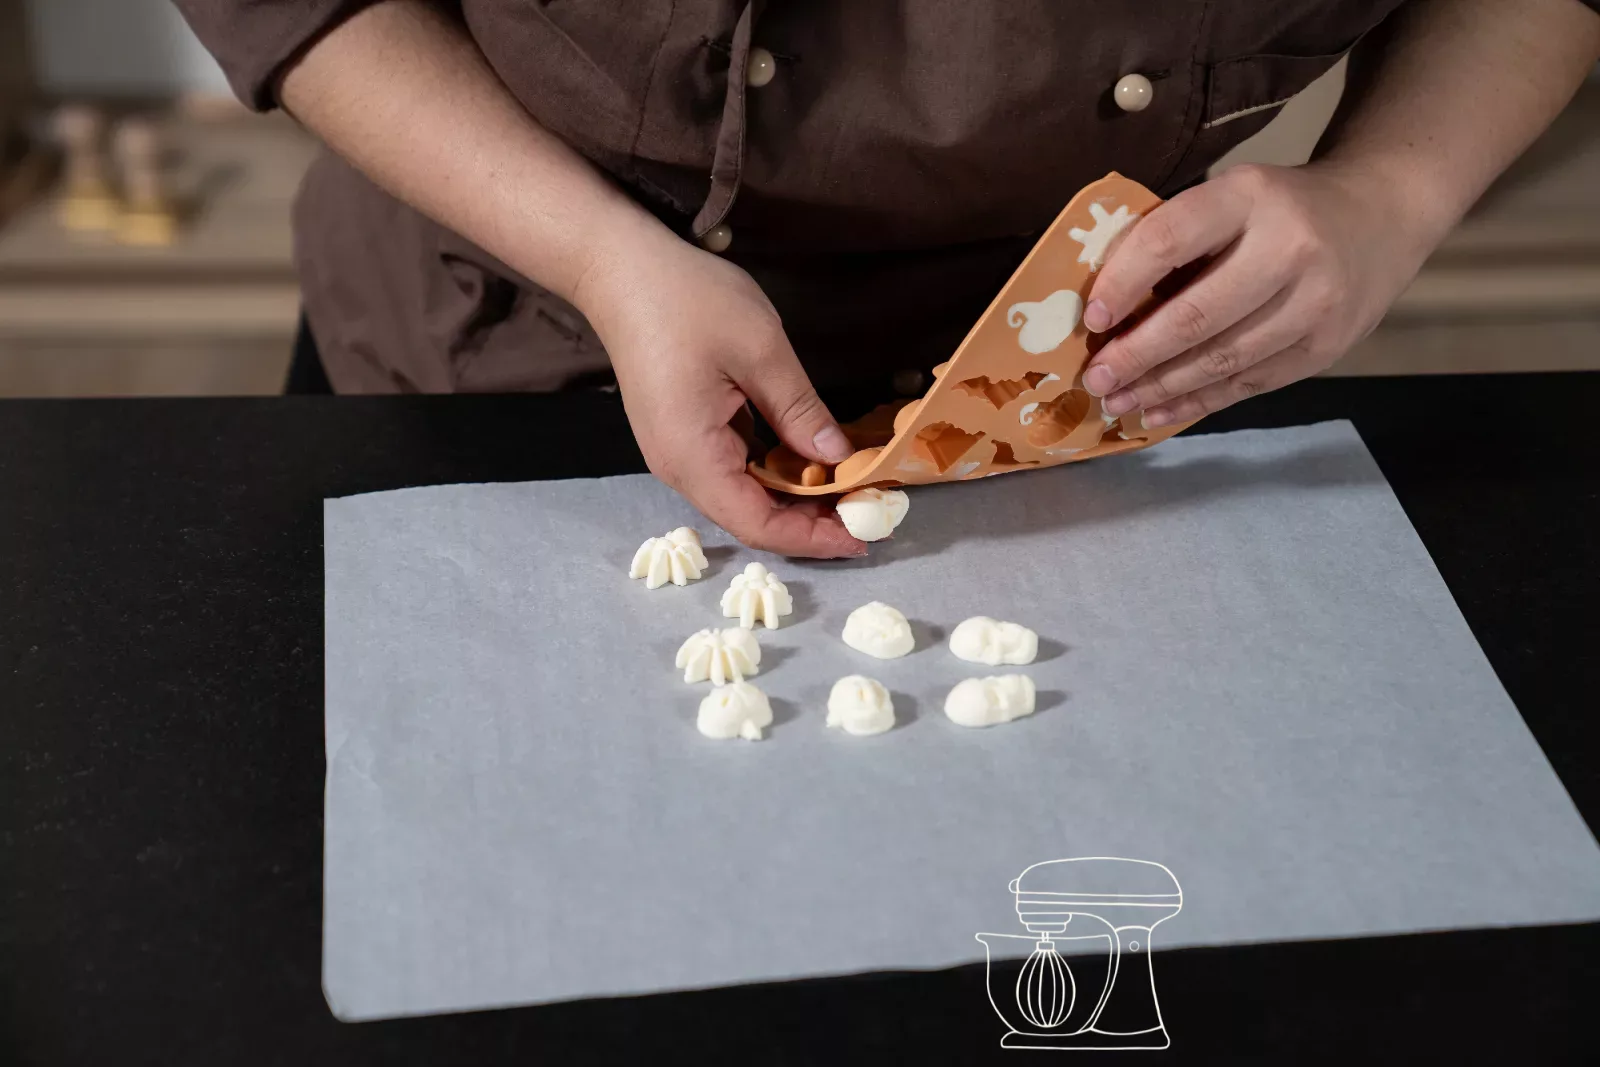
Remove the figures from the mold
Carefully press the frozen figures out of the mold onto baking paper and keep them cold until assembly.
Cream for the dots
Add the 30 g of heavy cream to the remaining cream and briefly whisk it with the whisk. This makes it a little firmer and perfect for the dots on the inside and on top. Fill it into a piping bag with a round piping nozzle.
Assembling
First dots
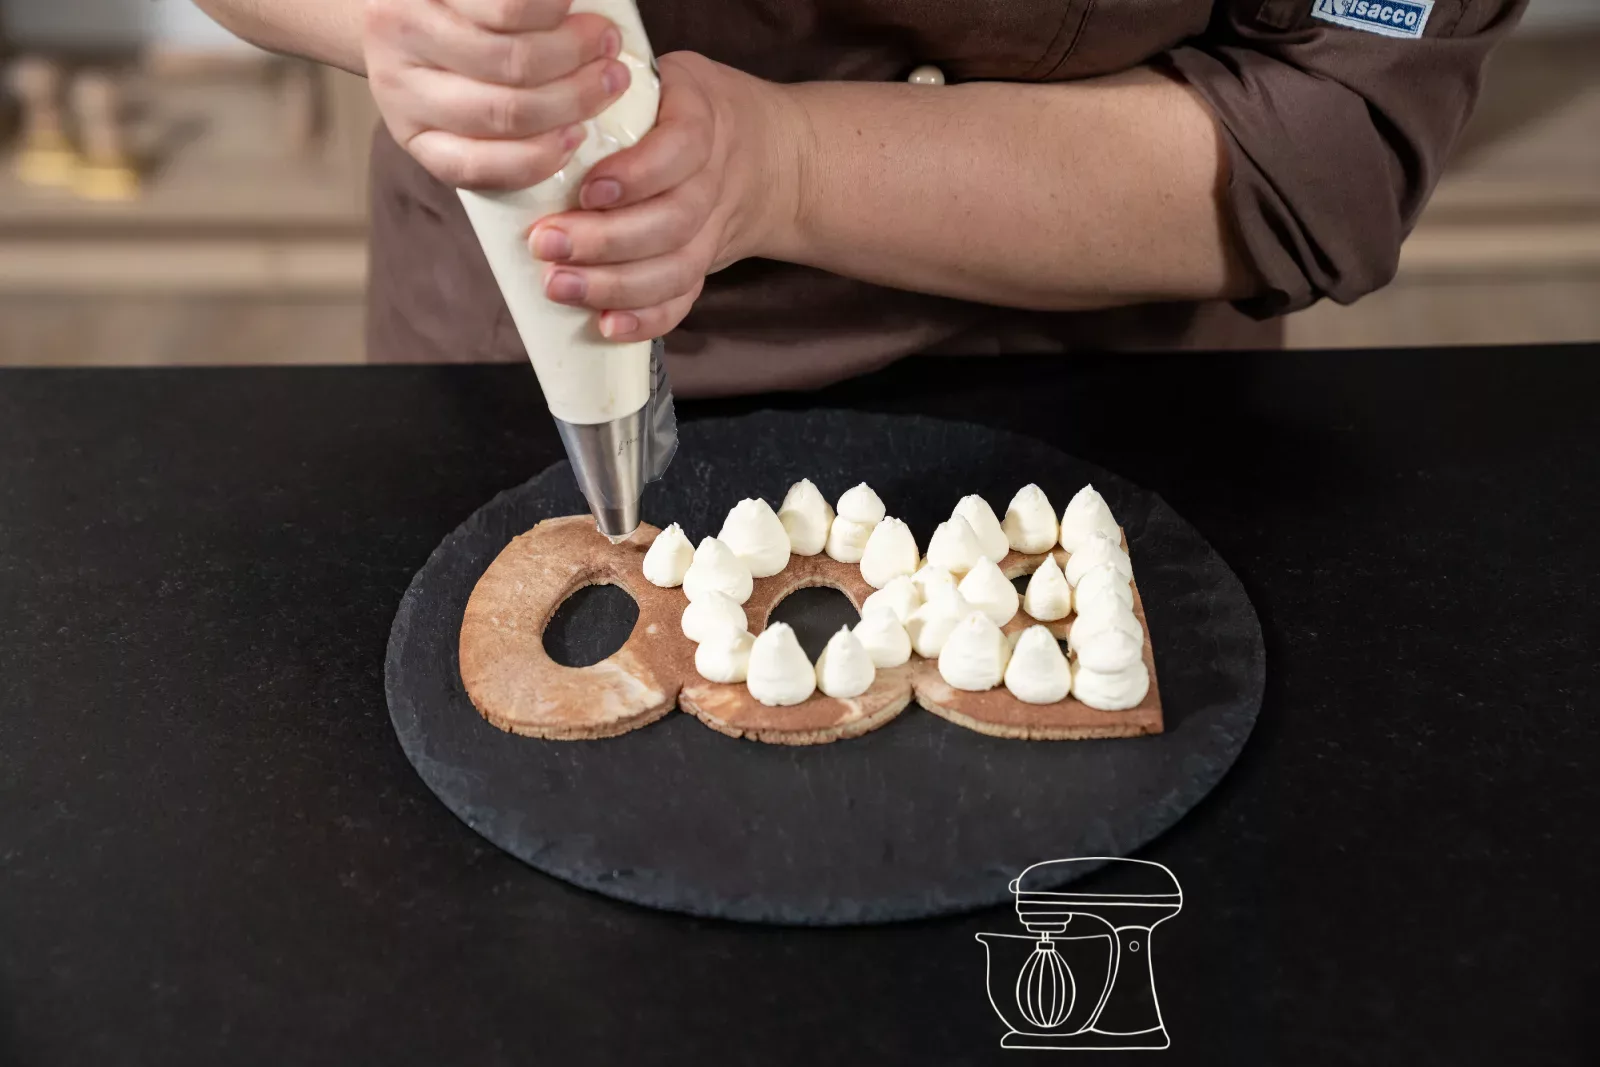
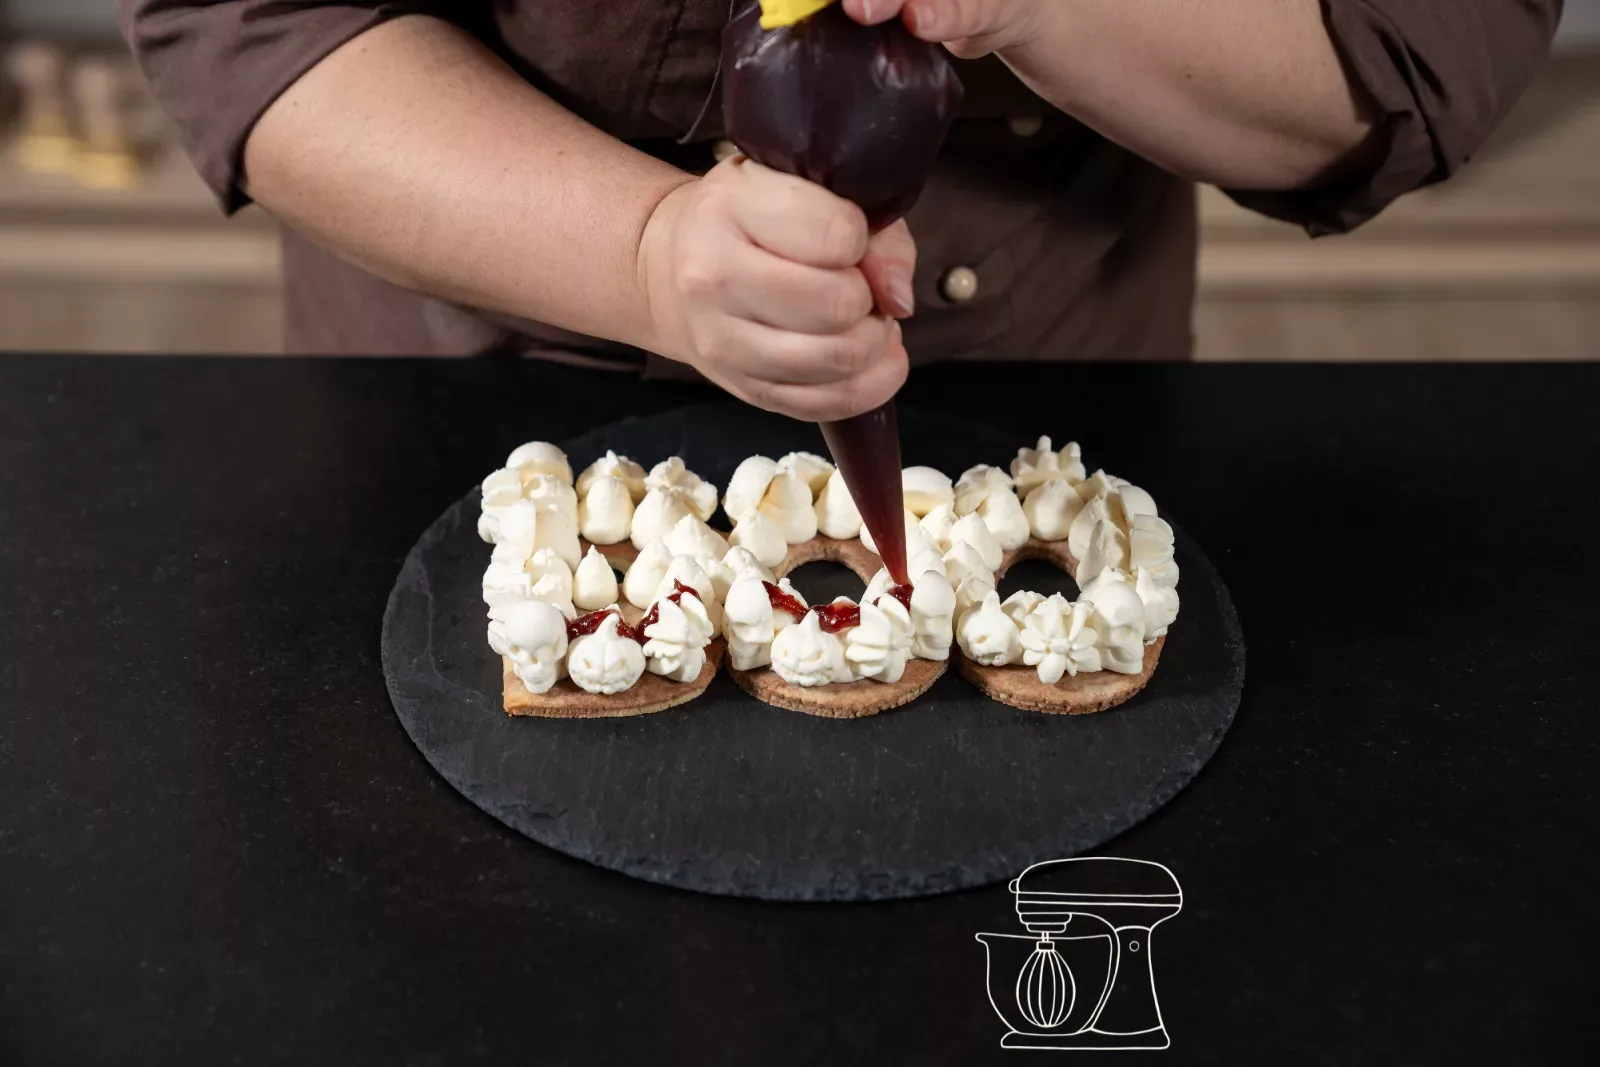
Place the first sponge layer on a cake board and pipe dots over all the letters, close together.
Figures and "blood"
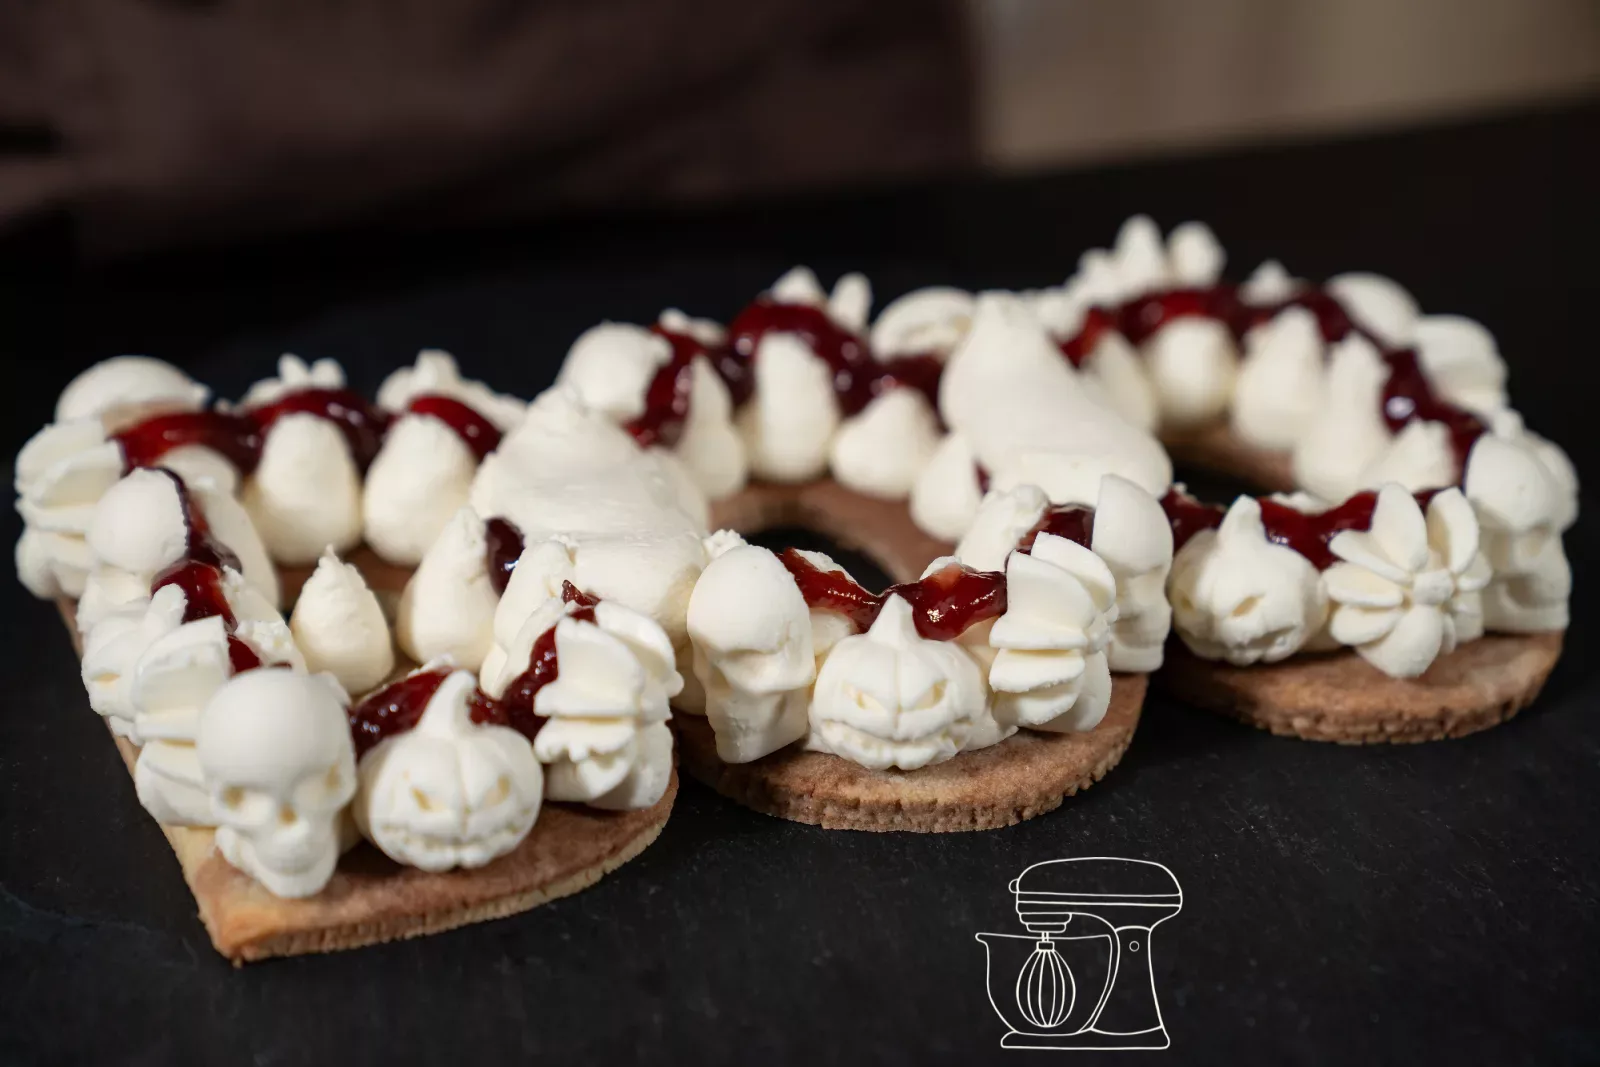
Set the frozen figures around the edge, faces outward. Fill the jam into a piping bag or a cornet and drizzle it over the dots inside, so it looks like blood. If it peeks out a little at the edges, all the better!
Smooth the cream and add the second layer
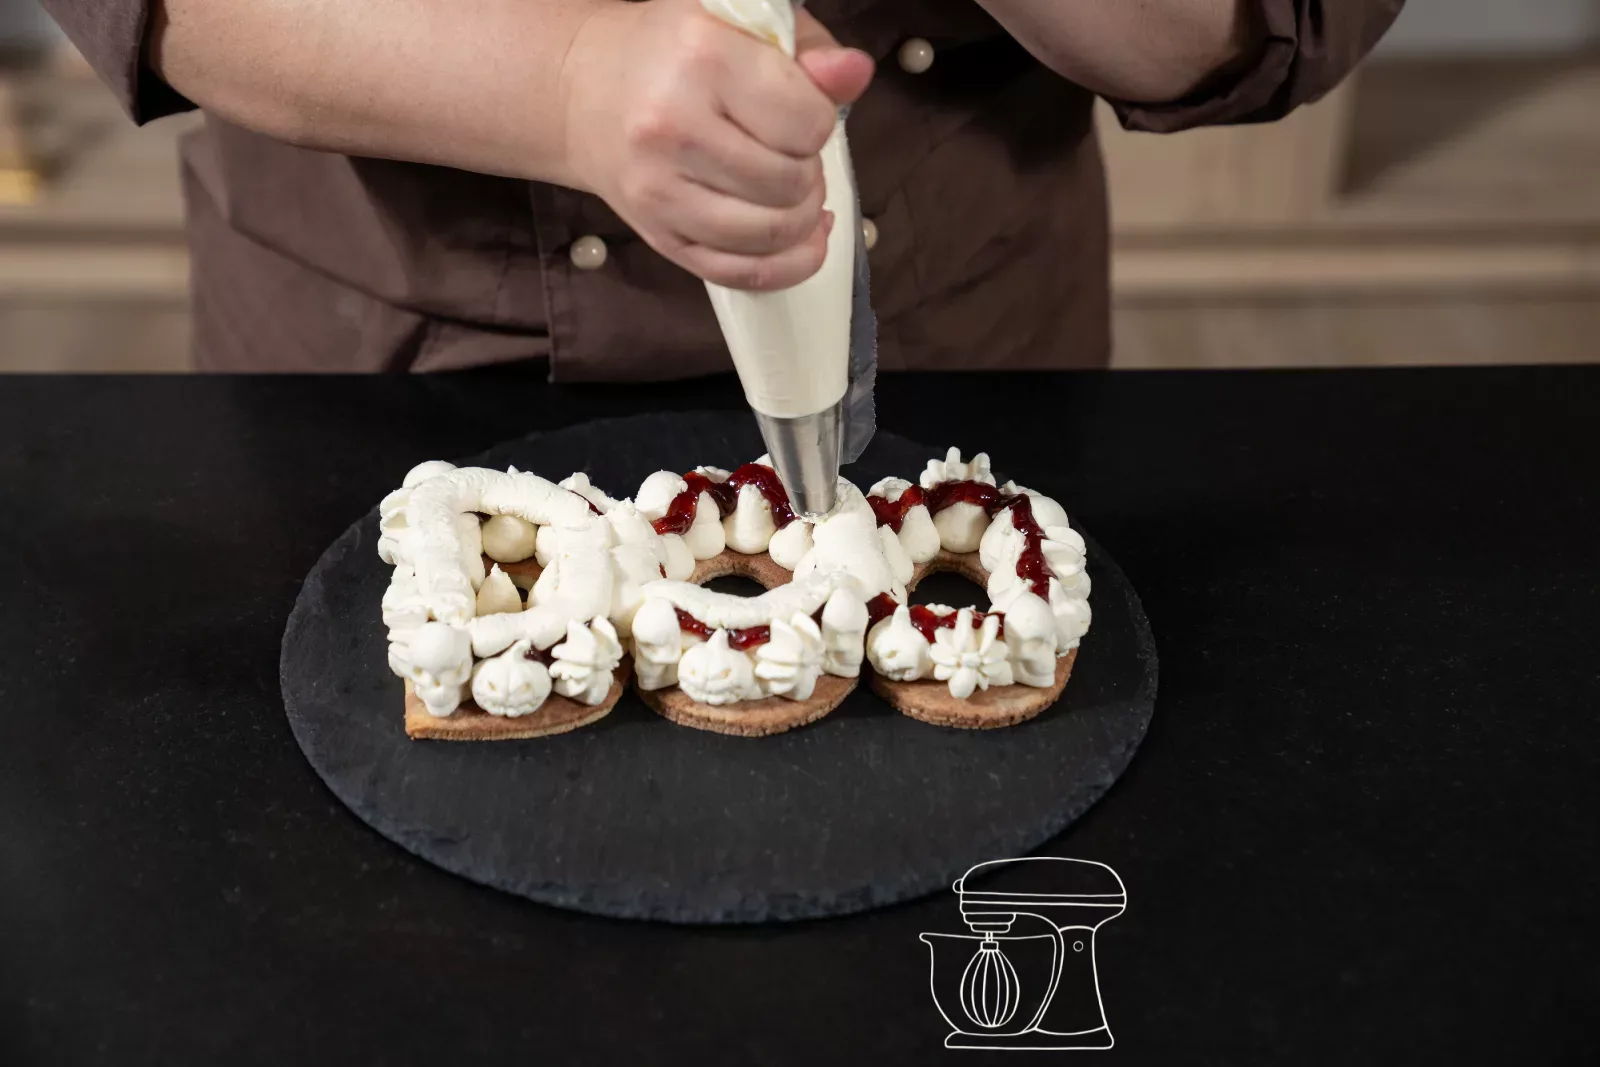
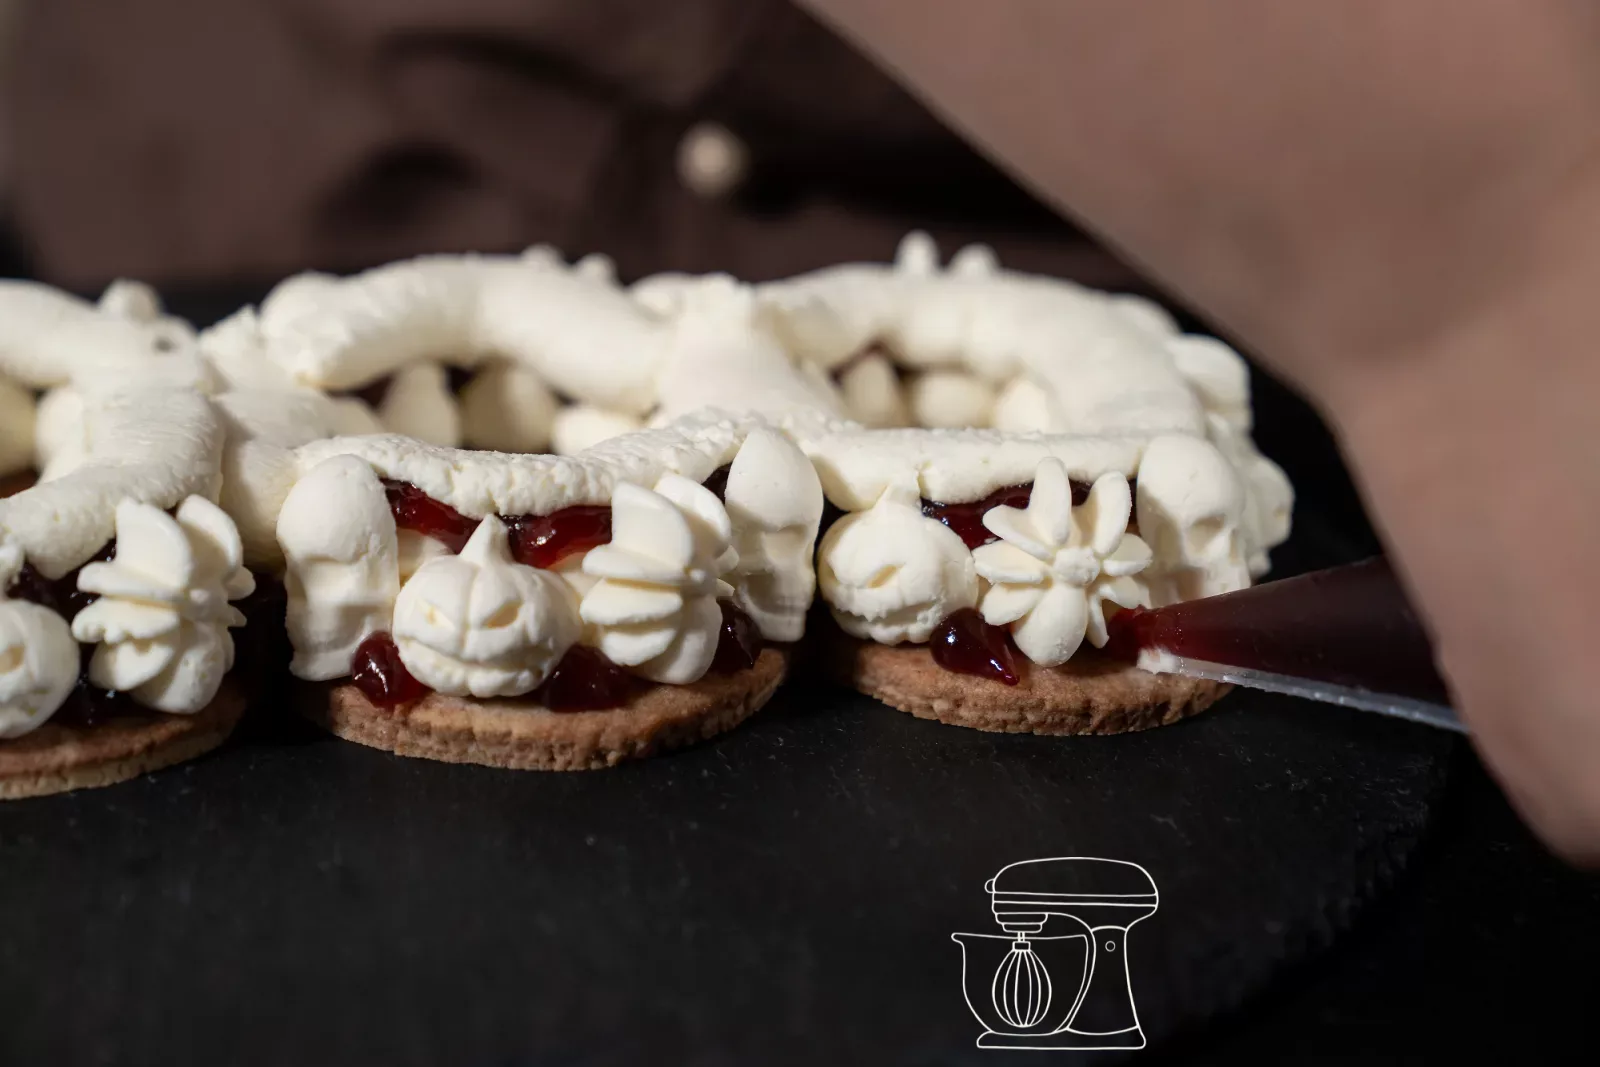
Spread a thin layer of cream over it so everything is level, then carefully place the second sponge layer on top.
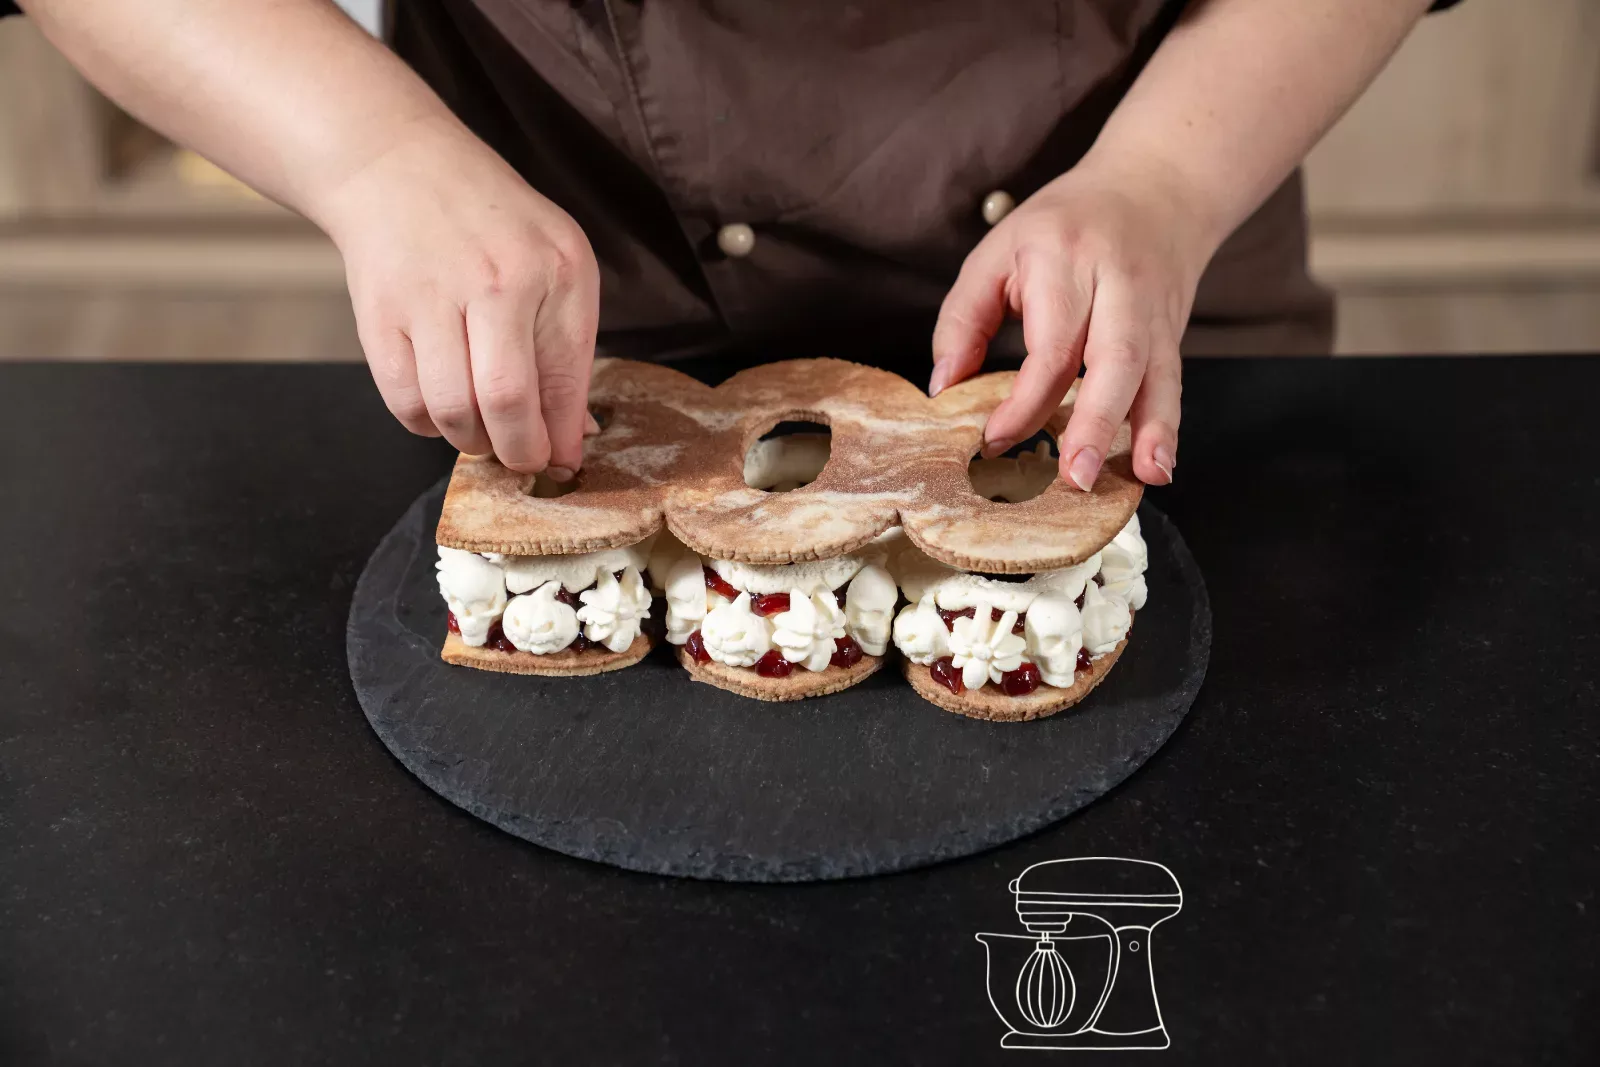
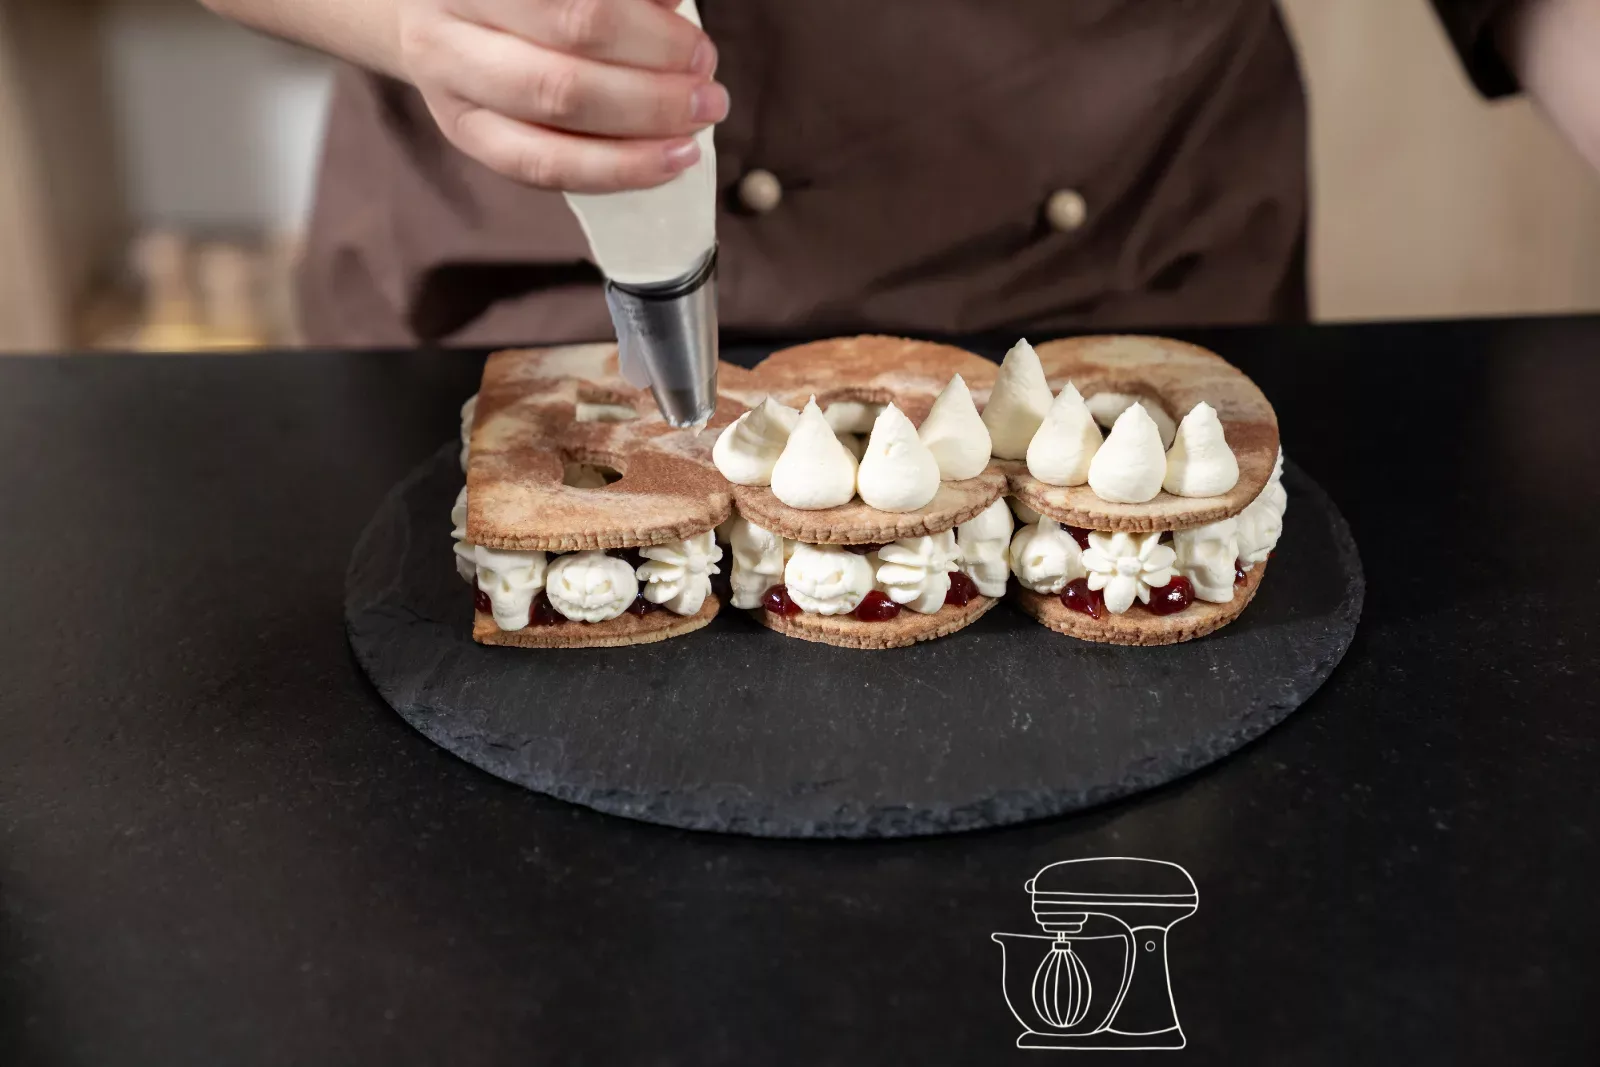
Dots on top
Now pipe dots onto the top layer as well, again over all the letters. Hold the piping nozzle upright and pull it straight up, so the dots get a little tip and look like ghosts.
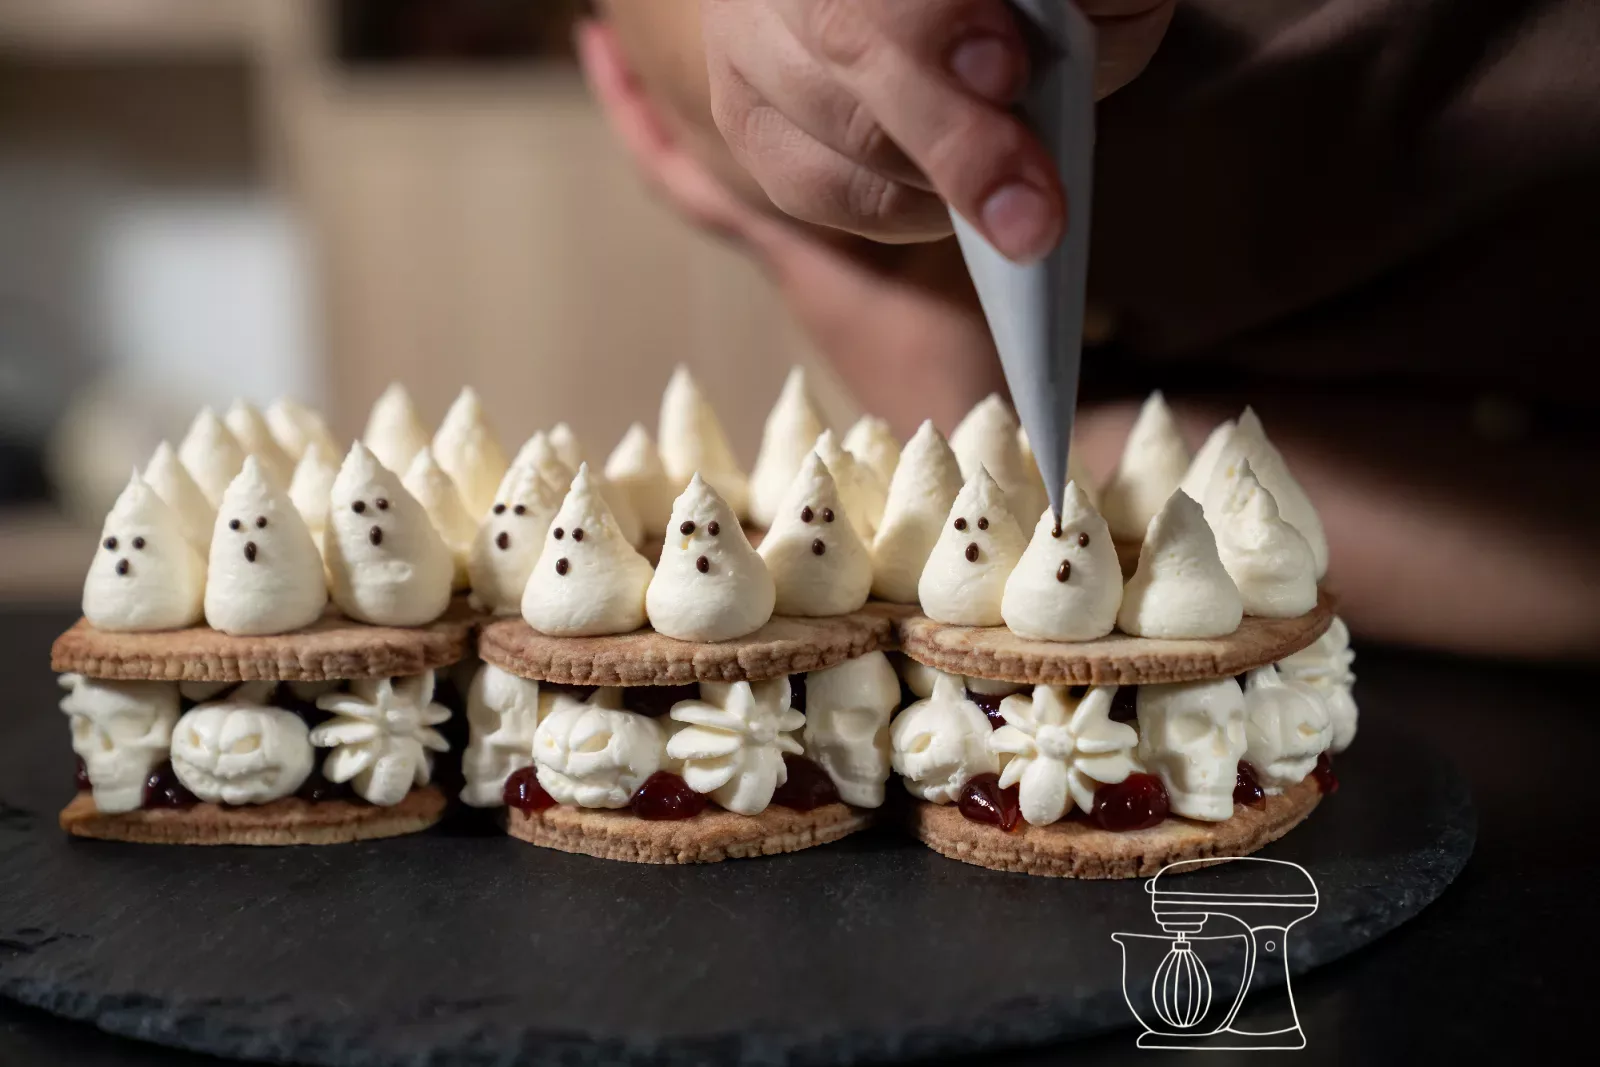
Ghost faces
Fill a cornet with slightly tempered dark couverture and pipe three small elongated dots onto each dot: two eyes and a mouth. And there you have a whole gang of ghosts on your cake. Done!
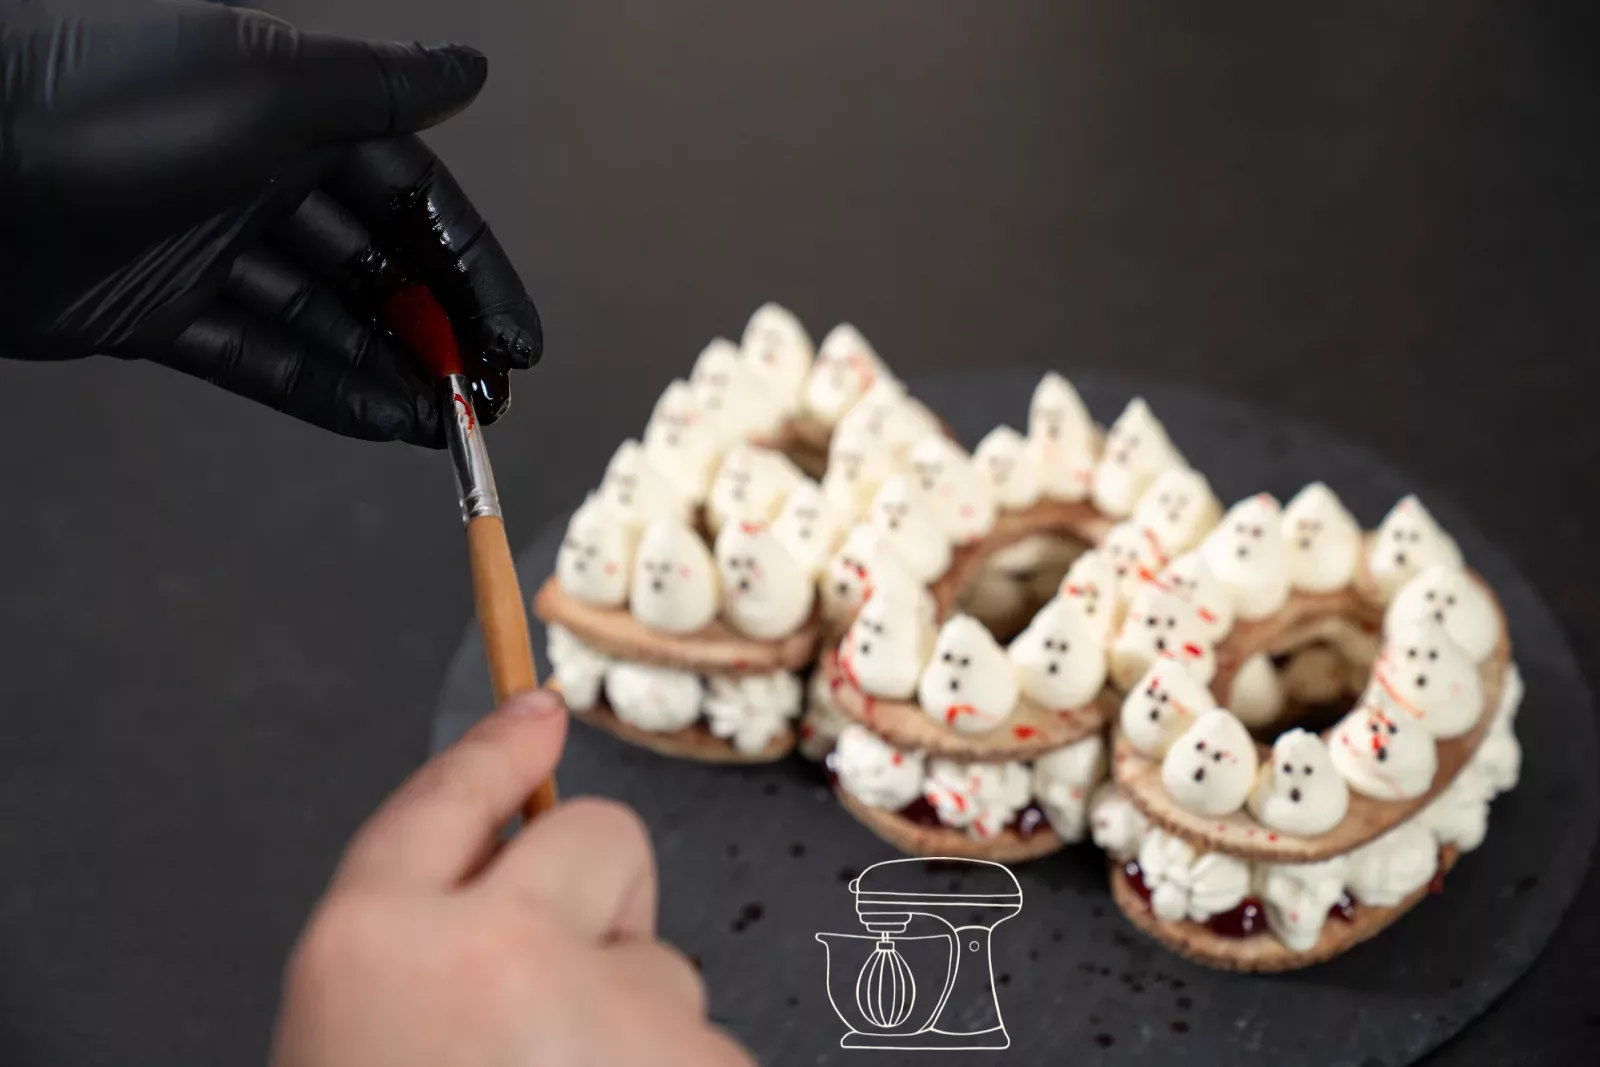
For our photos we added some decorative fake blood with a brush at the end. You don't need it for the cake itself.
Cornet paper, ready rolled, 15 pieces
Deco melts flavour milk chocolate
Deco melts - Black
Edible blood spray, 100 ml
BOO cake
Ingredients
Shortcrust pastry, light and dark (approx. 230 g)
Mascarpone lemon cream
For the dots
Filling and decoration
Method
- Dough: Prepare the shortcrust pastry, divide it in half, work cocoa into one half, chill for 1 hr.
- Bases: Marble 110 g of dough each, roll out to 5 mm thick, transfer the «BOO» template (28 × 13 cm) and cut out, 2×.
- Baking: 12 min at 190 °C fan-assisted, let cool on the tray.
- Cream: Whip the cream; mix mascarpone, sugar, lemon and cream powder, fold in the whipped cream.
- Figures: Fill the silicone mold (approx. 50 g for 9 cavities), smooth the surface, freeze for 20 min, 36 figures.
- Dots: Briefly whip the remaining cream with 30 g cream.
- Assembly: Base, dots, figures around the edge, jam, smooth cream, second base, dots.
- Decoration: Paint faces onto the dots with tempered chocolate.
Nutritional values per 100 g
Storage & shelf life
Everything for this recipe
Recommended by our bakery team, in exactly the sizes this recipe was tested with.
Ingredients
Swiss white flour, 1 kg
Cocoa powder, 1 kg
Bourbon vanilla seeds, 5 g
Vanilla cream powder, 120 g
Deco melts milk chocolate flavour
Deco melts - black
Milk couverture drops 500 g
Dark couverture drops 500 g
Edible blood spray, 100 ml
Accessories
Halloween sweets silicone mold
Beechwood rolling pins, 6 piece set (3/5/10 mm)
Disposable piping bag - 41cm - 24 pcs
Stainless steel angled spatula
Round piping nozzles, 3 piece set
Pre-rolled cornet paper, 15 pieces
Rectangular silver 35 x 25 x 0.3 cm cake board
Delivery in 1 to 2 working days · Free shipping from CHF 100
To make sure it works every time
Roll out the dough right on the baking paper and cut out the letters there. That way you can slide them onto the tray together with the paper, without the delicate shapes getting distorted.
Only well-frozen figures come cleanly out of the mould. If a spider is still soft, just give it another five minutes in the freezer.
Some dough is left over when you cut out the letters. Don't throw it away: it quickly turns into our Halloween Guetzli with a chocolate coating.
Frequently asked questions
Of course! The principle works with any letter and any number. Simply print your template in a similar size, and the quantities will be just right.
Yes: you can bake the sponge layers two or three days ahead and freeze the figures the day before. You should only assemble the cake on the day itself, so that the shortcrust pastry stays crisp.
A red jam looks most beautiful, for example raspberry or strawberry. It should be smooth, without large pieces of fruit, so that it can be piped easily.
Print recipe
Choose what should appear on the printout.
Related posts
 Juicy Matcha Muffins with Pecan Nuts & White Chocolate
Matcha Iced Latte & Coconut Variant
Pull-apart bread with fresh wild garlic pesto
Mini Banana Bread with Chocolate Chips
Leave a comment