
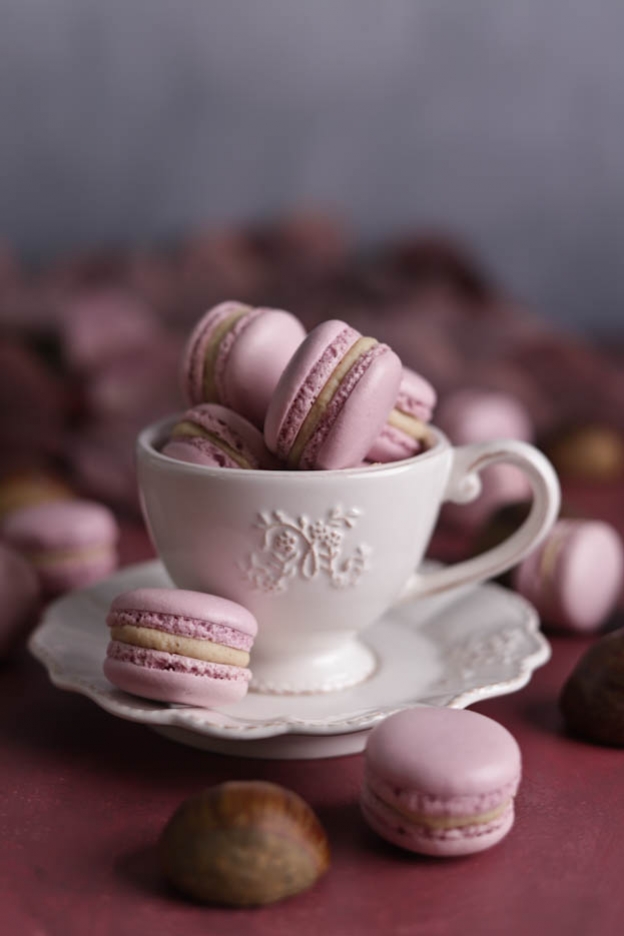
Blackcurrant-Chestnut Macarons
Hey my little foodies!
Finally a tutorial on macarons!
It's already October!!! And for me, autumn means chestnuts. So I wanted to offer you a chestnut macaron recipe, but one that isn't too sickly sweet either. To cut through that sweetness a little, I decided to make a small blackcurrant curd. What a burst of flavour in your mouth! ;o)
You should know that macarons are one of the most technically challenging pastries to make... Don't worry, I don't want to discourage you! But you really need to take into account all the details I'm going to give you, because one tiny thing can ruin everything. So read the recipe all the way through before you start.

Let's go! Here is the list of ingredients for 50 macarons:
Shells
- 200gr extra fine almond flour
- 200gr icing sugar from Coop
- 150gr egg whites (5-6 eggs)
- 200gr sugar
- 50gr water
Chestnut ganache
- 50gr white chocolate
- 25gr hot heavy cream
- 1 tsp chestnut cream
- 150gr vermicelli (chestnut purée)
- 100gr cold heavy cream
Blackcurrant curd
- 1 gelatine sheet
- 1 egg
- 50gr sugar
- 5gr cornstarch
- 105gr blackcurrant purée
- 65gr butter
Shells
We'll start by mixing the icing sugar with the almond flour. This is called a tant pour tant because there is equal amounts of icing sugar and almond flour.
Be careful, you need extra fine almond flour... Not the kind found in Swiss supermarkets. This is super important! Here, I always use the almond flour from Scrapcooking.
Same goes for the icing sugar, you need an extra fine icing sugar. My favourite? The one from Coop.
Mix the icing sugar with the almond flour using a spoon and set aside.


We will now crack our eggs. We need 150gr of egg whites which means 5 to 6 eggs depending on their size.
But be careful! There are many things to know about the eggs to use! And it's really super important!
Here are the guidelines to follow:
- The eggs must be at room temperature. Keep your eggs in your kitchen but not in your fridge! Personally, my eggs are always on my sideboard at room temperature.
- The eggs must be at least 10 days old. So if you get them from a farm for example, you need to let them age a minimum of 10 days. The older the better! Eggs keep for about 30 days. On the egg carton, A is the laying date, B is the sell-by date and C is the use-by date. So always check the A to know when the egg was laid.
Separate your eggs. As mentioned above, we need 150gr of egg whites.
You can freeze the yolks if you don't use them straight away. They'll be useful for making pastry cream or crème brûlée.
From the 150gr, pour 75gr of egg whites into our tant pour tant.
Then mix with a tablespoon to obtain a fairly compact almond paste. Set aside.


Pour the remaining 75gr of egg whites into your bowl, attach the whisk to your stand mixer and set aside.


Now we are going to prepare our sugar syrup. In this recipe, I show you macarons made with Italian meringue. Personally I find this method better than French meringue. Italian meringue is more melt-in-the-mouth.
Italian meringue is a sugar syrup that we pour over our lightly beaten egg whites.
So pour 200gr of sugar into your saucepan, then add 50gr of water. Make sure the water covers the sugar well before heating the mixture.
Get your thermometer and place it in your saucepan.
Caution! I don't recommend making macarons without a thermometer... It's an essential tool!


So, we are going to heat our sugar/water mixture without touching or stirring... Nothing! Turn it on full and let it heat.
Leave your thermometer in your saucepan. No need to hold it.
Once 103°C is reached, start whisking your egg whites into a foam at medium speed and wait for the sugar syrup to reach 118°C.
It's important not to whisk the whites into stiff peaks... We really want a foamy texture. So don't whisk too hard.


Once 118°C is reached, quickly remove the saucepan from the heat and pour the sugar syrup in a thin stream into your egg white foam while keeping your stand mixer running at low speed.
Be careful! In a thin stream! It's important not to pour too large a quantity at once... Second very important thing, the sugar syrup must flow along the bowl first because if you pour the sugar directly onto the foam, it will splatter on the sides (since your mixer will be running) and you will lose a lot of sugar. So press the saucepan right against the edge of the bowl and pour the sugar syrup along the side.


There you go, you've poured all the sugar syrup, it's time to choose the colour of your future macarons!
Caution! We work with powder or gel food colourings, but NEVER liquid colourings... Otherwise disaster awaits!
Here, I used my gel colourings from the brand Progel. I mixed violet and ruby to get a more pinkish purple.
Once the colourings are added to your meringue, whisk your mixture for 5 minutes at medium speed (to cool the meringue).
Whisk your meringue until you get a nice bird's beak, as in photo No. 3. The meringue must be nice and firm! This is important for the next steps. If it's too liquid, everything will collapse when macaroning.


Remove the whisk from your stand mixer and add your egg/almond/sugar mixture to your Italian meringue all at once.
Attach the K beater (flat beater) to your stand mixer and mix at minimum speed for about 30 seconds.
Stop your stand mixer once or twice and use a spatula to make sure everything is mixing well.


I always finish macaroning (mixing) by hand so that my texture is perfect!
Your texture should be shiny and should form a ribbon. So when you lift the spatula, your macaron batter should fall from the spatula in a ribbon without being liquid.


I show you this in a video:
So we have our macaron batter! Yay!
Take a 40 cm piping bag, an 8 mm round tip and a fairly tall jug.
Cut the end of your piping bag and insert your tip.


Then place the whole thing in a large jug. This way you'll have both hands free to work.
Fill the piping bag with the macaron batter.


Our piping bag is filled and we now need to prepare a perforated baking tray, some baking paper and our macaron template. It is much easier to pipe using templates than by eye.
I'll put the templates here: Macaron templates
My templates are about 3.5 cm but once baking is done, the macarons will be about 4.5 cm to 5 cm.


Here is a video for the piping technique because pictures won't be enough. ;o)
You need to hold your piping bag at 90°, place your tip right in the centre of the circle and keep your tip about 0.5 cm from the baking paper. Press on your piping bag until your circle is the right size, then stop pressing and make a rotating motion as shown in the video to pull away.
Don't panic if you have little peaks... You can tap your baking tray on the work surface and the little points will disappear. :o)
Baking
It's super important! It can make or break your macarons...
Here is everything you need to know:
If your oven is older, set it to top-bottom heat at 140°C and bake for approximately 15 to 18 minutes, one tray at a time. I always put a thermometer in my oven to check that it heats to the right temperature. Never put two trays at once with top-bottom heat.
If your oven is newer, then you can use fan/convection heat at 135°C. Baking time will be 12 to 18 minutes depending on the oven and you can put two trays at once. Likewise, I always put my thermometer in the oven to make sure of the temperature. Then I place my two oven trays upside down in my oven and let it preheat. Once the oven is hot, I place my two perforated trays with my macarons on the upside-down trays.
Perforated trays are essential!
I never use silicone mats, I find the baking too slow and they are hard to peel off.
Once your macarons are baked, remove the baking tray and let them cool on the baking paper.
Your macarons are done when you can lift one off with a knife.
If your macarons brown but don't come off, your oven is too hot. Lower the temperature.
If your macarons don't come off the paper, they are not baked enough. Or you are peeling them off too soon and they aren't cold yet.
If your macarons all crack on top, your eggs were too fresh or you didn't follow the recipe quantities. You need to be ultra precise with macarons!
If a few macarons crack on top, your oven isn't great and you'd be better off using top-bottom heat with one tray at a time.
If you still have a peak on your macarons, you need to macaron more (mix more) and pipe better.
If, on the contrary, your macarons are too liquid, you have over-macaroned.


You can freeze your macaron shells in an airtight container without any problem. Put them in loosely. They won't stick together so no worries.
Personally I always make more, to have some in my freezer. Ready for surprise guests! ;o)
Right, that's not all — we still need to fill these macarons!
Chestnut Ganache
Start by pouring 50gr of white chocolate into a glass bowl.
Then pour 25gr of heavy cream into a saucepan. Be careful — heavy cream! It's important.


Add 1 tsp of chestnut cream to your cream. This will enhance the flavour. I've tried it with and without. I find that with it makes all the difference!


Bring the cream to a boil, then pour the cream over the chocolate.
Let the chocolate melt for a few seconds, then mix with the whisk.


Once the chocolate is fully melted, add 150gr of vermicelli (chestnut purée) and mix with the whisk.


Finally, add 100gr of cold heavy cream and whisk again. You will get a nice thick mixture without lumps.
Whatever you do, don't use an electric whisk. The chocolate would split immediately.


Cover your ganache with cling film directly on the surface and place it in the fridge for a minimum of 3 hours.
If you don't respect the chilling time, your ganache will split and become grainy. This is called a split ganache. Not great texture-wise.


Blackcurrant Curd
Start by softening 1 gelatine sheet in very cold water.


Then in a saucepan, pour 1 egg and 50gr of sugar.


Weigh 5gr of cornstarch and pour it into the saucepan, mix everything well.
To weigh the cornstarch, I use my precision scale, to make sure I have the right proportions.


Then add 105gr of blackcurrant purée.
Once opened, blackcurrant purée keeps for 2-3 days in the fridge; if you don't use it within that time, you can freeze it in portions and it will keep for about 6 months in the freezer.
Mix everything well.


Prepare your butter and set it aside in a bowl nearby, next to your gelatine.
Then bring the blackcurrant/cornstarch/sugar/egg mixture to a boil while stirring.
At the first PLOP, pour the mixture into a bowl, off the heat.


Then add the softened and squeezed gelatine and mix until the gelatine has fully melted.


Add 65gr of butter and mix again.
Blend your mixture with a hand blender to smooth out your curd.


Cover it with cling film directly on the surface.
Then refrigerate while the ganache rests.


Once our ganache and curd are well chilled we can start filling our macarons!
FYI your ganache and curd can be made a day in advance without any problem.
Take your curd and whisk it lightly.


Then get a 5 mm round tip and fill a piping bag with the blackcurrant curd.


For the ganache, pour it into a bowl and whisk it for about 10 seconds.


You'll see that the ganache is slightly grainy and that's normal... It's the vermicelli that gives this texture.
Fill a piping bag fitted with an 8 mm round tip.


Let's go for the filling!
Pipe a ring of ganache around the macaron, then fill the centre with blackcurrant curd.
Close the macaron.


Enjoy! They're absolutely divine! If you like chestnuts, of course.
Once filled, these macarons will keep for 2 days in the fridge in an airtight container.
I hope you enjoy this recipe.
Wishing you a lovely Sunday.
Karin
P.S.: All the equipment used can be found at the bottom of the recipe.


Related posts
 Juicy Matcha Muffins with Pecan Nuts & White Chocolate
Matcha Iced Latte & Coconut Variant
Pull-apart bread with fresh wild garlic pesto
Mini Banana Bread with Chocolate Chips
Juicy Matcha Muffins with Pecan Nuts & White Chocolate
Matcha Iced Latte & Coconut Variant
Pull-apart bread with fresh wild garlic pesto
Mini Banana Bread with Chocolate Chips
Leave a comment
Comments
Question de William
By: William D. On 2025-04-09Bonsoir,
Je n’ai pas de robot mais un batteur électrique à main. Impossible d’avoir une texture en bec d’oiseau pour les coques. J’ai passer bien 20 minutes avec les’ batteurs sans avoir une texture ferme. Avez-vous une astuce ou ai-je fais quelque chose de faux?
Merci pour votre retour
Replied by: Karin On 2025-04-10
Question de Isabelle
By: Isabelle M. On 2022-07-10Bonsoir
Est-il possible de mettre une crème de marron au lieu des vermicelles?
Merci & bonne soirée!
Isa
Replied by: Karin On 2022-07-11