
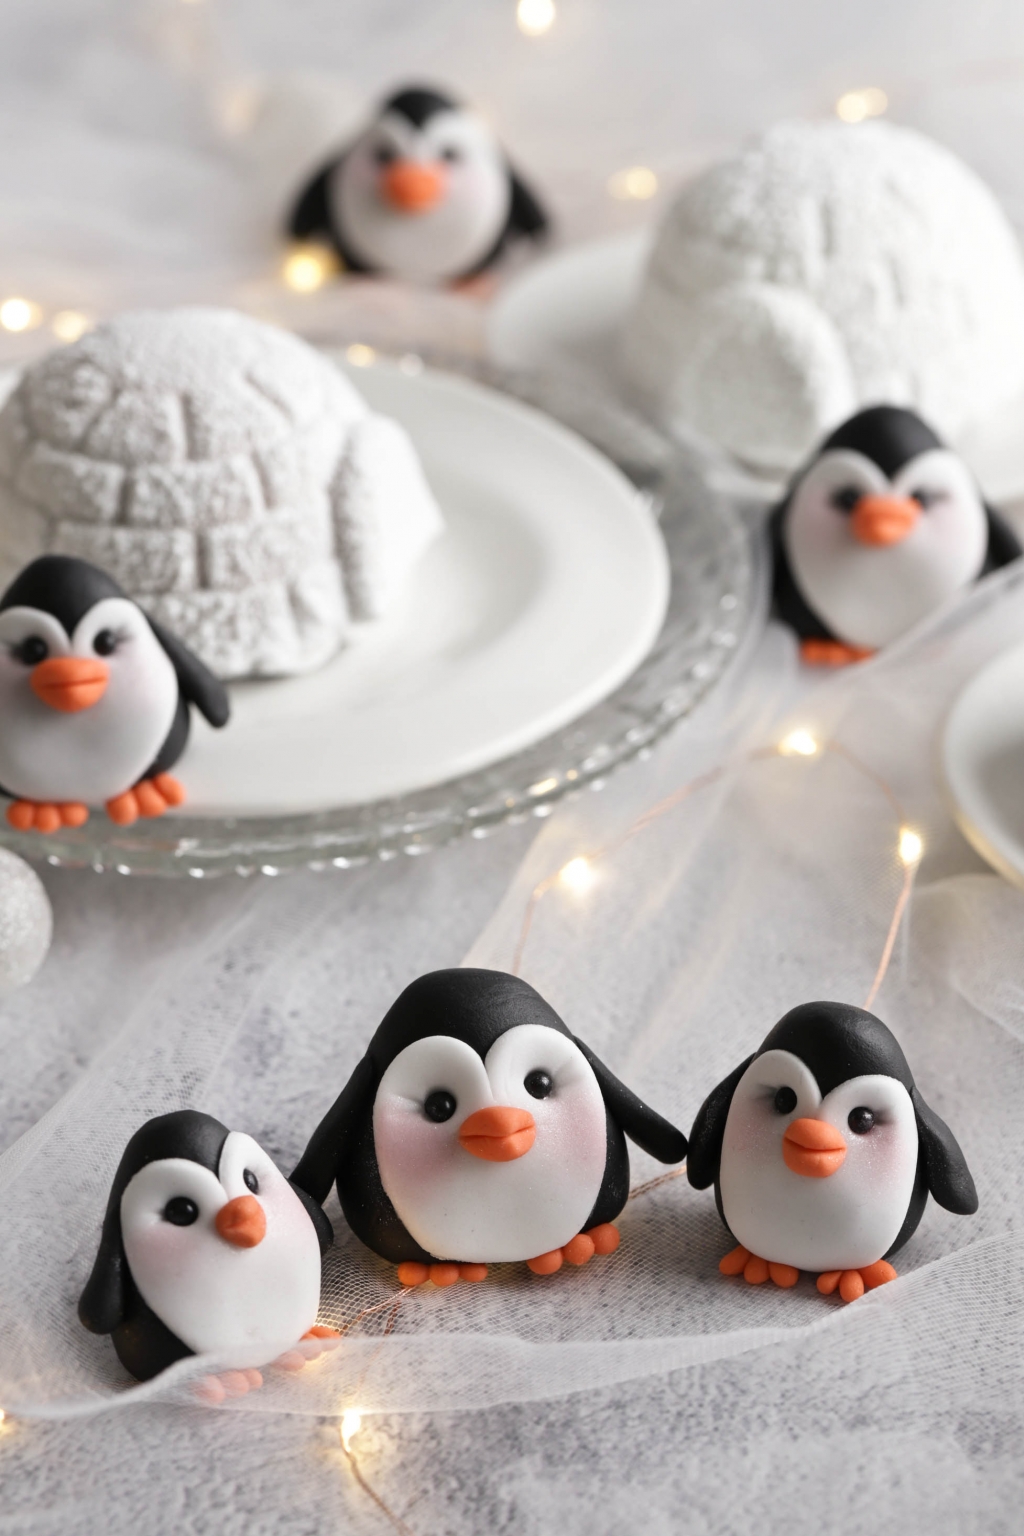
Modelled Penguins
Hey foodies!
How about some fondant penguins to decorate your desserts?
I know you love this kind of modelling!
So here's a simple step-by-step guide to create these cute penguins. Even for beginners, it's a piece of cake! ;o)

For these models, you will need the following materials:
- 250gr of white Massa Ticino fondant
- Orange gel food colouring
- 250gr of black Massa Ticino fondant
- Magic powder
- Small rolling pin
- Heart-shaped cutter
- Round cutter
- Edible glue
- Modelling tool (ball tool)
- Black sugar pearls
- Veining and ribbing tool
- Brush
- Pink glitter dust
Let's get started!
To model a figurine, you of course need fondant!
The brand you use is important. For small, very simple figurines like the penguin here, I use Carma's Massa Ticino fondant.
This is the fondant I get the best results with, whether for small decorations or cake covering. But it's very personal! Ask fondant fans and they all have different opinions on which brand to use, depending on their preferences but also their hands (warm, cold, dry... etc).
If the figurines are larger and/or have legs, arms, or ears sticking out, I usually add a little CMC powder so they dry faster and hold their shape better. If the figurines are very detailed, I use modelling paste designed specifically for modelling.
It is also possible to make simple figurines with marzipan or modelling chocolate.
For the penguins, I used black and white fondant and coloured part of the white with orange gel colouring. You can definitely buy pre-coloured fondant if you prefer.
To begin, colour approximately 50gr of white fondant using orange gel colouring.
While working, cover the fondant you're not using with cling film or keep it in a zip bag so it doesn't dry out.


Knead the fondant well so the colour is nice and uniform.
For the penguin bodies, I used between 25gr and 40gr, as I wanted penguins of different sizes, some bigger and some smaller. They are approximately 3 to 5 cm tall depending on the starting weight. ;o)
The base of almost all figurines is a ball that either stays as it is or is shaped into a cone.
Start by forming a nice ball between your hands, then shape it into a cone.


Then slightly round off the tip of the cone with your fingers.
It's up to you whether you prefer to do this in your hands or place the fondant on your work surface.


For the white part of the penguin, roll out a little white fondant with a small rolling pin (about 2-3 mm thick).
To prevent it from sticking to the work surface, I use my duster filled with magic powder.
This powder is made of special, very fine potato starch that doesn't clump and leaves few traces on the fondant.


Cut out the white fondant using a small heart-shaped cutter (4 cm). Gently pinch the shape as in the second photo to slim down the heart.


Then cut off the point of the heart using a round cutter (5 cm diameter).
Apply a thin layer of edible glue to the heart.
Caution! Less is more when it comes to glue. If you use too much, the heart won't stick but will slide around on the opposite surface. Also, once dry, the glue shines and shows on the surface, so use it sparingly. ;o)


Place the heart on the body, position it correctly and press gently.
Then make indentations for the eyes using the ball tool (the small ball).
If you press too hard or too fast, the head may become misshapen and that's not what we want, so be gentle. ;o)


Add glue in the holes and insert a black sugar pearl by hand or with precision tweezers.
You could also form two small balls with fondant and place them inside, but I find sugar pearls more practical and their shine gives a more lively effect.


For the wings, use the ball and cone technique again. Attach the wings to the body with edible glue.


Also model the feet with the orange fondant by making 3 mini balls/cones.
Flatten them slightly on one side and attach them under the penguin.


For the beak, start by forming a small ball, then shape it into a triangle with your fingers.
Attach the beak to the penguin.


Make an opening in the beak using a knife or, if you prefer, a scalpel.
I lightly marked the eyes on the side with the veining and ribbing tool. It's these little details that ultimately make the difference with your penguin. ;o)
This tool is, in my opinion, the most important one for modelling work. It allows you to highlight precise details such as smile lines, create structures for hair, veins for flower petals and much more...


For the rosy cheeks of the penguins, grab some pink glitter dust and a brush.
Pick up a little powder on the brush, dab it lightly on a paper towel and then tap it onto the cheeks of your penguins.
I was able to make 8 small penguins with 250gr of black fondant.
To keep your fondant for a long time, simply vacuum-seal it. That's what I did with the remaining white fondant. If you don't have a vacuum sealer, wrap it in cling film and a zip bag and store it in a Tupperware, away from light, in a kitchen cupboard.


Here are my little penguins! :o)
You can easily make this type of model 3 months in advance.
So they don't become rock hard, let them dry for 1 to 3 days (depending on their size) and store them in a Tupperware. This way they will remain relatively soft inside if you want to eat them.
I wish you a great Wednesday and stay tuned — on Sunday you'll get the igloo recipe ;o)
Jenny
P.S: All the materials used can be found at the bottom of the blog.


Watch this modelling tutorial on video!

Related posts
 Juicy Matcha Muffins with Pecan Nuts & White Chocolate
Matcha Iced Latte & Coconut Variant
Pull-apart bread with fresh wild garlic pesto
Mini Banana Bread with Chocolate Chips
Juicy Matcha Muffins with Pecan Nuts & White Chocolate
Matcha Iced Latte & Coconut Variant
Pull-apart bread with fresh wild garlic pesto
Mini Banana Bread with Chocolate Chips
Leave a comment
Comments
Question de Emeline
By: Emeline Q. On 2025-01-23Bonjour !
Mignons ces petits pingouins :)
Laisser les sécher, ça veut dire à l'air libre ? et ensuite dans un tupp ?
Merci pour toutes vos recettes et idées !
Replied by: Emeline Q. On 2025-01-23
Replied by: Laura On 2025-01-24