
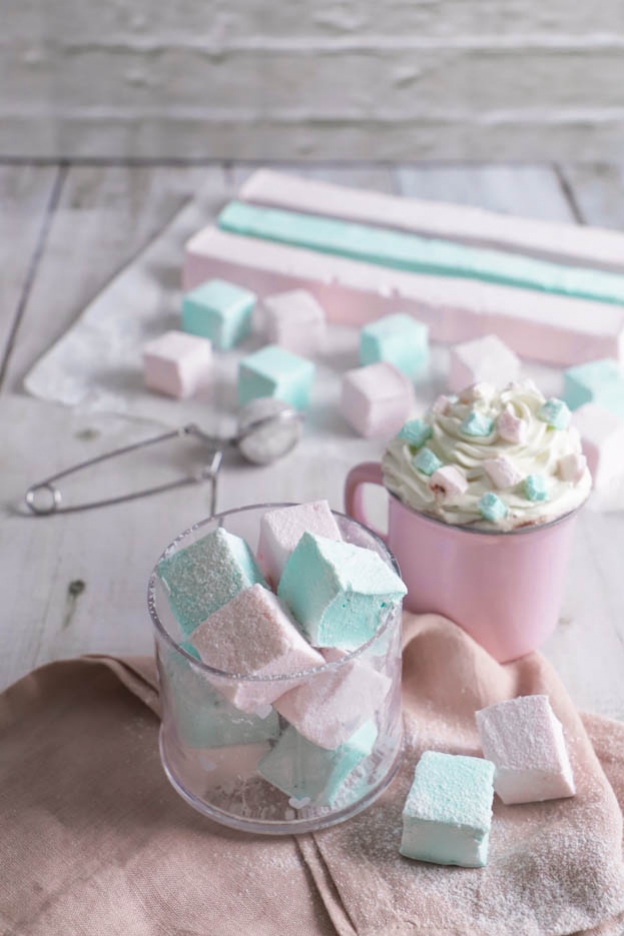
Marshmallows
Hey there, sweet tooth!
This morning, I have an amazing recipe for you! Homemade marshmallows! This recipe is absolutely perfect!

And the coolest thing is that this recipe comes from a customer! :o) We love recipe sharing!
Isabelle shared a photo of marshmallows with us because she had used our corn syrup. We were instantly smitten with her marshmallows! She was kind enough to share her recipe and help us with our tests! A huge thank you if you're reading this!
The recipe comes straight from the USA! There are no egg whites, just sugar, water, gelatin and corn syrup. :o) Corn syrup is a product from the United States! It's the essential ingredient for making marshmallows! :o)
Unfortunately corn syrup is no longer available in our range. However, you will get the same result by replacing the corn syrup with glucose syrup. :o)
Here is the list of ingredients:
- 24 gelatin sheets
- 770gr sugar
- 510gr glucose syrup
- 250gr water
- 2 pinches of salt
- 1 tsp raspberry flavoring
- Food coloring
- Powdered sugar
In a large bowl of cold water, soak 24 gelatin sheets. Yes, that's a lot of sheets... But it's normal!
.jpg)

In a saucepan, pour 770gr of sugar and 510gr of glucose syrup.
Then add 250gr of cold water and set the mixture aside for now.

.jpg)

Squeeze out your gelatin sheets and place them in a microwave-safe bowl.
Once the sheets are well squeezed, heat the gelatin in the microwave at 600W for 30 seconds.
Your gelatin will melt completely.
Set the melted gelatin aside for now.


We will now heat our sugar/glucose syrup mixture.
Place your saucepan on the heat and warm until it reaches 115°C.
Do not stir during cooking! Simply let the sugar heat up. It's just like caramel. :o)
Once it reaches 115°C, immediately remove from heat.


Pour the melted gelatin into a large bowl.
Set the whisk to speed 1 and pour the sugar syrup in a thin stream onto the gelatin, while keeping the whisk running at low speed.
In a thin stream means like photo N°2. So slowly and in small quantities. Make sure to press your saucepan against the edge of the bowl so the sugar doesn't splatter against the sides but flows in a thin stream. :o)
Once all the sugar has been poured in, increase the whisk speed to 2 or 3.


Add to the mixture 2 pinches of salt, 1 tsp of raspberry flavoring and food coloring if you want to color your marshmallows. :o)
Here, I used the natural raspberry flavoring which is really great! And pink and blue gel food coloring.


Then whisk the mixture at medium speed for 12 to 15 minutes, until the mixture thickens.
The mixture will become like a beautiful Italian meringue.
Attention! This is the most crucial moment of the recipe! The mixture needs to be set but not too much! If you let your mixture cool down too much, you won't be able to get the mass out of your bowl.
I tested this myself... And I can tell you that if you let it whisk and cool too long, it's impossible to get the mass out of the bowl! lol! I was literally trapped by my marshmallow mixture the first time!
So when you lift your whisk, the marshmallow mixture should be slightly set. If it's still liquid, keep whisking. As soon as the mass becomes elastic and stays a little on the whisk, it's ready! The mixture should not be liquid. It really is similar to an Italian meringue.


While the mixture is being whipped, prepare a perforated baking tray lined with parchment paper and an adjustable frame set to approximately 20 x 28 cm.
Generously butter the inside of your frame and dust the parchment paper with powdered sugar. This method will allow you to unmold your marshmallow afterwards without too much trouble.


Once the marshmallow mixture is ready, pour it into the frame.
Since it's an adjustable frame and the marshmallow mass is quite strong... Place a board and then a fairly heavy dish on top to keep the frame from moving.
Otherwise your frame will keep opening and your marshmallows won't be tall enough!
Then let your marshmallow mixture rest at room temperature for 24h or even two days. Two days is ideal but it's hard to resist! lol!


Once two days have passed, dust the top of your marshmallow with powdered sugar.
Then carefully remove the frame using a sharp knife. If it sticks, dust it with powdered sugar.
Tada! Here is my giant marshmallow! :o) All that's left is to cut it up!
When you press it with a finger, the marshmallow should bounce back slightly. If so, you've succeeded!


Start by cutting your rectangle in half lengthwise.
Then cut slices 2-3 cm wide. And finish by cutting cubes with scissors.
Don't forget to dip each piece in powdered sugar so they don't stick to each other. Once they are all well coated in powdered sugar, remove the excess by shaking them in a sieve. This way, you'll have just a thin layer of powdered sugar. :o)


And here is the result! Enjoy!
They keep very well in an airtight container for 10 days. But will you manage to keep them that long? :o) I'm not so sure!
Thank you again Isabelle for this incredible recipe! We love it here.
Have a great Sunday, sweet tooth!
Karin
P.S.: All the equipment used can be found at the bottom of the recipe.


Watch our recipe in video!

Related posts
 Juicy Matcha Muffins with Pecan Nuts & White Chocolate
Matcha Iced Latte & Coconut Variant
Pull-apart bread with fresh wild garlic pesto
Mini Banana Bread with Chocolate Chips
Juicy Matcha Muffins with Pecan Nuts & White Chocolate
Matcha Iced Latte & Coconut Variant
Pull-apart bread with fresh wild garlic pesto
Mini Banana Bread with Chocolate Chips
Leave a comment
Comments
Question de Alexia
By: Alexia G. On 2024-12-28Est-ce qu’il est possible de remplacer les feuilles de gélatine par de la gélatine de poissons en poudre? Si oui, vous utiliseriez quel ratio? Merci d avance! ?
Replied by: Laura On 2024-12-30