
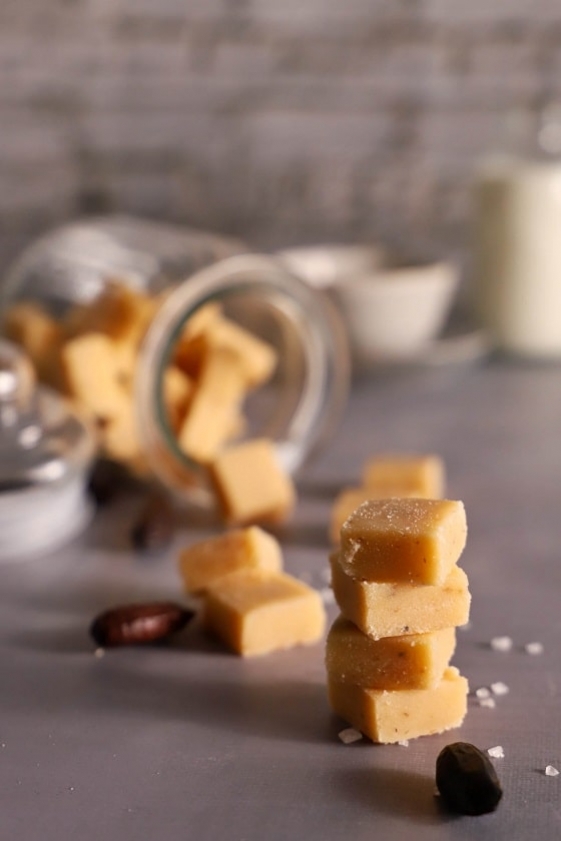
Cream Caramels
Hey sweet tooth!
Who doesn't know the famous cream caramels? Made with just 3 ingredients: sugar, butter and full cream.
Warning! Before I get dozens of messages... :o) Caramels are sometimes made with double cream, condensed milk, half cream or even milk. There are so many different recipes! Everyone is free to follow the recipe of their choice. :o)
In the old days, for example, milk was used to make caramels because cream was too expensive... Depending on the ingredient chosen, the caramels will be more or less hard or soft. Personally I prefer them with full cream. But in any case, these little caramels are a real treat and are loved by young and old alike :o)
Today, I'm sharing two kinds of caramels with you. Tonka bean caramels (a spice that gives a lovely vanilla flavour) and saffron caramels.
The process is the same, only the spice changes. You can also make these caramels without any spice if you prefer.

For 50-60 caramels (2 x 2 x 1 cm), you will need:
Base recipe
- 250gr full cream
- 250gr sugar
- 25gr butter
- 1 pinch of salt
Spices
- Saffron
- Tonka bean
These caramels can also be flavoured with vanilla, cinnamon and many other spices. Let your imagination run wild. :o)
Tonka Bean Caramels
Pour 250gr of full cream, 250gr of sugar and a pinch of salt into a 22 cm diameter saucepan.


Using a zester, grate half a tonka bean into the mixture.
Depending on taste, you can grate a whole bean, but don't forget that the flavour will intensify during cooking.


Bring the mixture to a boil over high heat, stirring constantly.
When the mixture starts to bubble and its volume increases, reduce the heat to medium. Just enough to keep the mixture boiling without burning.
It is important to stir the mixture constantly with a wooden spoon.


The most important thing when making cream caramels is having the right cooking temperature and a lot of patience. Because cooking caramels takes time.
For this quantity, you will need to cook the caramels for approximately 30 to 45 minutes. Making caramels and caramelising them is a slow process.
Never turn the heat higher than "medium heat". If the heat is too high, the liquid will evaporate too quickly and the mixture will become too sandy and crumbly. Result: burnt caramel! So take it easy with the temperature. :o)
If the heat is too low, on the other hand, the caramels will be too light and won't have that lovely caramel flavour. It is therefore important to keep an eye on the cooking.
Stir the mixture until it thickens, takes on colour and starts to pull away slightly from the saucepan.


Warning! For the first 30 minutes, not much happens and that's normal. It's from around 30 minutes (depending on the size of your saucepan) that the consistency changes and becomes foamy.
Once the texture is foamy, add 25gr of butter and stir, still over medium heat. The mixture may become crumbly. If that's the case, add 1 to 2 tablespoons of lukewarm water to the mixture to make it smooth again.


When the consistency becomes thick, a bit like chewing gum, your caramel is ready!
Stop cooking. And pour the caramel onto a perforated baking tray lined with baking paper.
Be careful not to burn yourself!


To make sure all my caramels are the same height, I use biscuit bars. I stack the 3 bars from the kit to get a height of 1 cm.
Place a second sheet of baking paper on top of the caramel and spread it out using a small rolling pin.
Then let the caramel cool for 5 to 10 minutes at room temperature.
Don't let it cool any longer! Otherwise it will be too crumbly when cutting.


To cut my caramel, I used this divider roller. It's great for getting nice uniform and even caramels.
Set the divider roller to 2 cm and roll it over the caramel. Once lengthways and once widthways.
The divider roller cuts, but sometimes not all the way through. So I went over the lines with a sharp knife to finish cutting my caramel.
Once the caramel is cut, let it cool completely at room temperature for 2-3h before placing it in small jars or bags. :o)
If the caramel crumbles when cutting, it means you let it cool too long. You can slightly dampen your knife with water to prevent the caramel from breaking too much when cutting.


Saffron Caramel
The making process is exactly the same as for the tonka bean caramels.
Pour 250gr of full cream, 250gr of sugar, a pinch of salt and a pinch of saffron into a large saucepan.
Bring the mixture to a boil over high heat, stirring constantly. The saffron will turn the mixture yellow.
When the mixture starts to bubble and its volume increases, reduce the heat to medium. Just enough to keep the mixture boiling without burning.
It is important to stir the mixture constantly with a wooden spoon.
The most important thing when making cream caramels is the temperature and a lot of patience. Because cooking caramels takes time.
For this quantity, you will need to cook the caramels for approximately 30 to 45 minutes. Making caramels and caramelising them is a slow process.
Never turn the heat higher than "medium heat". If the heat is too high, the liquid will evaporate too quickly and the mixture will become too sandy and crumbly. Result: burnt caramel! So take it easy with the temperature. :o)
If the heat is too low, on the other hand, the caramels will be too light and won't really have that lovely caramel flavour.


Stir the mixture until it thickens, takes on colour and starts to pull away slightly from the saucepan.
Warning! For the first 30 minutes, not much happens and that's normal. It's from around 30 minutes (depending on the size of your saucepan) that the consistency changes and becomes foamy.
Once the texture is foamy, add 25gr of butter and stir, still over medium heat. The mixture may become crumbly. If that's the case, add 1 to 2 tablespoons of lukewarm water to the mixture to make it smooth again.
When the consistency becomes thick, a bit like chewing gum, your caramel is ready!


Stop cooking. And pour the caramel onto a perforated baking tray lined with baking paper.
Be careful not to burn yourself!
To make sure all my caramels are the same height, I use biscuit bars. I stack the 3 bars from the kit to get a height of 1 cm.
Place a second sheet of baking paper on top of the caramel and spread it out using a small rolling pin.
Then let the caramel cool for 5 to 10 minutes at room temperature.
Don't let it cool any longer! Otherwise it will be too crumbly when cutting.


To cut my caramel, I used this divider roller. It's great for getting nice uniform and even caramels.
Set the divider roller to 2 cm and roll it over the caramel. Once lengthways and once widthways.
The divider roller cuts, but sometimes not all the way through. So I went over the lines with a sharp knife to finish cutting my caramel.
Once the caramel is cut, let it cool completely at room temperature for 2-3h before placing it in small jars or bags. :o)
If the caramel crumbles when cutting, it means you let it cool too long. You can slightly dampen your knife with water to prevent the caramel from breaking too much when cutting.


If the caramels are too crumbly, you can put them in the refrigerator for a few hours. They will come off the baking paper more easily and soften slightly.
Cream caramels keep for up to 3 months sealed in a tin, away from light and moisture. Do not store them in the fridge. But in my opinion, these caramels won't last 3 months. :o) They'll be eaten long before that!
I hope you enjoy these slightly different cream caramels.
Have a lovely Sunday.
Jenny
P.S.: All the equipment used can be found at the bottom of the recipe.


Watch the recipe on video!

Related posts
 Juicy Matcha Muffins with Pecan Nuts & White Chocolate
Matcha Iced Latte & Coconut Variant
Pull-apart bread with fresh wild garlic pesto
Mini Banana Bread with Chocolate Chips
Juicy Matcha Muffins with Pecan Nuts & White Chocolate
Matcha Iced Latte & Coconut Variant
Pull-apart bread with fresh wild garlic pesto
Mini Banana Bread with Chocolate Chips
Leave a comment
Comments
Question de Chantal
By: Chantal G. On 2024-11-27Bonjour,
Quelle quantité d’arôme vanille conseillez-vous pour cette recette?
Replied by: Karin On 2024-11-27