
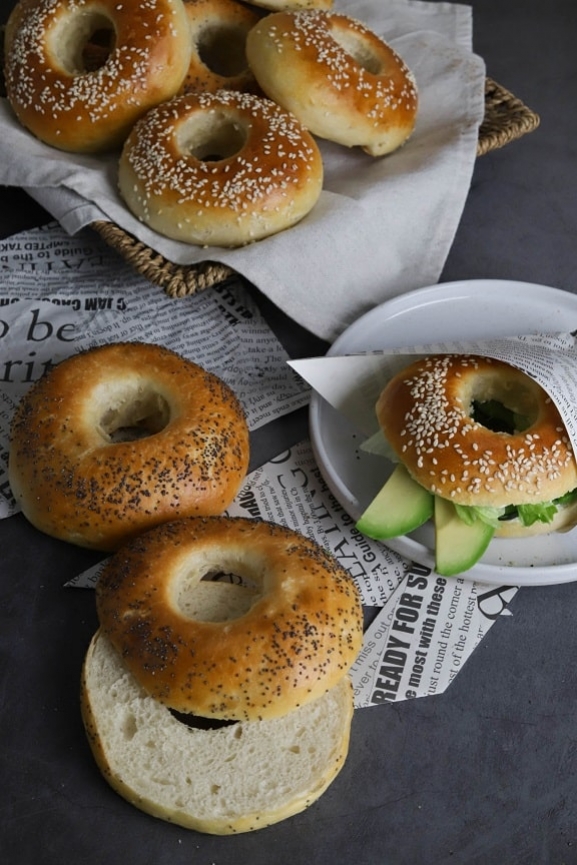
Homemade bagels for sweet or savory recipes
Hey foodies,
Today I'm sharing a recipe I've been wanting to share with you for a long time! :o)
On every trip to New York, I ate a considerable number of bagels. Savory ones with salmon, avocado, chicken... Sweet ones with jam. These soft and airy little rolls with a hole in the middle are simply delicious.
Personally, I find it hard to buy good bagels in Switzerland, so I often make them myself. And today I'm finally sharing the recipe with you. ;o)
Many people think bagels come from the United States, but that's not the case. They are actually a traditional Jewish recipe.
Bagels have existed since the 16th century, but it wasn't until the end of the 19th century that they were introduced to Canada and America by immigrants. Since the 1970s, bagels have been part of everyday Canadian and American food culture, and that's why we know these little rolls today.
I hope you enjoyed that little historical introduction. :o) Now, let's get to the recipe!

For 10 bagels, you will need:
Bagel dough
- 150g warm milk
- 60g butter
- 20g sugar
- 150g water
- 20g fresh yeast or 7g dry yeast
- 1 egg
- 1 tbsp milk
- 250g white flour
- 250g spelt flour
- 1 tsp salt
Brine
- 600g water
- 3-4 tbsp honey
Decoration
- Sesame seeds
- Poppy seeds
Bagel dough
First, heat 150g of milk and 60g of butter in two separate small bowls in the microwave at 600 Watt for 45-60 seconds (don't let them boil!).
It's fine if the butter isn't completely melted.
Then pour both ingredients into a jug.


Add 20g of sugar and 150g of warm water to the milk/butter mixture and whisk everything together.


Check that your mixture is not too hot. If the mixture is too hot (above 25°C-30°C), the yeast will lose its fermenting power.
Once the temperature is checked, add 20g of fresh, crumbled yeast (or 7g of dry yeast) and whisk everything together again for a few moments.
Set the mixture aside at room temperature.


Separate the yolk and the white of one egg. Then mix the egg yolk with 1 tbsp of milk and set this mixture aside in the fridge.
It will be used later to glaze the bagels.


In a large bowl, pour 250g of white flour and 250g of spelt flour, then make a well in the middle.
I like to mix white flour with spelt flour, but you can also use just one type of flour if you prefer.
Pour the milk/yeast mixture and the egg white into the well.
Attach the dough hook.


Knead everything with the dough hook for about 15 minutes at speed 1.
After the first 5 minutes, add 1 tsp of salt to the dough.
Your dough should become very soft and elastic.


After 15 minutes, increase the speed of your mixer to 4 or 5 and knead for 5 more minutes. The dough should pull away from the sides of the bowl.
The dough will be soft and slightly sticky — that's how it should be. ;o)
Cover the bowl with a damp cloth and let it rest for 1h30 at room temperature.


After the resting time, the dough has risen well. Gently knock it back by pressing your fingers into the dough.
Then preheat the oven to 200°C (top/bottom heat).


Using a dough scraper, weigh out 10 dough pieces of 85-90g.


Shape each dough piece into a round ball. To do this, place the dough piece on the work surface and fold the outer edges toward the center.
Press down on the seam that forms and flip the dough piece over. Then shape it into a nice round ball between your hands.
You can see that the top is smooth and the bottom has a seam.


Once all your dough pieces have been shaped into nice balls, it's time to make the typical bagel hole.
To do this, pierce the center of the dough ball with your thumb.


Then enlarge the hole by placing two fingers in it and spinning the bagel on the work surface or in your hands.
Give the bagels a regular shape like in my 2nd photo.
Then place the bagels, seam side down, on a perforated baking tray lined with a perforated mat.


Brine
To make sure the bagels are nice and crispy on the outside and soft on the inside, I suggest making a special bagel brine.
For the brine, bring 600g of water to a boil and pour it into a large elongated container.
Add 3-4 tbsp of honey and whisk everything together.


Then soak the bagels for 60 seconds on each side in the honey water bath.


Then remove the bagels from the brine (use a slotted spoon to lift them out).
Place the bagels, pretty side up (photo No. 3), on a perforated baking tray lined with a perforated mat.
For the 10 bagels, I used two trays (5 bagels per tray) so they don't stick to each other during baking.


To keep the bagel hole nice and open after baking, I placed a shot glass in the hole.
Remember to spray the shot glasses with a non-stick baking spray. This way it will be easier to remove them after baking.


Place the greased glasses in the center of the bagels.
If the opening has become too small in the meantime, first enlarge it a little with your fingers before placing the glass.
Then brush the bagels with the egg yolk and milk mixture you prepared earlier.


Finally, I sprinkled poppy seeds on one tray and sesame seeds on the other.
The seeds are optional and you can also use other seeds such as sunflower seeds for example. Adjust to your taste. ;o)


Place both trays in the oven preheated to 200°C top/bottom heat and bake the bagels for 20 minutes.
Halfway through baking, swap the trays for more even baking.
After 20 minutes, take your bagels out of the oven. Attention, the baking is not finished! Carefully remove the shot glasses.
If you want to freeze some of the bagels, stop the baking here and let them cool completely. Then freeze them wrapped in a freezer bag (they keep for 4 months in the freezer). To defrost them, put them in the oven at 180°C for about 10 minutes or warm them up in the toaster.


For the remaining bagels, extend the baking time by 5 to 10 minutes, until they are nicely golden.
Once fully baked, let them cool on a cooling rack.


And there you go! The bagels are ready to be filled. :o)
Now it's up to you to decide whether you prefer savory or sweet.
I filled mine with cream cheese, avocado, cucumber and salad.
Well wrapped, the bagels can be enjoyed for about 3 days.
I hope you enjoy the recipe!
Have a great day, foodies. :o)
Jenny
P.S.: All the equipment used can be found at the bottom of the recipe.


Related posts
 Juicy Matcha Muffins with Pecan Nuts & White Chocolate
Matcha Iced Latte & Coconut Variant
Pull-apart bread with fresh wild garlic pesto
Mini Banana Bread with Chocolate Chips
Juicy Matcha Muffins with Pecan Nuts & White Chocolate
Matcha Iced Latte & Coconut Variant
Pull-apart bread with fresh wild garlic pesto
Mini Banana Bread with Chocolate Chips
Leave a comment