
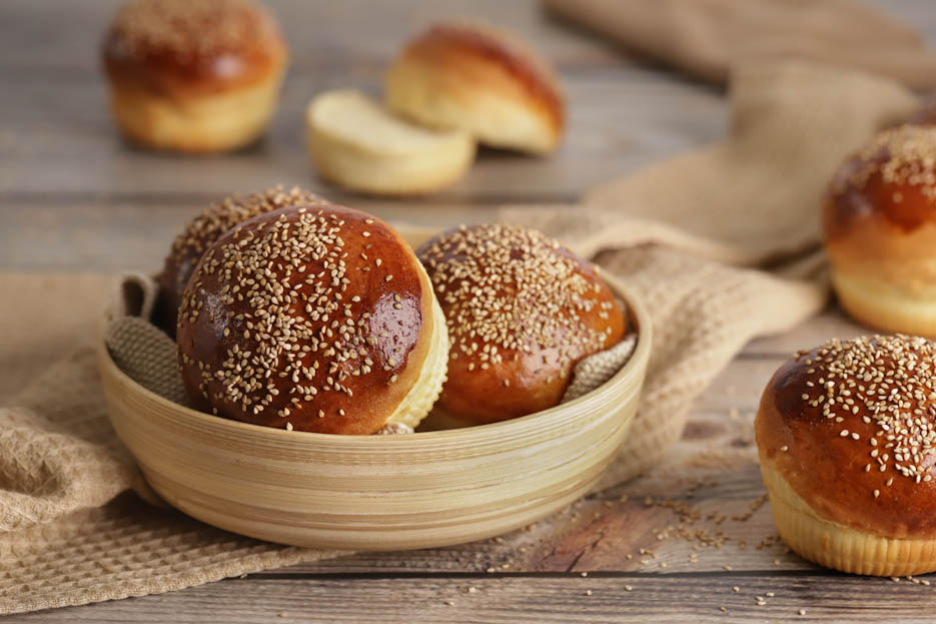
Hamburger buns
Hey foodies!
We love homemade hamburgers, but store-bought buns often let the whole thing down…
Nothing beats bakery-style buns, and I always thought it was mission impossible… Well, it turns out it's not that complicated after all.
Here is THE super simple recipe to make your own homemade hamburger buns! These buns are nice and soft and fluffy. The whole family approved!
This is a brioche bread recipe, so there are two proofing times to make sure the bread is nice and soft. :o)

Here are the ingredients for 12 buns:
- 100g milk
- 200g water
- 640g flour
- 14g dry yeast (2 packets)
- 2 tsp salt
- 40g sugar
- 2 eggs (100g)
- 60g butter
- 1 egg yolk
- Sesame seeds
Let's get started!
In a bowl, mix 100g of milk with 200g of water and warm the mixture for 30 seconds in the microwave at 600W. Set aside.


In another large bowl, pour 640g of flour and add 14g of dry yeast (2 packets), then mix with a spoon.
It is important to mix the flour and yeast well, as the yeast must not come into direct contact with the salt. Otherwise, it will lose its effect and the buns will not rise properly.


Add 2 tsp of salt and 40g of sugar to the flour, then mix again with the spoon.
Use measuring spoons to accurately measure the salt.


Then make a small well in the middle of the flour.
Pour in 2 eggs and add the warm milk/water mixture.


Attach the dough hook to your stand mixer.
Mix with the dough hook at speed 1 (or 2 maximum) for 3-4 minutes (until the dough pulls away from the sides of the bowl).


Add 60g of cold butter cut into small pieces and mix with the dough hook for 5-6 minutes at speed 2.
It is very important to mix for a minimum of 5-6 minutes. This is what develops the gluten. ;o)


Your dough will become very elastic and smooth.
Once the 5 minutes are up, cut your dough in half. If you see air bubbles, it's ready. :o)
Shape the dough into a ball and let it rest for 30 minutes in a bowl covered with a damp cloth.


After 30 minutes, punch down your dough by hitting it with your fist 5-6 times.
This step is very important! It will release the gas from your dough.
Once deflated, cover your bowl again with a damp cloth and place it in the fridge for 2h or overnight.
Personally, I always start my bun dough in the evening, so it stays in the fridge overnight. And it works great that way!


To get nice, even hamburger buns, use 2 silicone hamburger moulds.
Place the moulds on a perforated baking tray for perfect baking.
Your dough has risen nicely!


It's time to shape balls of 95-100g. This will give you 12 buns.
Lightly flour your work surface. Don't use too much flour, otherwise it will be impossible to shape the dough as it will slide on the work surface.
Shape nice balls of 95-100g between your hands. Make sure to keep the small folds at the bottom of the ball.


Here is an explanatory video to help you shape the balls:
Place each dough ball in the silicone moulds.
Flatten your balls to create nice buns.


Brush them with an egg yolk using a pastry brush (keep the rest of the egg yolk in the fridge for later).
Place your buns in your cold oven. Put a bowl of very hot water at the bottom of the oven and let your dough rise for 1h. Do not open the oven during this time.
Having a bowl of hot water in a closed oven creates a proofing chamber that will allow your buns to develop. They will almost double in size.


After 1h, remove your dough from the oven along with the bowl of water.
Take your remaining egg yolk out of the fridge and brush your buns again.
Finally, sprinkle them with sesame seeds.


Bake your buns in your non-preheated oven at 200°C for 20 minutes.
And here is the result — beautifully golden hamburger buns! :o)
Remove them from the moulds and let them cool on a cooling rack.


They're ready — enjoy!
I always make 12 because even if we don't eat that many burgers, we're always happy to have some for breakfast.
They're brioche-like, soft and indulgent! :o)
Hamburger buns freeze very well in freezer bags. Handy to always have some on hand for future burgers.
I hope you'll try this amazing recipe!
Have a great Sunday, foodies!
Karin
P.S.: All the equipment used can be found at the bottom of the recipe.


Watch the recipe in video!

Related posts
 Juicy Matcha Muffins with Pecan Nuts & White Chocolate
Matcha Iced Latte & Coconut Variant
Pull-apart bread with fresh wild garlic pesto
Mini Banana Bread with Chocolate Chips
Juicy Matcha Muffins with Pecan Nuts & White Chocolate
Matcha Iced Latte & Coconut Variant
Pull-apart bread with fresh wild garlic pesto
Mini Banana Bread with Chocolate Chips
Leave a comment
Comments
Question de Alison
By: Alison C. On 2023-05-01La recette es juste génial je vien de la faire merci beaucoup
Replied by: Karin On 2023-05-01
Question de Jean-Claude
By: Jean-Claude B. On 2021-10-06Bonjour,
Étant allergique aux œufs, est-il possible de les remplacer par un autre produit soit tout simplement de ne pas les utiliser ?
Replied by: Karin On 2021-10-06