
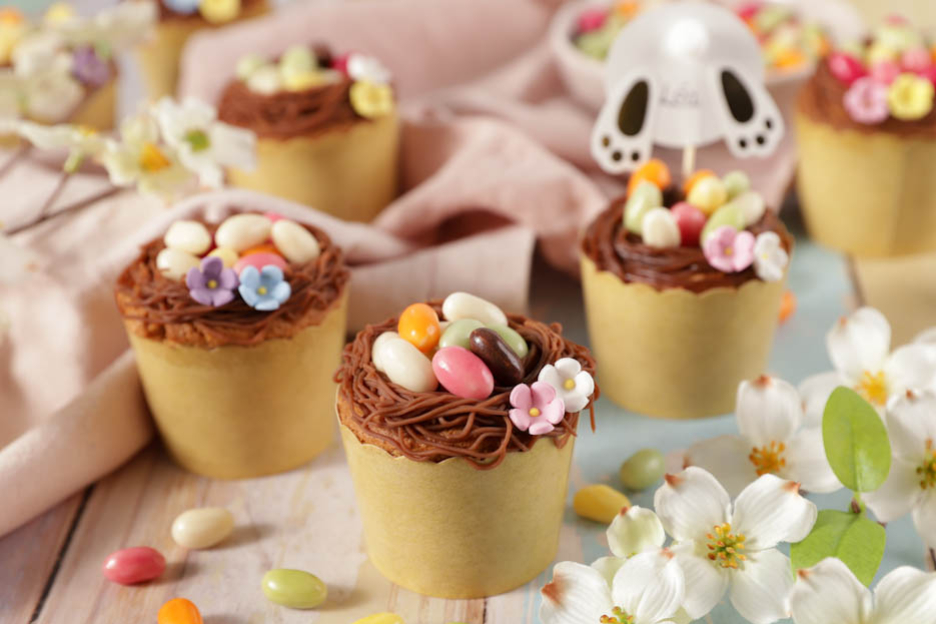
Easter Nest Cupcakes
Hello sweet tooths!
Spring is starting to show its face, and spring means Easter.
For this occasion, we have a recipe that promises to bring young and old together in the kitchen! ;-)
We present our raspberry cupcakes, crowned with a praline ganache nest filled with little eggs. And for a spring touch, small sugar flowers.
Let's get started with the recipe! :-)

To make 16 cupcakes, you will need:
- 100gr whole cream
- 50gr hazelnut praline
- 125gr milk chocolate
- 115gr butter
- 200gr brown sugar
- 2 eggs
- 2 tsp raspberry flavouring
- 1/2 tsp salt
- 2 tsp baking powder
- 200gr flour
- 40gr ground hazelnuts
- 125gr milk
- 50gr fresh or frozen raspberries
- 48 whole fresh or frozen raspberries
- Nozzle N°233
- Small sugar eggs
- Sugar flowers
First, we will start with the praline ganache as it will need to chill in the fridge for a minimum of 4 hours.
Praline Ganache
In a saucepan, pour 100gr of whole cream and 50gr of hazelnut praline.


Bring the cream and hazelnut praline to a boil, stirring occasionally so the praline melts into the cream.


Remove the cream/praline mixture from the heat and pour it 3 times into 125gr of milk chocolate, mixing well after each addition.


Once the ganache is smooth and homogeneous, cover the preparation with cling film directly on the surface.
The cling film must touch the ganache to prevent a skin from forming on top.
Place the praline ganache in the fridge for about 4 hours.


We can now make the raspberry cupcakes.
Raspberry Cupcakes
Start by placing 115gr of butter and 200gr of brown sugar in a large bowl.
Beat everything together for about 5 minutes at maximum speed.


Crack 2 eggs and add 2 tsp of raspberry flavouring.
Mix everything again for 1 to 2 minutes at medium speed until you get a smooth, homogeneous mixture.
Use measuring spoons to add the raspberry flavouring precisely.
Preheat your oven to 180°C fan-assisted.


Then add 200gr of flour and 40gr of ground hazelnuts.


Add 1/2 tsp of salt and 2 tsp of baking powder, then mix for 1 minute at medium speed.


Pour in 125gr of milk then mash 50gr of raspberries. If you are using frozen raspberries, don't forget to thaw them before starting the recipe.
If the season allows, use fresh raspberries. ;-)


Add the mashed raspberries and mix again for 1 minute at medium speed to get a beautiful cupcake batter.


Place a large piping bag in a jug to fill it neatly.
Transfer the cupcake batter into the piping bag and close it with a clip.


For this recipe, we used baking cups. They are great, no mould needed! :-)
Place 16 of them on a perforated tray and pipe the cupcake batter into the cups. Pipe about 1/3 of batter per cup.


Place 3 whole raspberries on each cupcake and cover them with cupcake batter. You will need 48 raspberries in total.


Bake for about 20-25 minutes in the middle of the preheated oven.
After 20 minutes, insert a knife blade into a cupcake — if it comes out clean, they are done! :-)
If not, bake them again for 2 to 3 more minutes.
Let them cool on a wire cooling rack at room temperature.


Once the cupcakes and the ganache have cooled, we can move on to the decorations. :-)
Decorations
Take the praline ganache out of the fridge and let it sit for about 15 minutes at room temperature.
Then whip it to make it softer and easier to pipe.


In a small piping bag, place a N°233 nozzle.
Fill the piping bag with a small amount of ganache. I recommend not filling it too much to make piping easier.


Pipe a ganache nest by going all the way around the cupcake.
Place small sugar or chocolate eggs inside the nest, depending on your taste! ;-)


Finally, place 2 small sugar flowers on the edge of the nest.
We have in our assortment some cute "bunny bottom" toppers that can be used as place cards by adding your guests' names, or simply as decoration on the cupcakes.


Here is the result! Beautiful Easter nest cupcakes to delight your guests!
They will keep for 3 days in the fridge in a well-sealed container.
I hope you enjoy this recipe!
Wishing you a wonderful Easter!
Sophie
P.S.: All the materials used can be found at the bottom of the recipe.


Related posts
 Juicy Matcha Muffins with Pecan Nuts & White Chocolate
Matcha Iced Latte & Coconut Variant
Pull-apart bread with fresh wild garlic pesto
Mini Banana Bread with Chocolate Chips
Juicy Matcha Muffins with Pecan Nuts & White Chocolate
Matcha Iced Latte & Coconut Variant
Pull-apart bread with fresh wild garlic pesto
Mini Banana Bread with Chocolate Chips
Leave a comment