
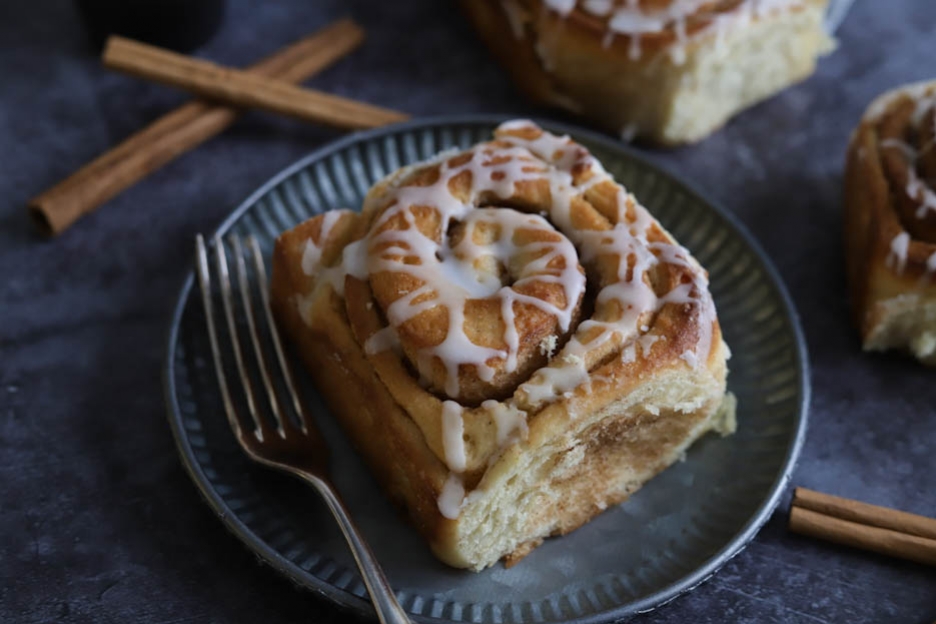
Cinnamon Rolls
Hey food lovers!
For this Sunday, I went looking for one of my travel recipes… Yes, I'm a travel enthusiast and over the past 10 years, we've visited lots of different countries including the USA!
So I'm sharing a Cinnamon Rolls recipe with you. It's a kind of cinnamon swirl without the raisins but with plenty of brown sugar, cinnamon and… BUTTER! You're going to love them!

Preparation time: 30 minutes
Rising time: 1 night
Baking time: 20 to 25 minutes
Here is the list of required ingredients:
Brioche
- 240gr warm milk
- 55gr warm water
- 11gr dried yeast
- 100gr sugar
- 1 tsp vanilla extract
- 2 eggs
- 650gr flour
- 1/2 tsp salt
- 120gr butter at room temperature
Filling
- 113gr butter at room temperature
- 90gr brown sugar
- 4 tsp ground cinnamon
- 40gr almond flour
Brushing and glaze
- 100gr heavy cream
- 100gr icing sugar
- 2 tsp milk
Brioche
We'll start by making our brioche dough.
I don't know if you're aware, but brioche dough requires two rising times. This means we'll mix all the ingredients except the butter. Then we'll add the butter and knead the dough for a good 10 minutes. After that, we'll let the dough rise for 30 minutes. We'll knock it back, then place it in the fridge for 2h to overnight. Once the 2h (or the night) has passed, we'll fill it, roll it up and let it rise again in a proving environment for 1h. It sounds quite complicated but I promise it's really super simple in practice.
You can easily prepare your dough a day in advance and leave it in the fridge.
Start by weighing your yeast. You'll need 11gr of dried yeast.
Baking needs to be precise! And as you've seen, I use my balance spoon for everything!


Next, warm 240gr of milk and 55gr of water and add the yeast. Stir a little so the yeast dissolves well into the milk and water.


Then add 100gr of sugar and 1 tsp of vanilla extract (yes, still my trusty vanilla extract). :o)
Mix again.


Add 2 eggs, then 650gr of flour and 1/2 tsp of salt. Be careful! Always add the salt last so it doesn't come into contact with the yeast. I use my measuring spoons for the salt. So handy!


Using the dough hook, knead the ingredients until the mixture becomes a fairly smooth dough. This will take about 4-5 minutes.
Once the dough is smooth (see photo No.2 below), we'll add the butter and knead again for 10 minutes. It's very important to knead well for a long time as the gluten needs to work and develop. This is how you'll get a beautiful light and airy brioche.


Once the dough is smooth, supple and there are almost no residues on the sides, it's ready!
Cover the bowl with a damp cloth (don't place the cloth on the dough) and set the bowl somewhere at room temperature for 30 minutes.


After 30 minutes, the dough will have doubled in volume as shown in the photo below.
Now we're going to knock back our dough, as it has accumulated a lot of air. So I give it a few punches.
You'll see that the dough will lose a little volume and that air bubbles will come out when you punch it. That's normal!
Punch it about ten times or so.
Once the dough is knocked back, cover your bowl with the damp cloth and place it in the fridge for a minimum of 2h to overnight. You can safely leave the dough in the fridge overnight.


Great! Our dough has rested a minimum of 2h in the fridge and we're ready to continue!
Filling
Start by taking your butter out of the fridge. If it's too cold, you can microwave it for 10 to 15 seconds to soften it more quickly.
Then add 4 tsp of ground cinnamon and 40gr of almond flour to a bowl.
Here I used Scrapcooking's extra-fine almond flour! It's perfect for baking and much finer than what you find in Swiss shops.


Then pour 90gr of brown sugar into the bowl.
Mix everything together well with a fork.


Take a sheet of baking paper and place your brioche dough on it.


Lightly dust with flour so the rolling pin doesn't stick, then roll out your dough to the size of your baking paper sheet.
I always use my large plastic rolling pin! It's so easy to clean and sticks much less to sugar paste, bread dough...etc. Plus, it's quite heavy so it's great for rolling out doughs.
Try to make as even a rectangle as possible.


Now we're going to spread the softened butter over the brioche dough. For this, I used an offset spatula.


Once the butter is well spread, sprinkle the sugar/almond/cinnamon mixture over it. Try to spread it in an even layer all over.
Now all that's left is to roll the dough lengthways.
Roll the dough lengthways, using the baking paper to help you so that your roll is nice and tight.


Then take an adjustable baking frame.
For this recipe I set mine to approximately 38 cm x 24 cm. I placed it on a perforated baking tray lined with a silpat. I love working with my perforated tray and my silpat! The baking results are just perfect!
To prevent my brioche from sticking to the frame and silpat after baking, I sprayed everything with my release spray! As you've probably seen in my tutorials, I use it a lot. It prevents your brioche dough, sponge cake or biscuits from sticking to the bottom of the tin.


Cut slices 3-4 cm wide. Don't cut them too thin! We want a nice soft brioche and for that we need height. Place the rolls in your frame.
You can see in the third photo below that I made 3 rows of 5 rolls and not too tightly packed (the rolls will still expand further). I also collected the sugar/cinnamon/almond mixture that had fallen to the side and sprinkled it over the rolls once they were in place.


Brush your rolls with a little cream or milk using a pastry brush. Personally, I used cream to make them even more indulgent. No need to drench them! Just brush them lightly.


Next, we're going to create a proving environment in our oven to let the rolls rise one more time.
To do this, place a bowl of hot water (very hot) at the bottom of your oven and place the cinnamon rolls on a rack a little higher up. Close the oven and leave to rise for 30 minutes.
Do not open your oven at all during these 30 minutes. The aim is to let our rolls rise in humid warmth. If you open it, the heat and moisture will escape.
Once the rolls have risen nicely, it's time to bake them!
Make sure to remove the bowl from the bottom of your oven.
Leave your cinnamon rolls in the oven and turn it on to 200°C, fan-assisted, for 20 to 25 minutes. Your cinnamon rolls should be nicely golden.
Brushing and glaze
Our cinnamon rolls would already be delicious as they are, but we're going to add that little finishing touch that will turn them into pure indulgence!
Mix 100gr of icing sugar with 2 tsp of milk. Once your glaze is well mixed, it should be fairly runny but not too much. Add milk according to your desired consistency.


Glaze the cinnamon rolls while they're still warm.
The best way is to put your glaze in a small piping bag and drizzle it over in a thin stream. You can go back and forth as many times as you like.


Here's a short video to show you how it's done:
And there you have it, your cinnamon rolls are ready!
They can be eaten hot, warm or cold! We couldn't resist right out of the oven! We had one or two and kept the rest for breakfast. Absolutely delicious!
This recipe can also be made in individual portions in tulip muffin cases. Take inspiration from our pumpkin swirl brioches. With 1/2x the cinnamon rolls recipe, you'll get about 20 individual pieces.
I wish you a wonderful Sunday, food lovers!
Karin
P.S.: All the equipment used can be found at the bottom of the recipe.


Related posts
 Juicy Matcha Muffins with Pecan Nuts & White Chocolate
Matcha Iced Latte & Coconut Variant
Pull-apart bread with fresh wild garlic pesto
Mini Banana Bread with Chocolate Chips
Juicy Matcha Muffins with Pecan Nuts & White Chocolate
Matcha Iced Latte & Coconut Variant
Pull-apart bread with fresh wild garlic pesto
Mini Banana Bread with Chocolate Chips
Leave a comment
Comments
Question de Charlotte
By: Charlotte J. On 2024-12-18Bonjour :-) Je n'ai pas d'arôme de vanille. Puis-je, à la place, faire infuser de la gousse de vanille dans le lait tiède et mettre un peu de sucre vanillé dans le sucre ? Merci d'avance pour votre retour :-)
Replied by: Karin On 2024-12-18
Replied by: Charlotte J. On 2024-12-18
Question de Sophie
By: Sophie A. On 2024-02-08Excellent!!! Merci pour cette délicieuse recette. Un seul petit changement pour moi, je mets plutôt 1.5 c c de sel, avec autant de farine...et de sucre;-)
Replied by: Karin On 2024-02-08
Question de Anita
By: Anita P. On 2023-10-21Bonjour, merci pour la recette, un délice!!! Petite question, comment les conserver pour qu'ils se gardent bien?
Replied by: Karin On 2023-10-23
Réponse à Stéphanie
By: Karin On 2020-01-12Stéphanie. Que mettez-vous comme levure? Car je n'ai aucun soucis de mon côté ma pâte est à chaque fois ultra aérée... Le beurre n'est pas le soucis. :o) Respectez-vous bien toutes les phase de pousse?