
Cheesecake on a Stick
Creamy from the water bath, colourfully glazed and on a stick
Hello gourmets
Do you know that moment when a dessert arrives at the table and everyone immediately reaches for their phone? This recipe was made for exactly that.
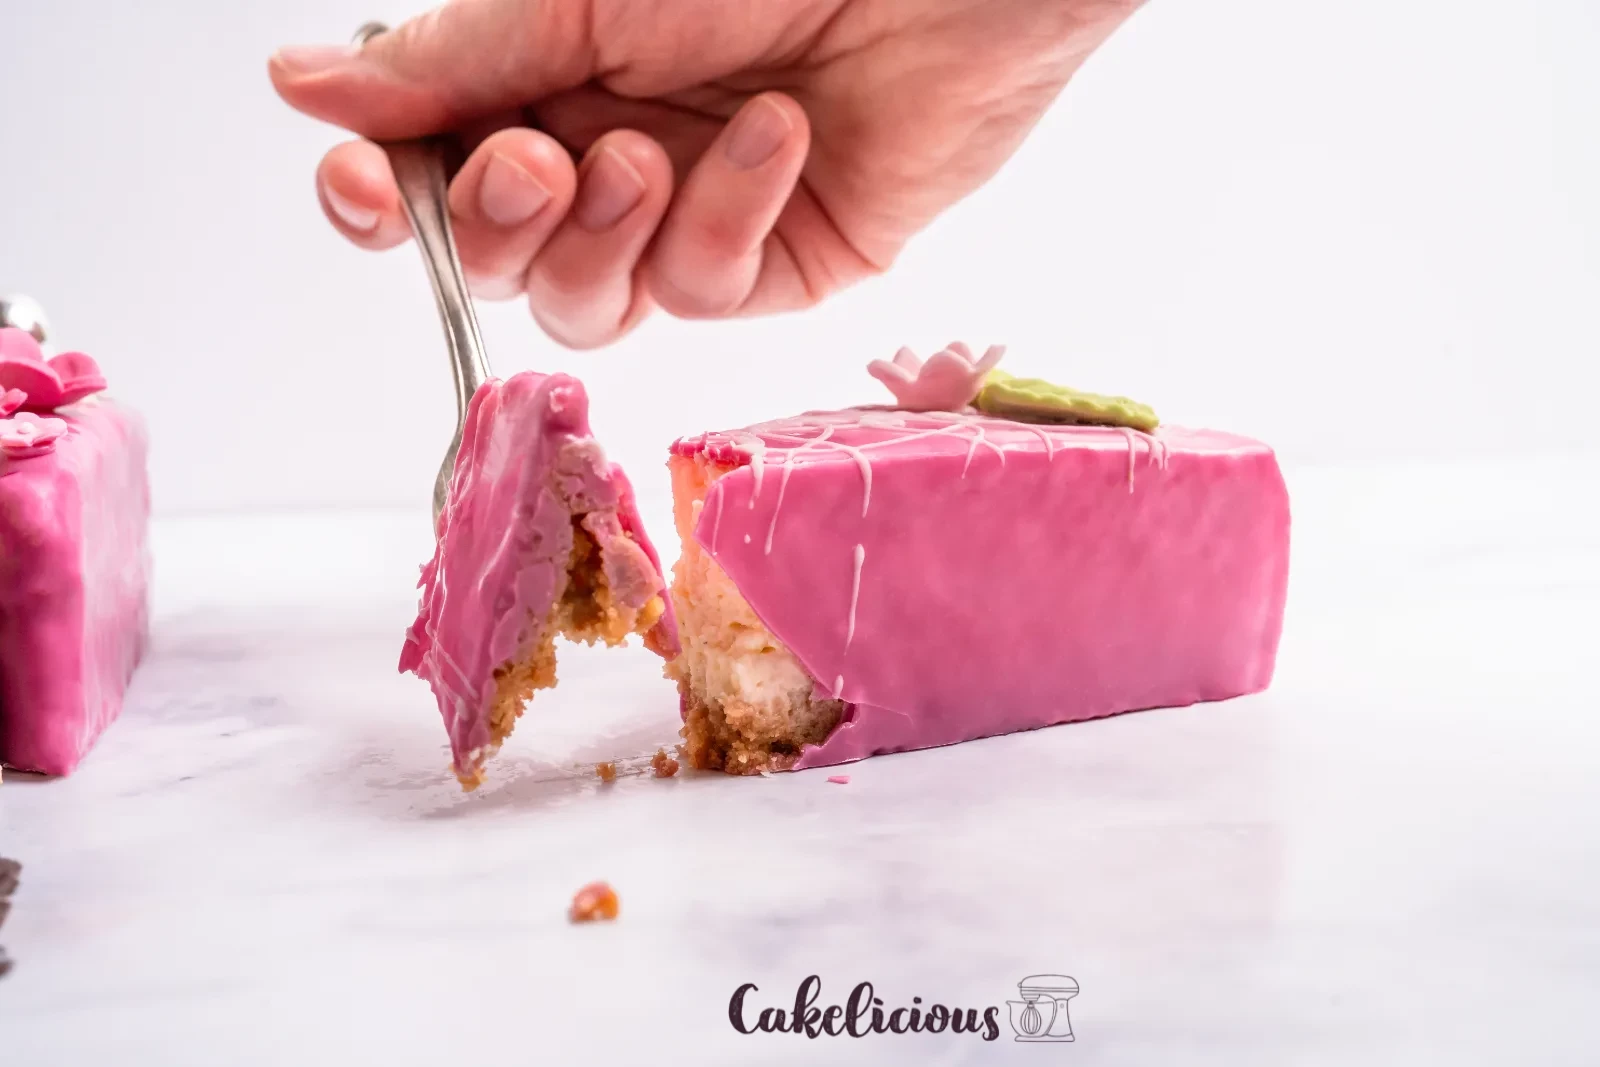
It started out as a completely classic cheesecake: a crunchy butter biscuit base, a velvety cream cheese filling, gently baked in a water bath. The water bath is no gimmick, by the way, but the whole trick – the mixture bakes evenly from all sides, stays creamy and doesn't get a single crack on the surface.
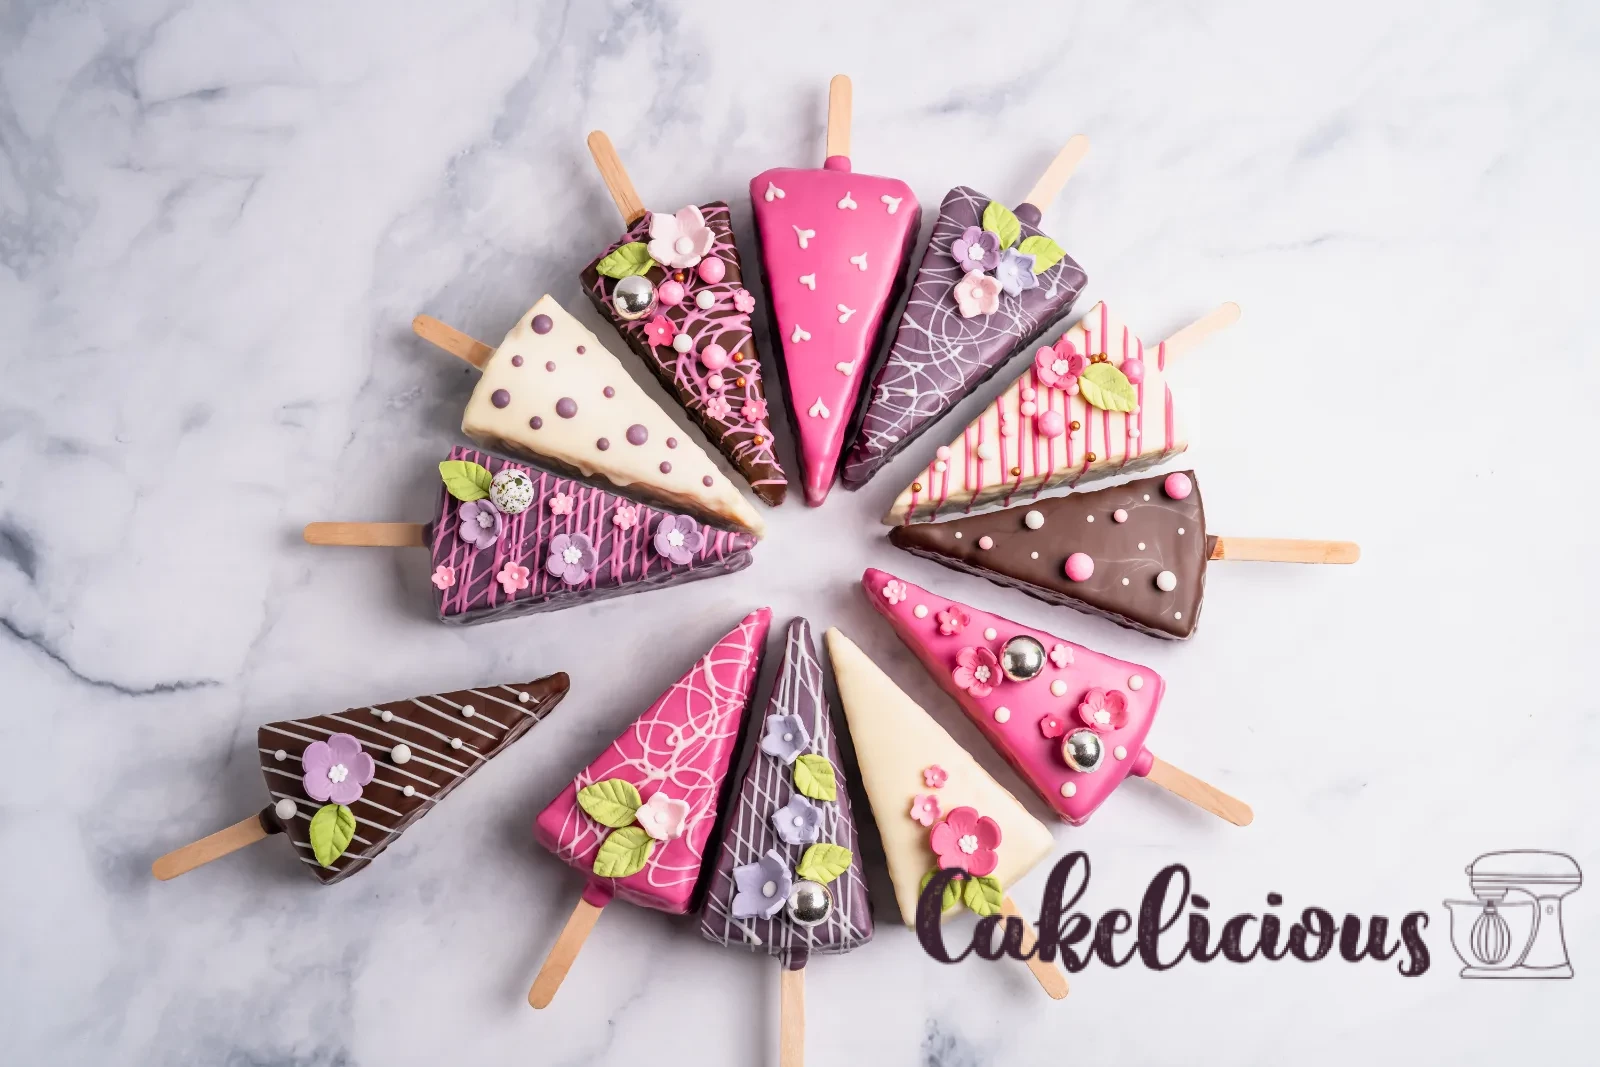
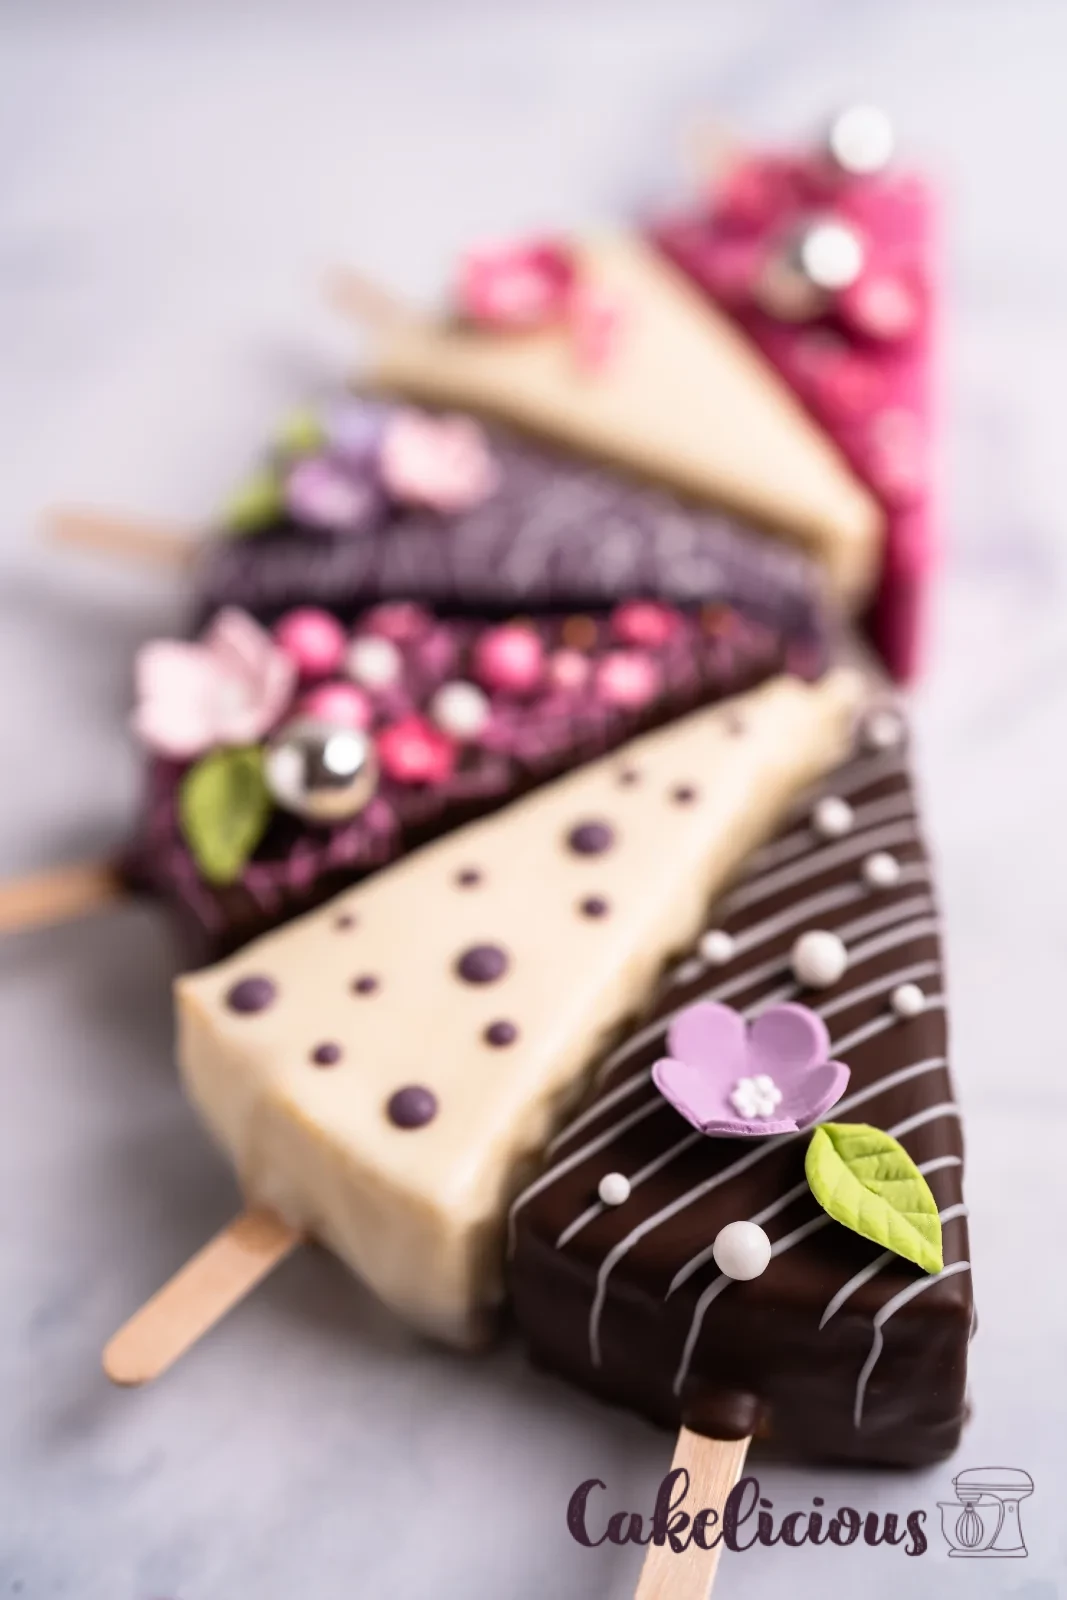
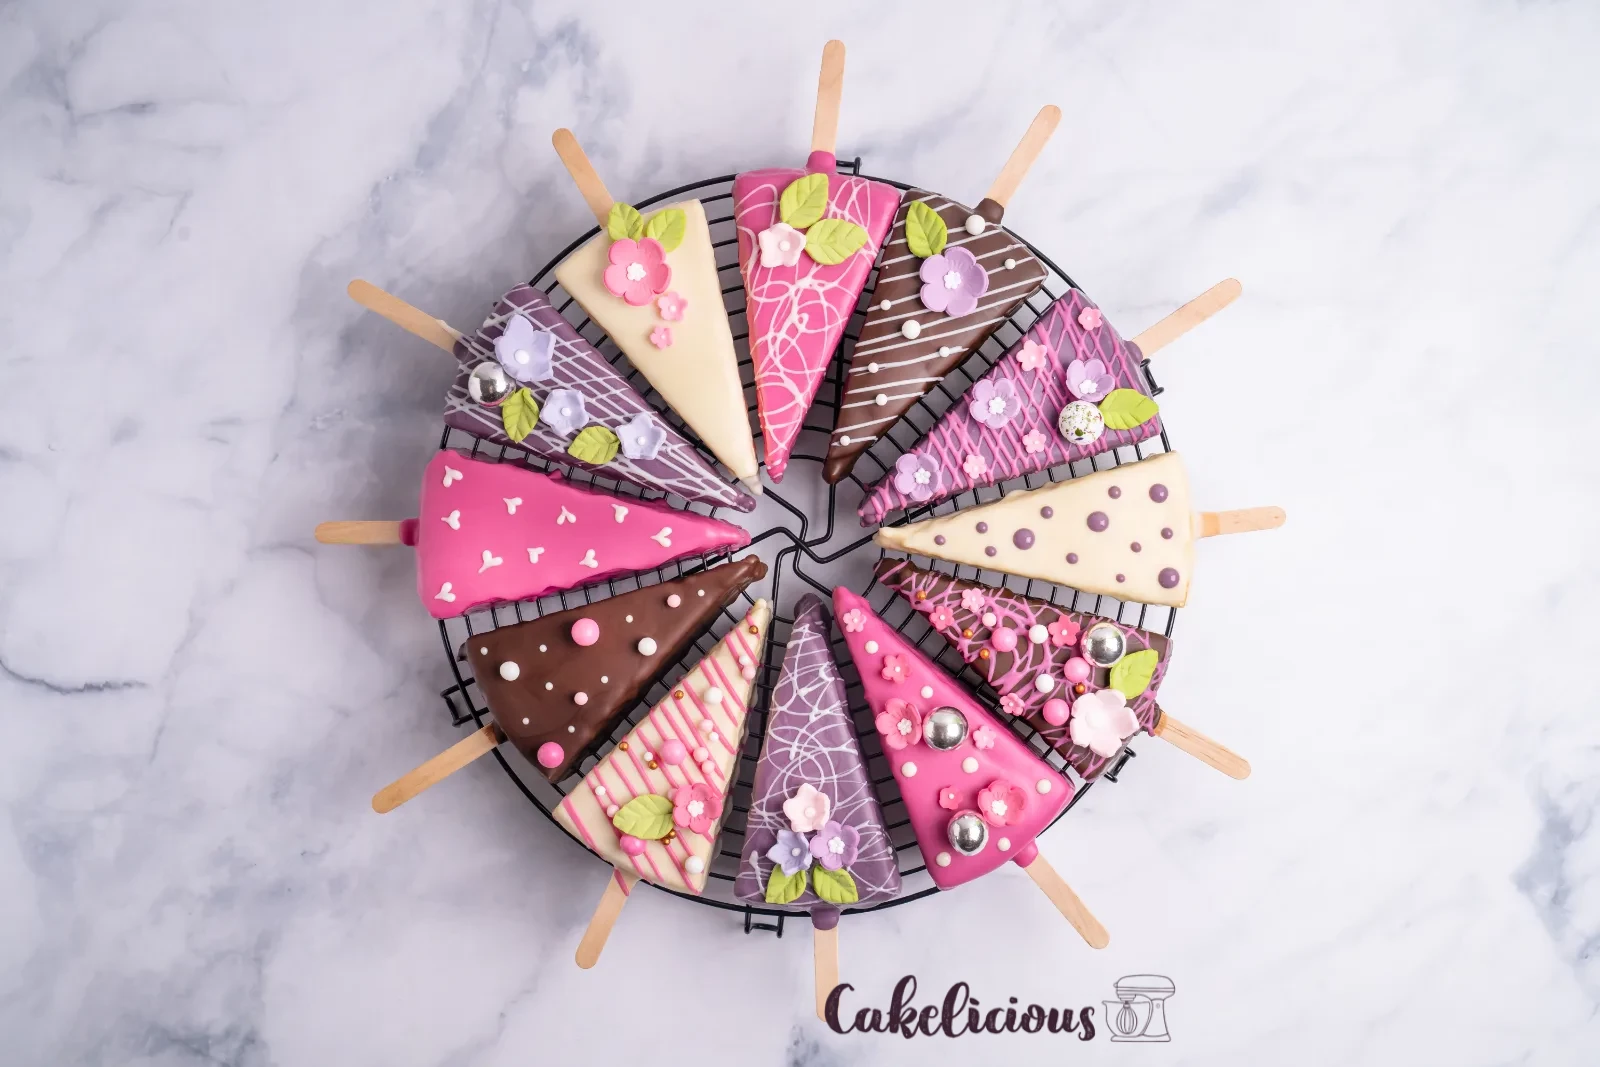
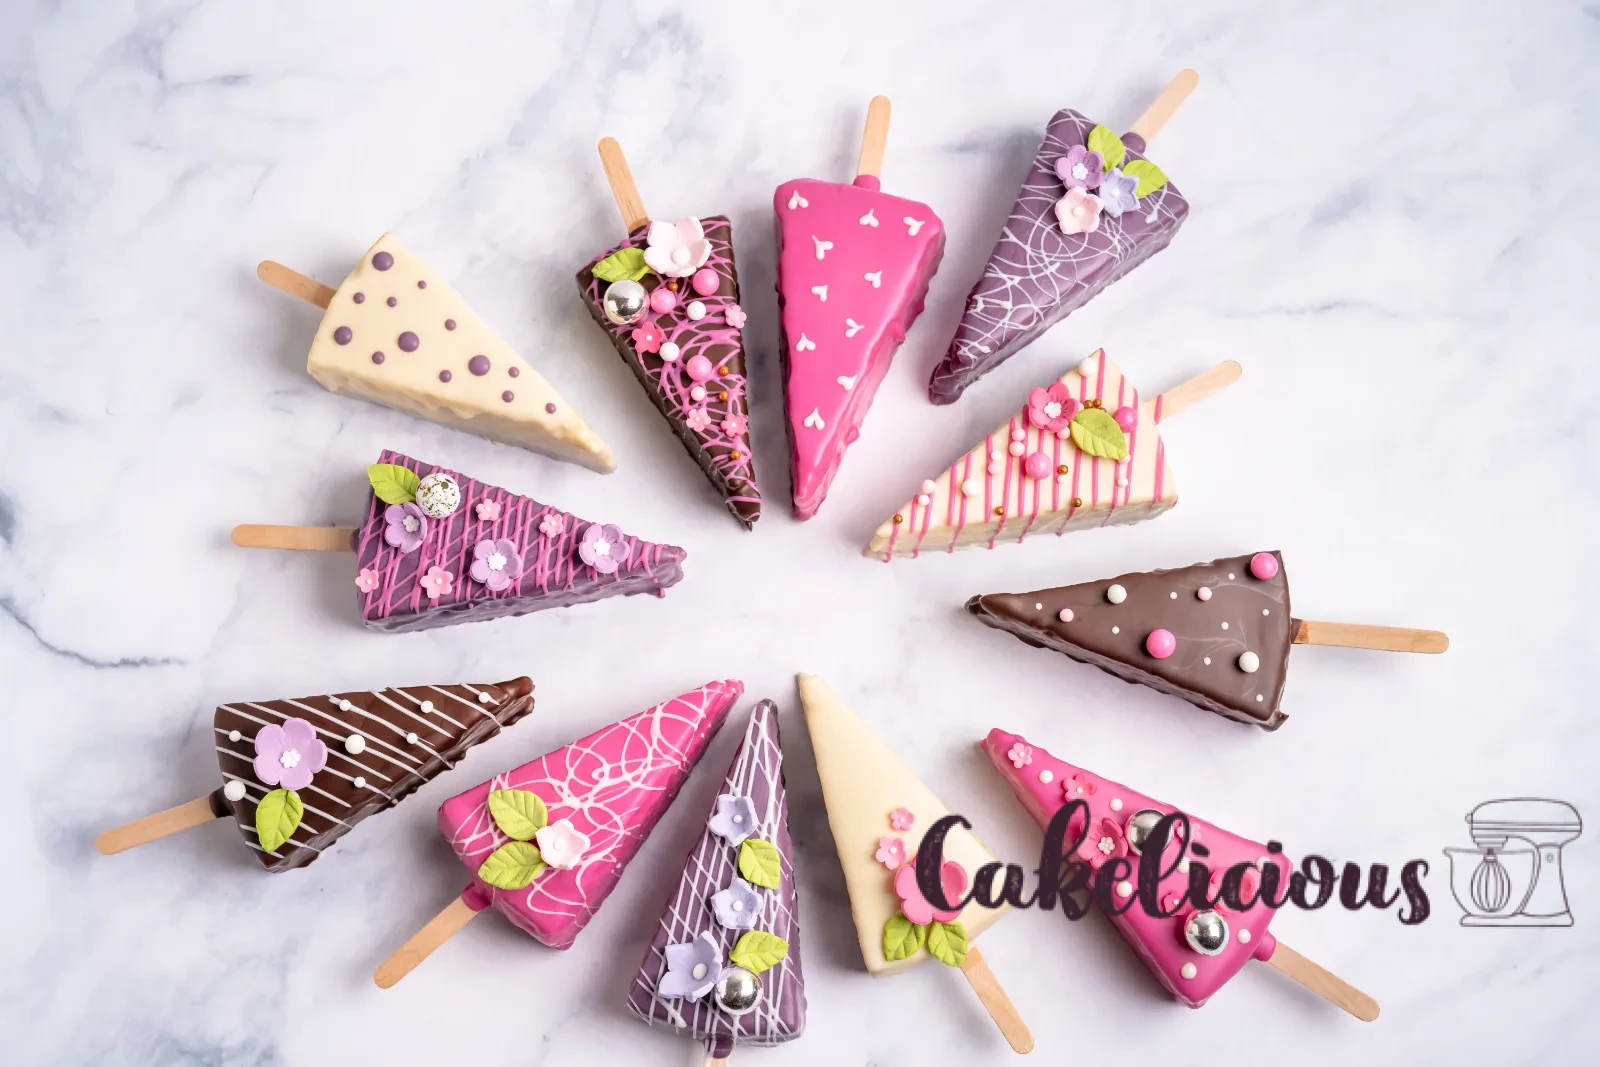
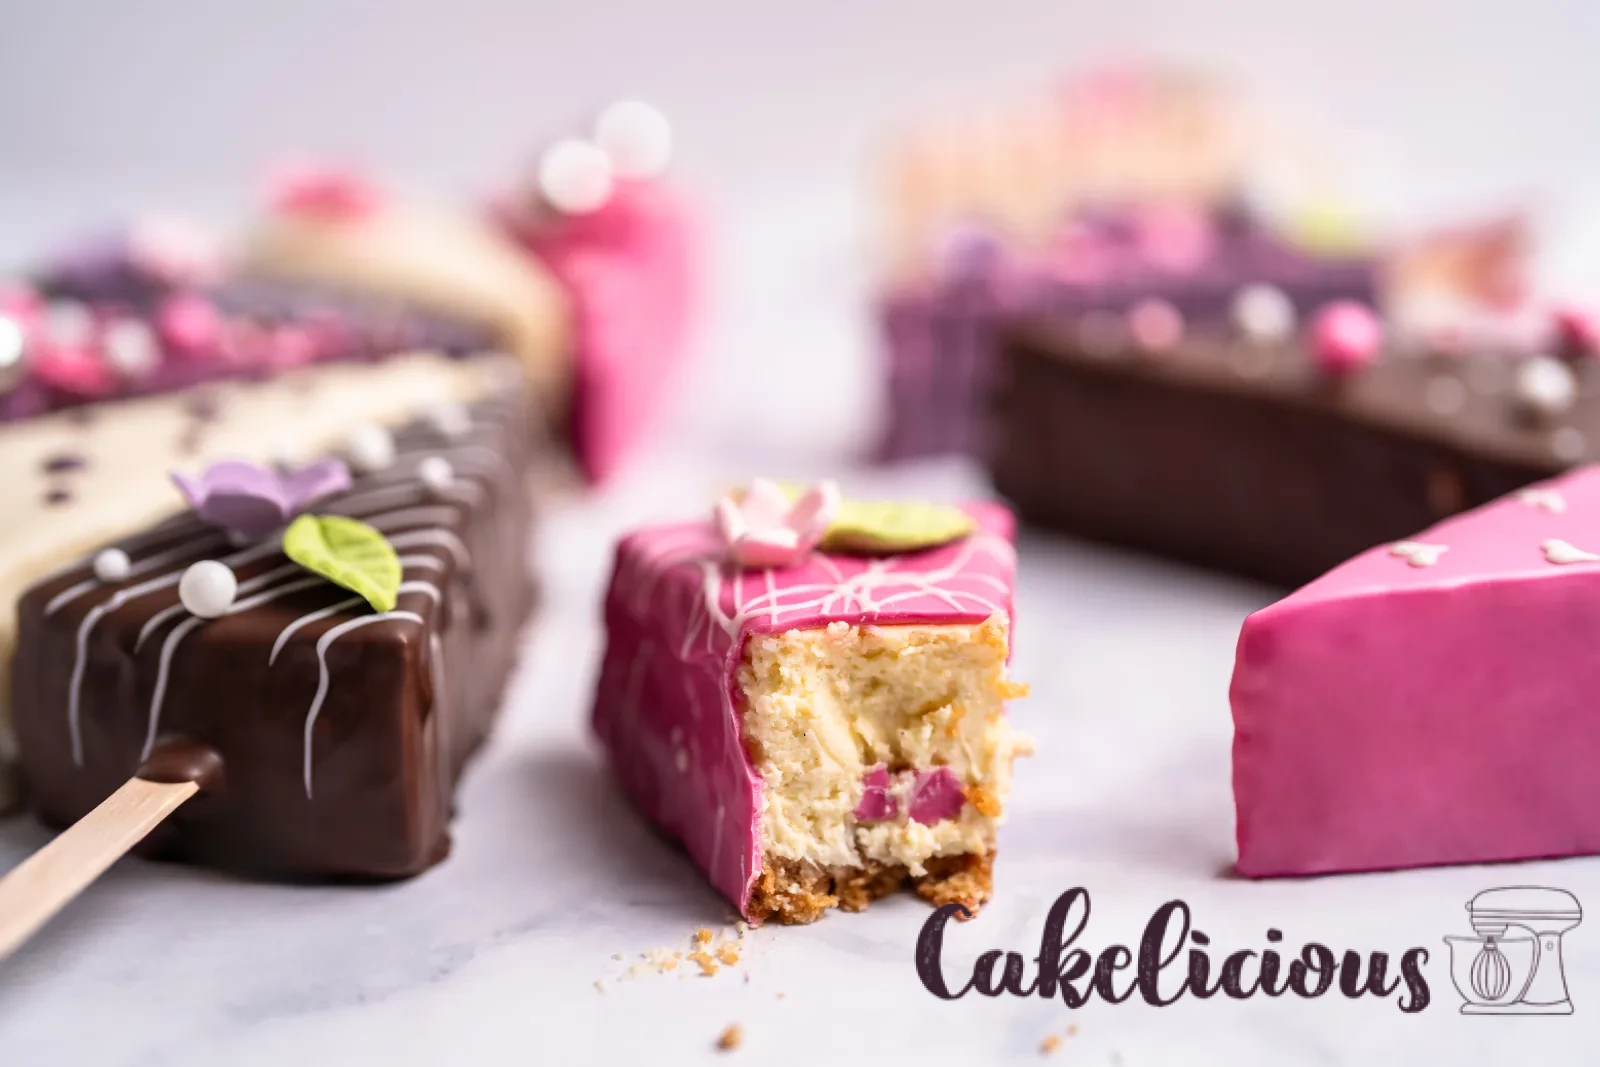
And then came the idea: why place slices on a plate when you can put them on a stick? So we cut the finished cheesecake into twelve pieces, gave each one a wooden stick and coated them in colourful icing – violet, pink, white, dark. Plus sugar flowers, fine lines, a few pearls. Every piece looks different, and together on a platter they're a little firework display.
And that's the real reason I love this idea so much: it works all year round. The cheesecake stays the same, only the decoration changes. Orange and black with a spider's web and candy eyes for Halloween. Brown, gold and caramel with leaves in autumn. Red, white and gold with stars for Christmas. Pastels with sugar flowers in spring and summer. Once you've learnt it, you have a dessert for every occasion of the year.
The best part: the difficult bit is the cheesecake, and that's actually quite simple. Decorating afterwards is pure pleasure – and exactly the part where children want to join in.
Give yourself a day's head start for the cheesecake. It has to go into the fridge overnight, and that's not a matter of patience but of structure: only a thoroughly chilled cheesecake can be cut cleanly and will later hold up on the stick.
Ingredients
BASE
FILLING
ICING AND DECORATION
Step by Step
Butter biscuit base
Preheat the oven and crush the biscuits
Preheat the oven to 175 °C fan.
Then it's the base's turn. Put the butter biscuits in a freezer bag and crush them into fine crumbs with the Rolling pin – it's quicker and makes less washing-up than any machine. Meanwhile, melt the butter in a pan.
Rolling pin, 28 cm
Press the base and pre-bake for 10 minutes
Mix the biscuit crumbs with the melted butter, put everything into the Silicone mold and press it flat and evenly with a spoon or fork. Pre-bake the base at 175 °C fan for 10 minutes – that way it stays crisp later and doesn't go soggy under the filling.
One point where there's no "you can also do it differently": you need a Silicone mold. The cheesecake is baked in a water bath, and a Springform pan with a clip fastener isn't watertight.
Silicone mold - Round - Cake tins diameter: 24cm
Cheesecake mixture
Stir the cream cheese until creamy
While the base is in the oven, make the mixture. Put the Philadelphia into a larger Bowl and stir it briefly smooth with the Hand mixer – really just until it's creamy. No longer: the more air gets in now, the greater the risk that the surface cracks later.
Work in the sugar, crème fraîche, starch and eggs
Add the granulated sugar and the crème fraîche and briefly mix both in. Then sift in the starch and stir it in with the hand Whisk.
The four eggs go in last, one after the other, and are only folded in – not beaten. Here too the rule is: as little air as possible. That's half the battle for a smooth surface.
Flavour it
Now you get to flavour it: the zest of a fresh organic lemon and a dash of natural extract. The lemon makes the cheesecake fresh, the vanilla rounds it off – together they give exactly the taste you'd expect from a good cheesecake.
Natural Vanilla Extract
Fill the mixture into the Silicone mold
Put the finished mixture onto the pre-baked base and spread it evenly. The quantity fits exactly a mold with a 24 cm diameter – for other sizes you can adjust it with the quantity switcher above.
Bake in a water bath and chill
Prepare the water bath and bake for 45 minutes
Place the filled Silicone mold into a larger form – a tall square Cake tin, a tray with a high rim or a large casserole dish. Slide it all into the oven together and only then pour hot water into the outer form, up to about halfway up the Silicone mold. That way you don't have to carry a full water bath across the kitchen.
Bake the cheesecake at 175 °C fan for about 45 minutes.
Tall square Cake tin - Square form: 30 x 30
Cool in the switched-off oven
After the 45 minutes, switch off the oven and prop the door open a crack with a wooden spoon. Just leave the cheesecake inside.
That's the second reason the surface stays smooth: the cake cools slowly instead of in a sudden temperature drop. Leave it to stand for an hour.
Take it out of the water bath
After the hour, carefully take the cheesecake out of the oven together with the water bath – the water is still hot, and a hasty movement will slosh it into the cake. Then lift the Silicone mold out of the water and leave the cheesecake in it for at least another hour at room temperature.
Chill overnight and remove from the mold
After that, the cheesecake goes into the fridge together with the Silicone mold for at least 8 hours, ideally overnight.
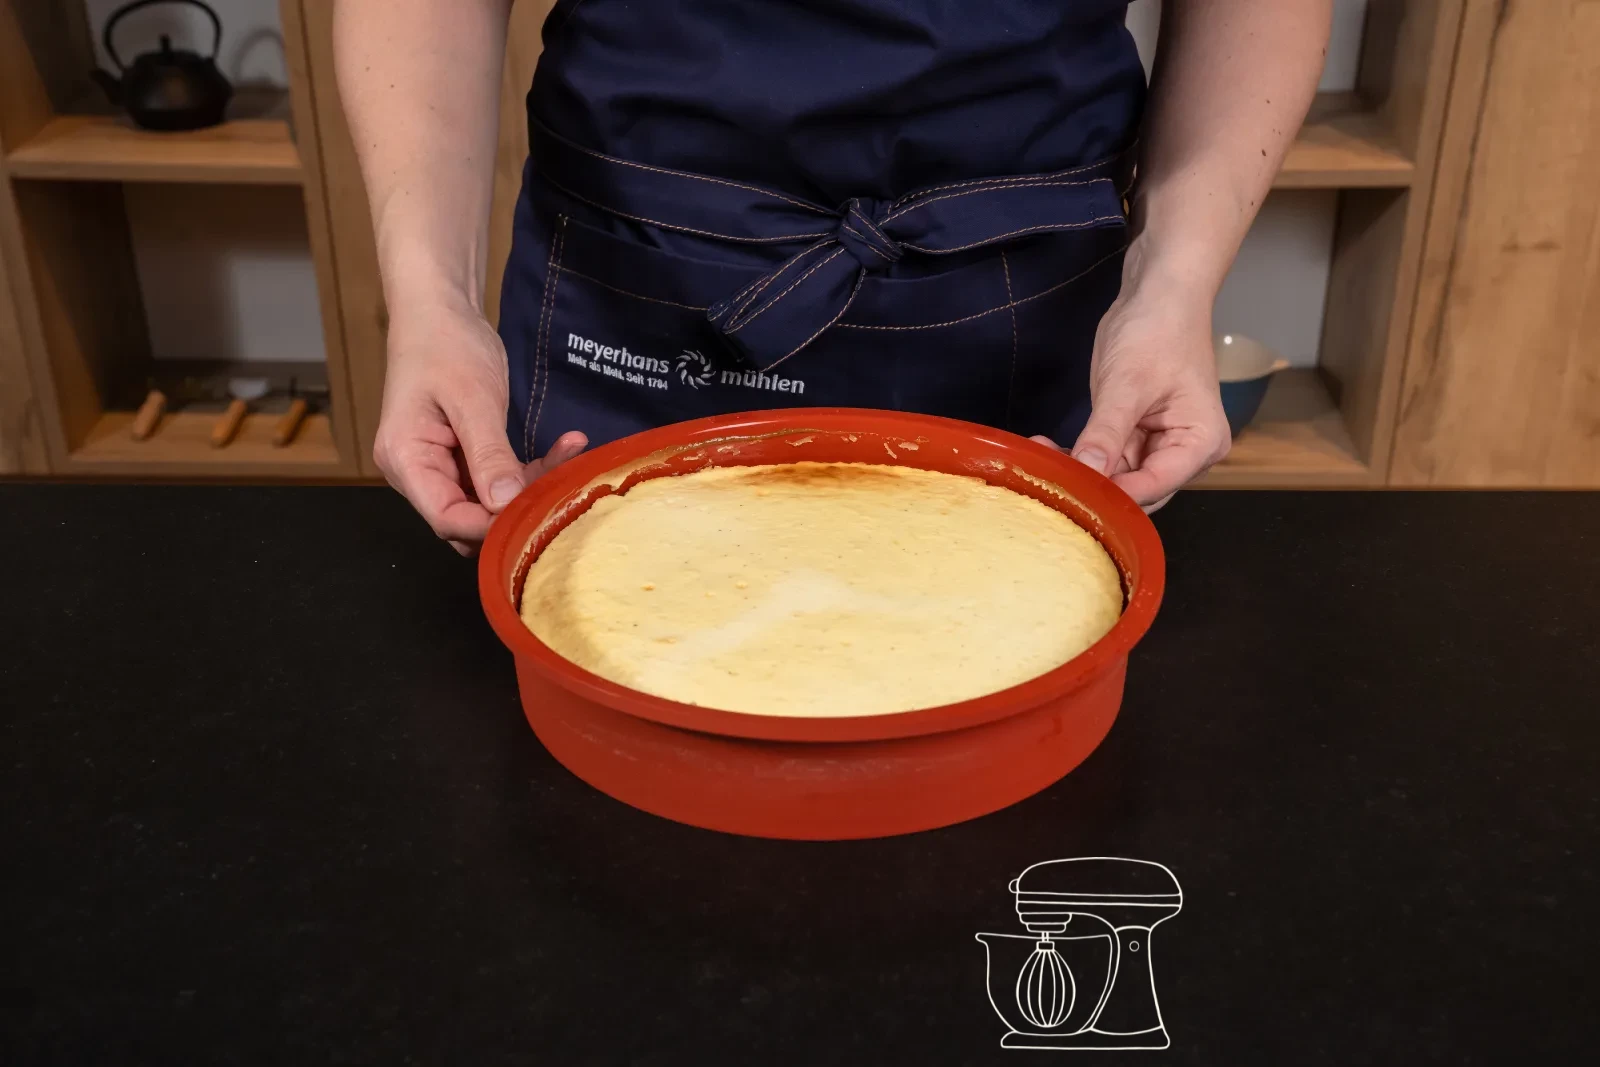
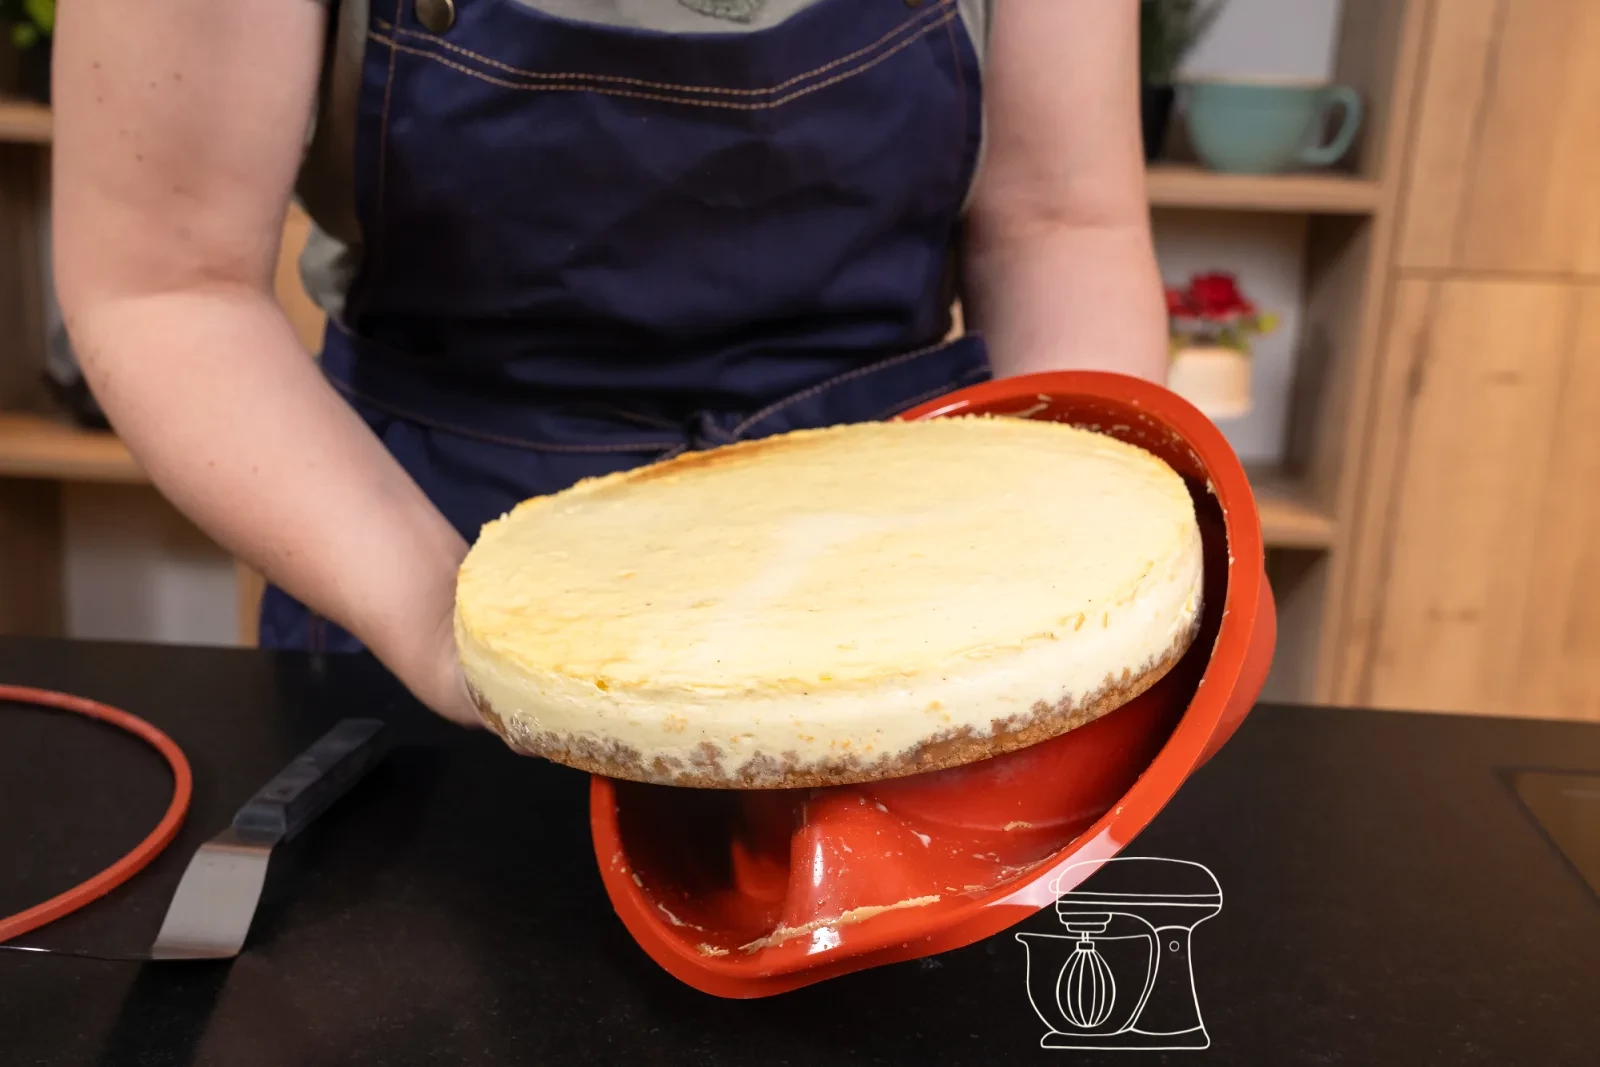
Only once it's properly cold do you remove it from the mold – and then it comes out all by itself, which is the beauty of silicone. Place it on a platter or a board. Up to this point it's a wonderful classic cheesecake. If you like, you can stop here. We'll keep going.
On a stick: cut, glaze, decorate
Cut into twelve equal pieces
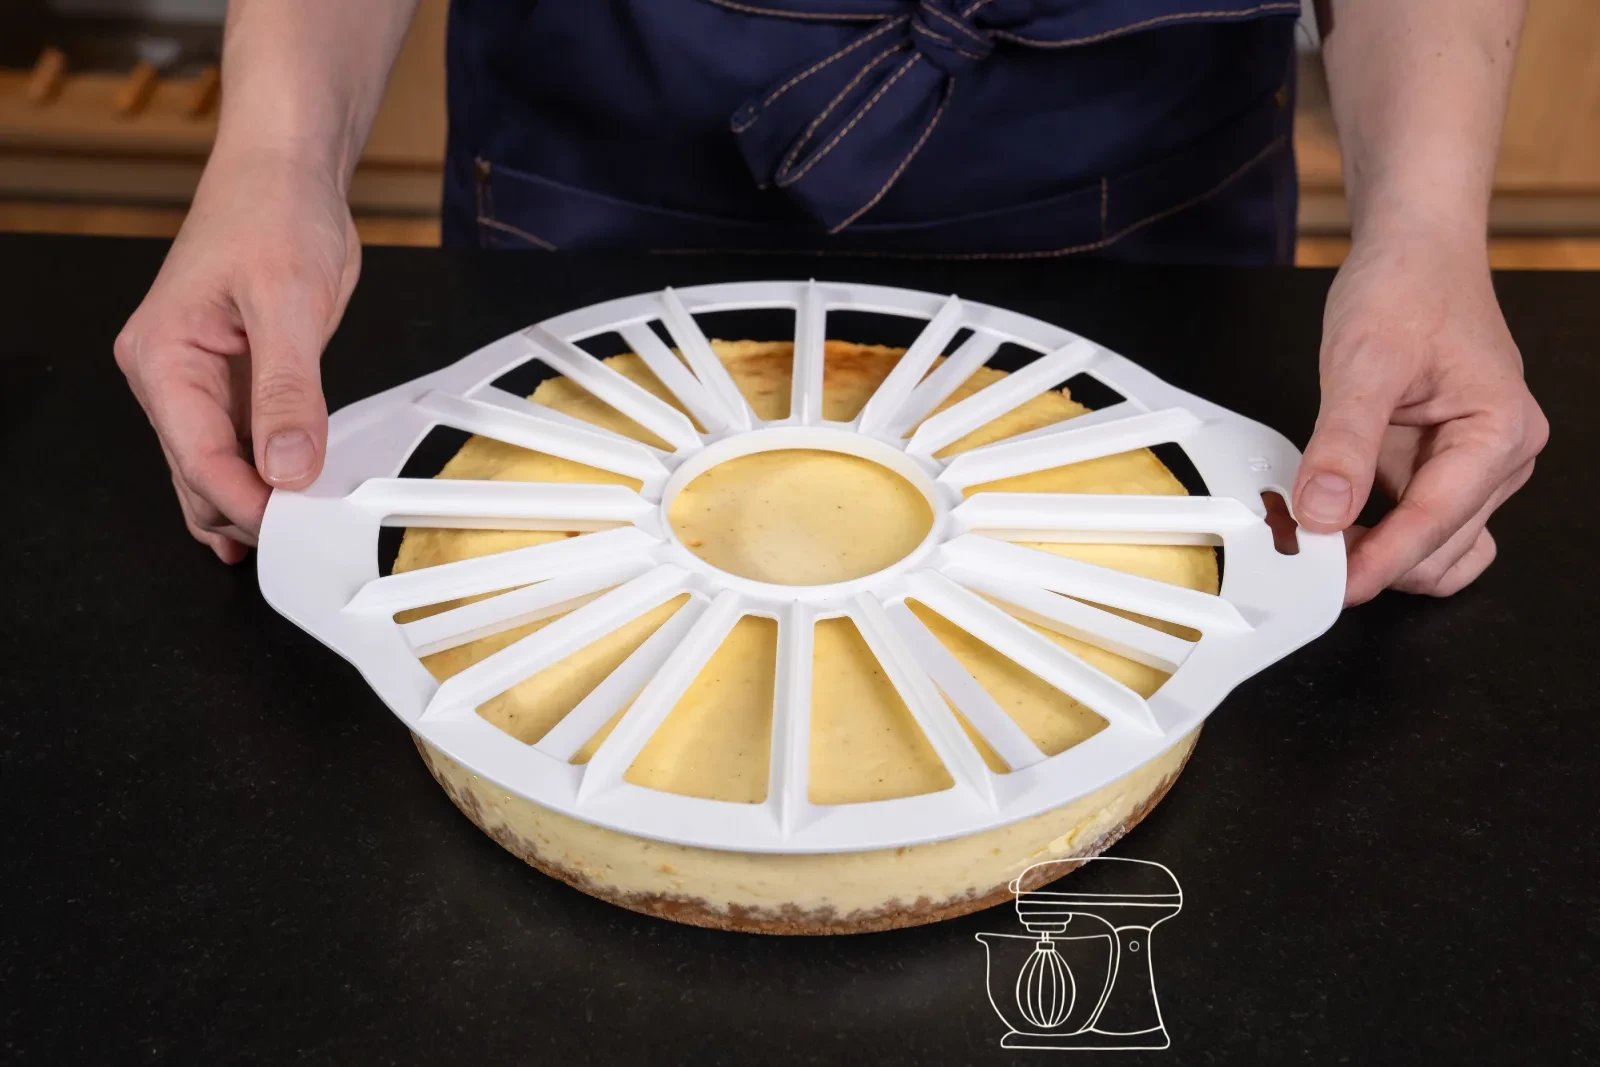
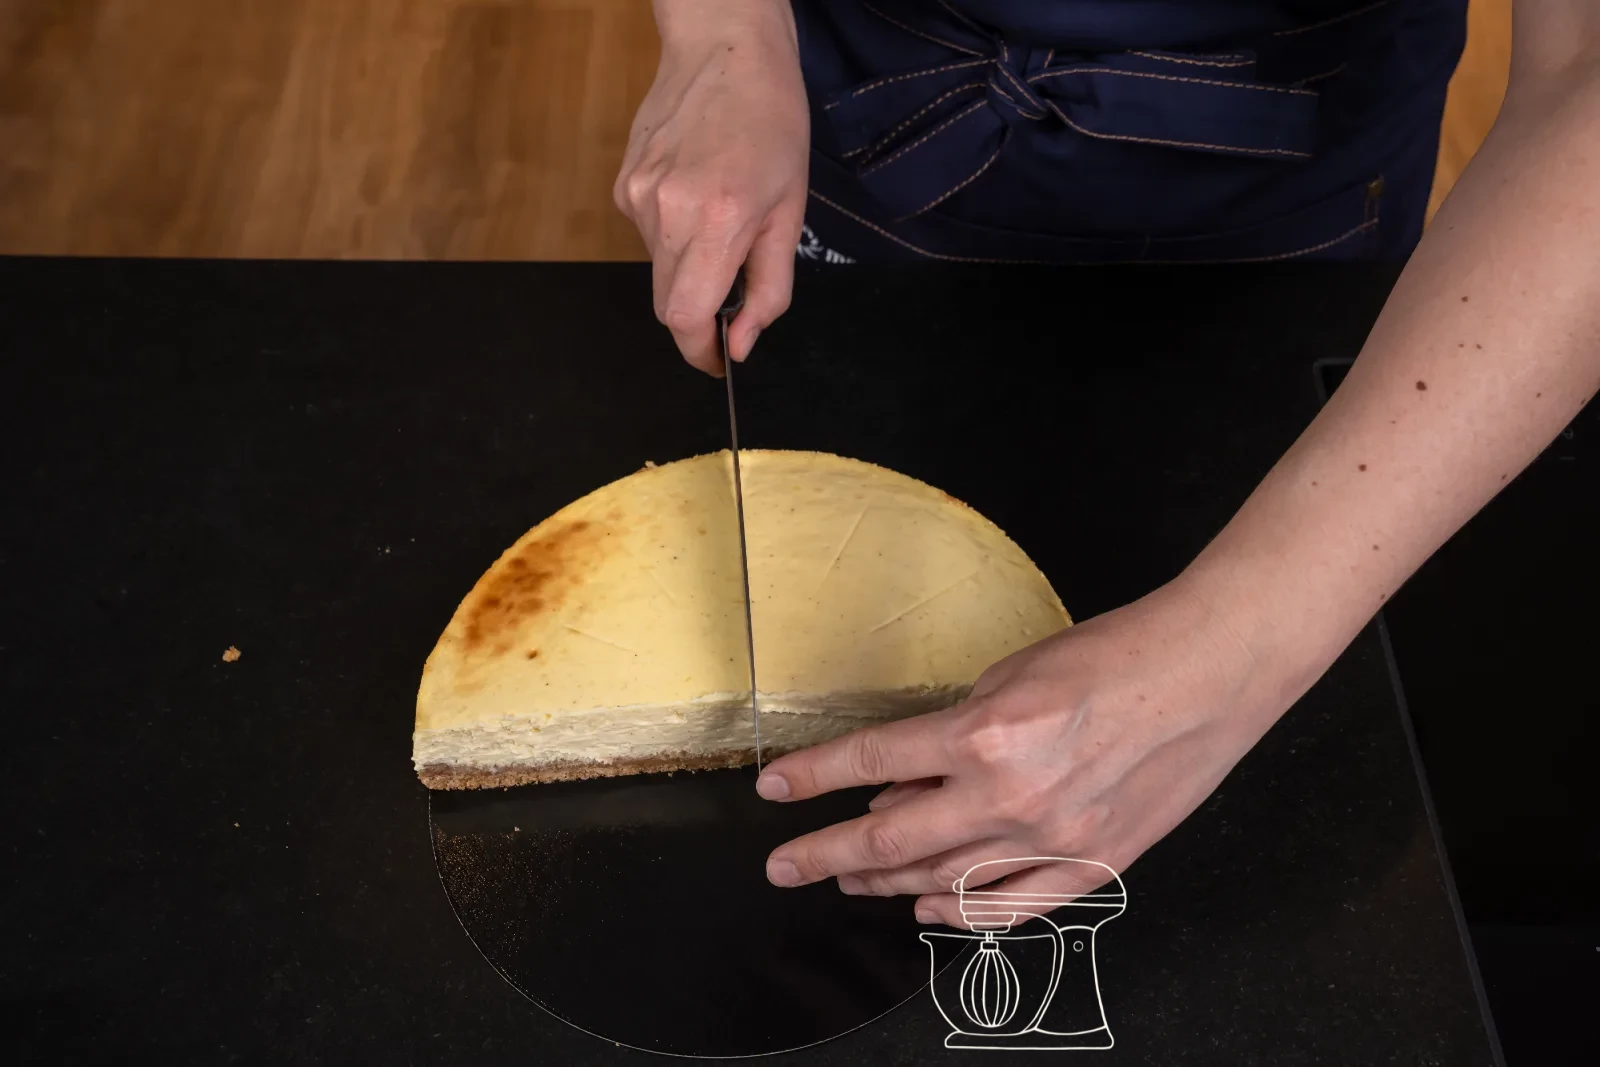
To make sure all the pieces are the same size, place the cake divider on the cold cheesecake and press it in lightly – the markings are enough to guide you.
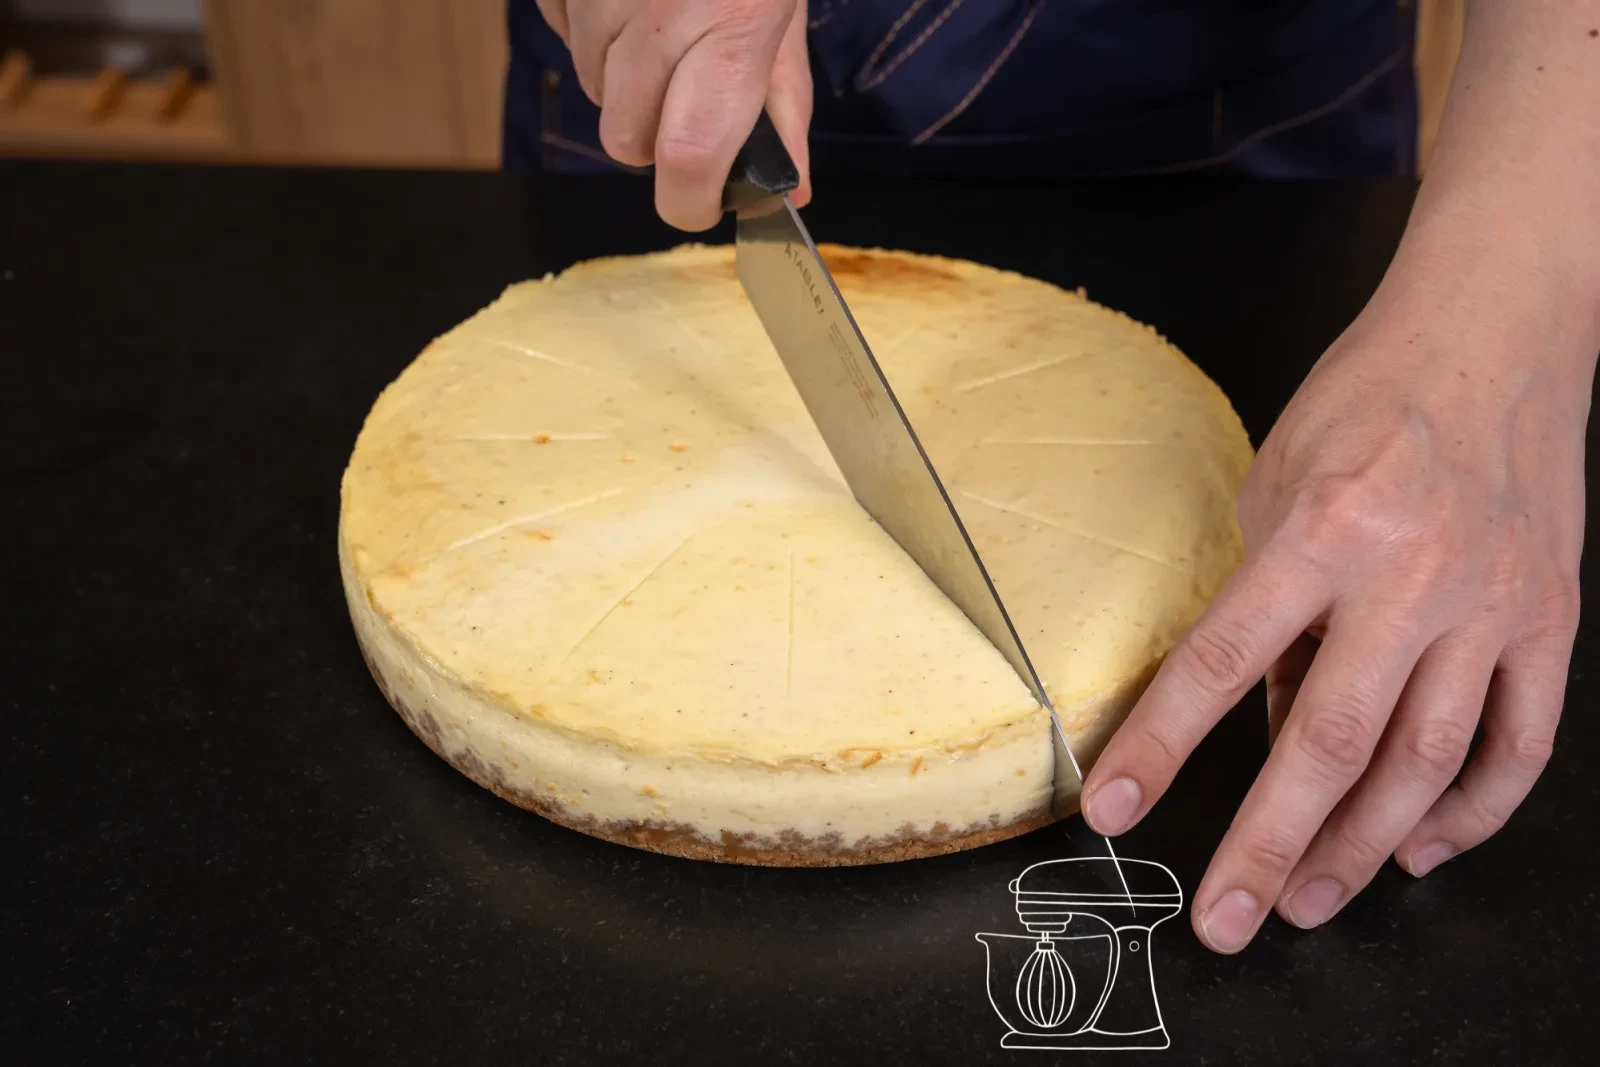
Then cut through with a long, smooth knife. Halve it, quarter it, and go on from there; that gives you the straightest cuts. Wipe the blade with kitchen paper between cuts; if you also briefly dip it in hot water and dry it off, you'll get really clean edges.
Insert wooden sticks and chill
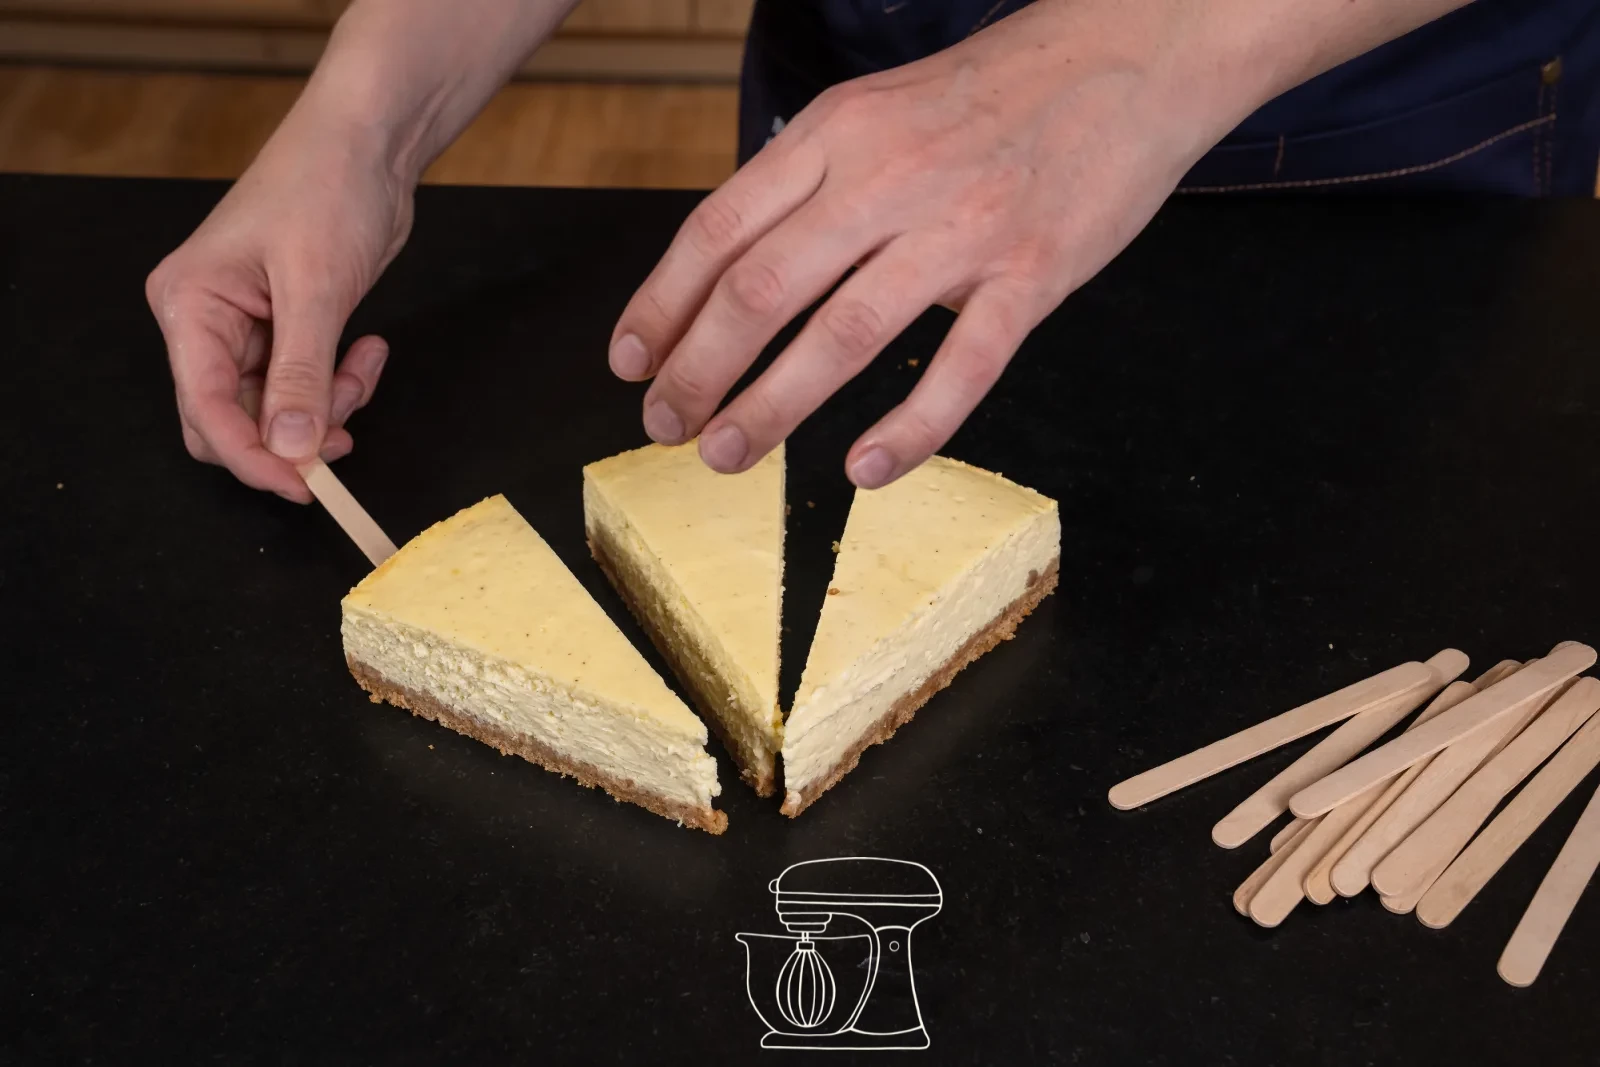
Pull the pieces slightly apart so you have room all around. Then push a wooden stick into each piece from the wide side – flat and centred, about halfway in. The stick should sit in the biscuit base and in the filling, then it will hold.
And now the most important step of the whole recipe: **put the pieces in the freezer for at least 30 minutes.** A fridge-cold cheesecake is still too soft for the warm icing – frozen, it keeps its shape, the icing sets immediately and stays even.
Wooden sticks for ice cream and small cakes, 50 pieces
Glazing – method 1: pouring over
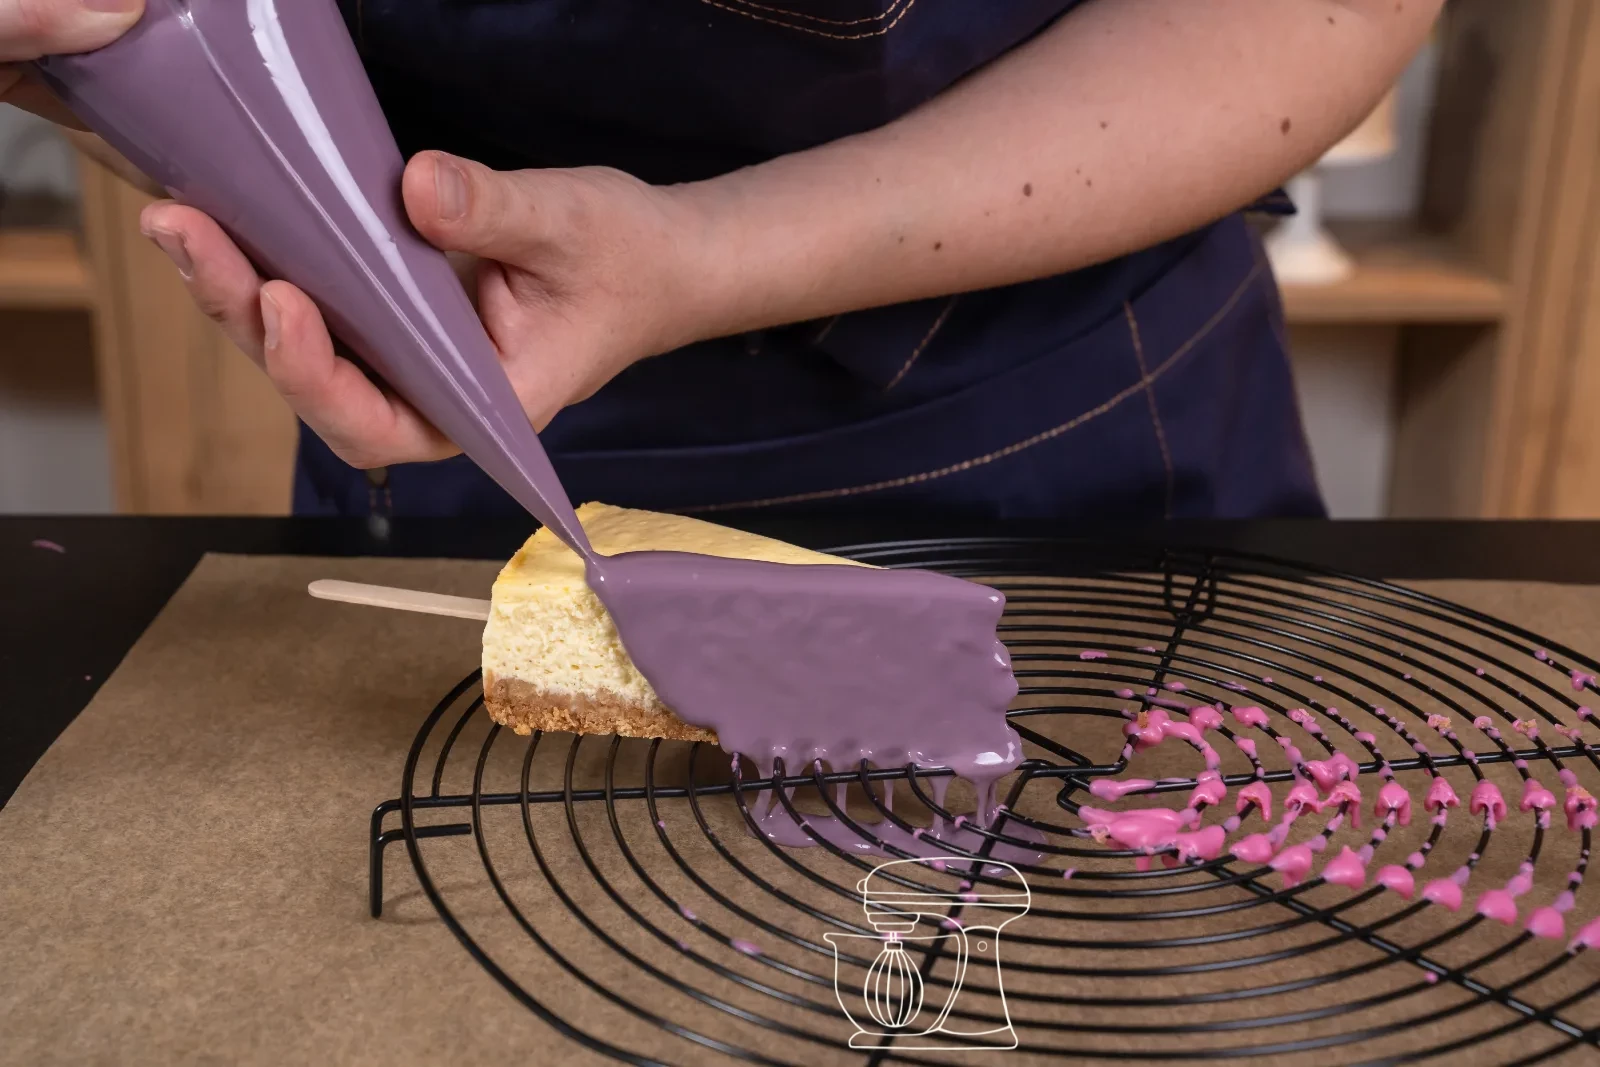
Melt the Deco melts as directed on the packet: in the microwave in short intervals of 20 to 30 seconds, stirring in between each time, or over a bain-marie. They should be runny but not hot – around 40 °C is enough. If it gets too hot, the mixture turns thick and dull.
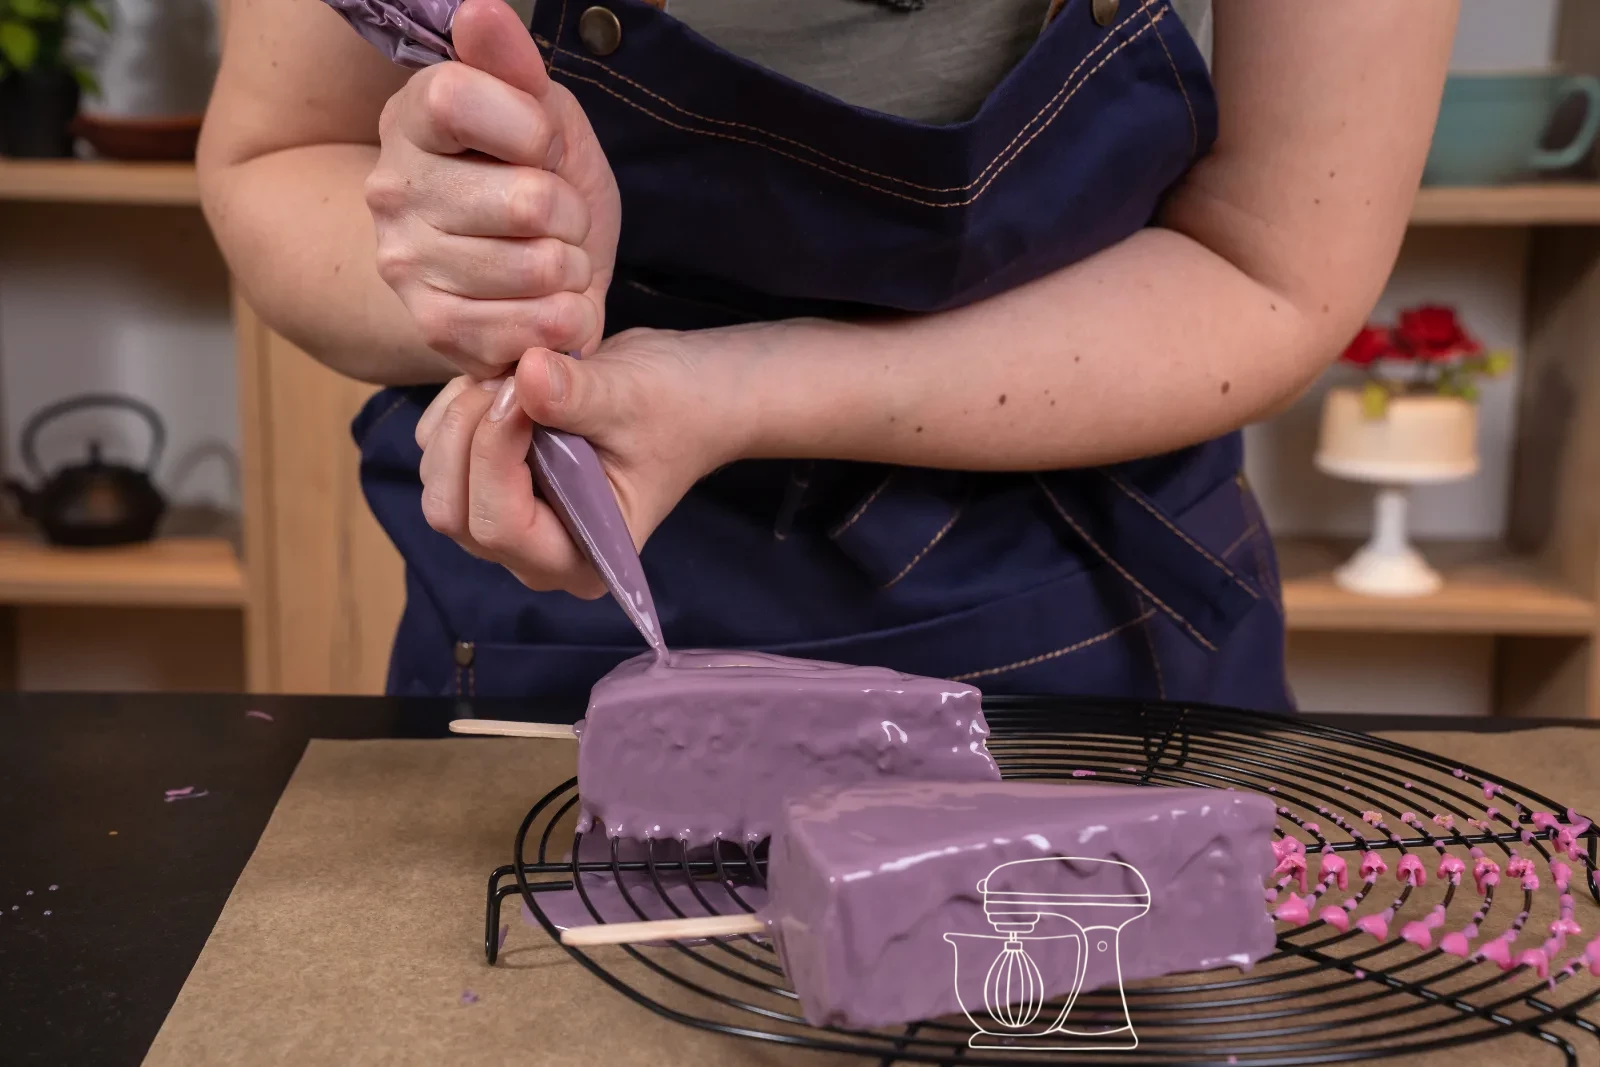
Place a Cake rack on a tray with baking paper, which will catch everything that spills over. Lay a frozen piece on the rack and pour the icing over it from the tip so that it runs over the edges. Any excess drips through. Work quickly: on the cold piece the icing sets in seconds.
Do this for each colour: violet, pink, white and dark. That way each piece gets its own look – and together they look like a fan of colours.
**Alternative – method 2: dipping.** Instead of pouring over, you can also dip the pieces into the icing. For this they need to be **frozen right through**, at least one to two hours, and the container has to be deep enough. Dip the piece in by the stick, pull it out slowly and let it drip off briefly. This gives a particularly even coating – but needs considerably more icing. Both ways work; we poured ours over.
Deco melts: Violet
Deco melts: Pink
Deco melts - White
Dark Cake icing for cakes & biscuits, 250 g
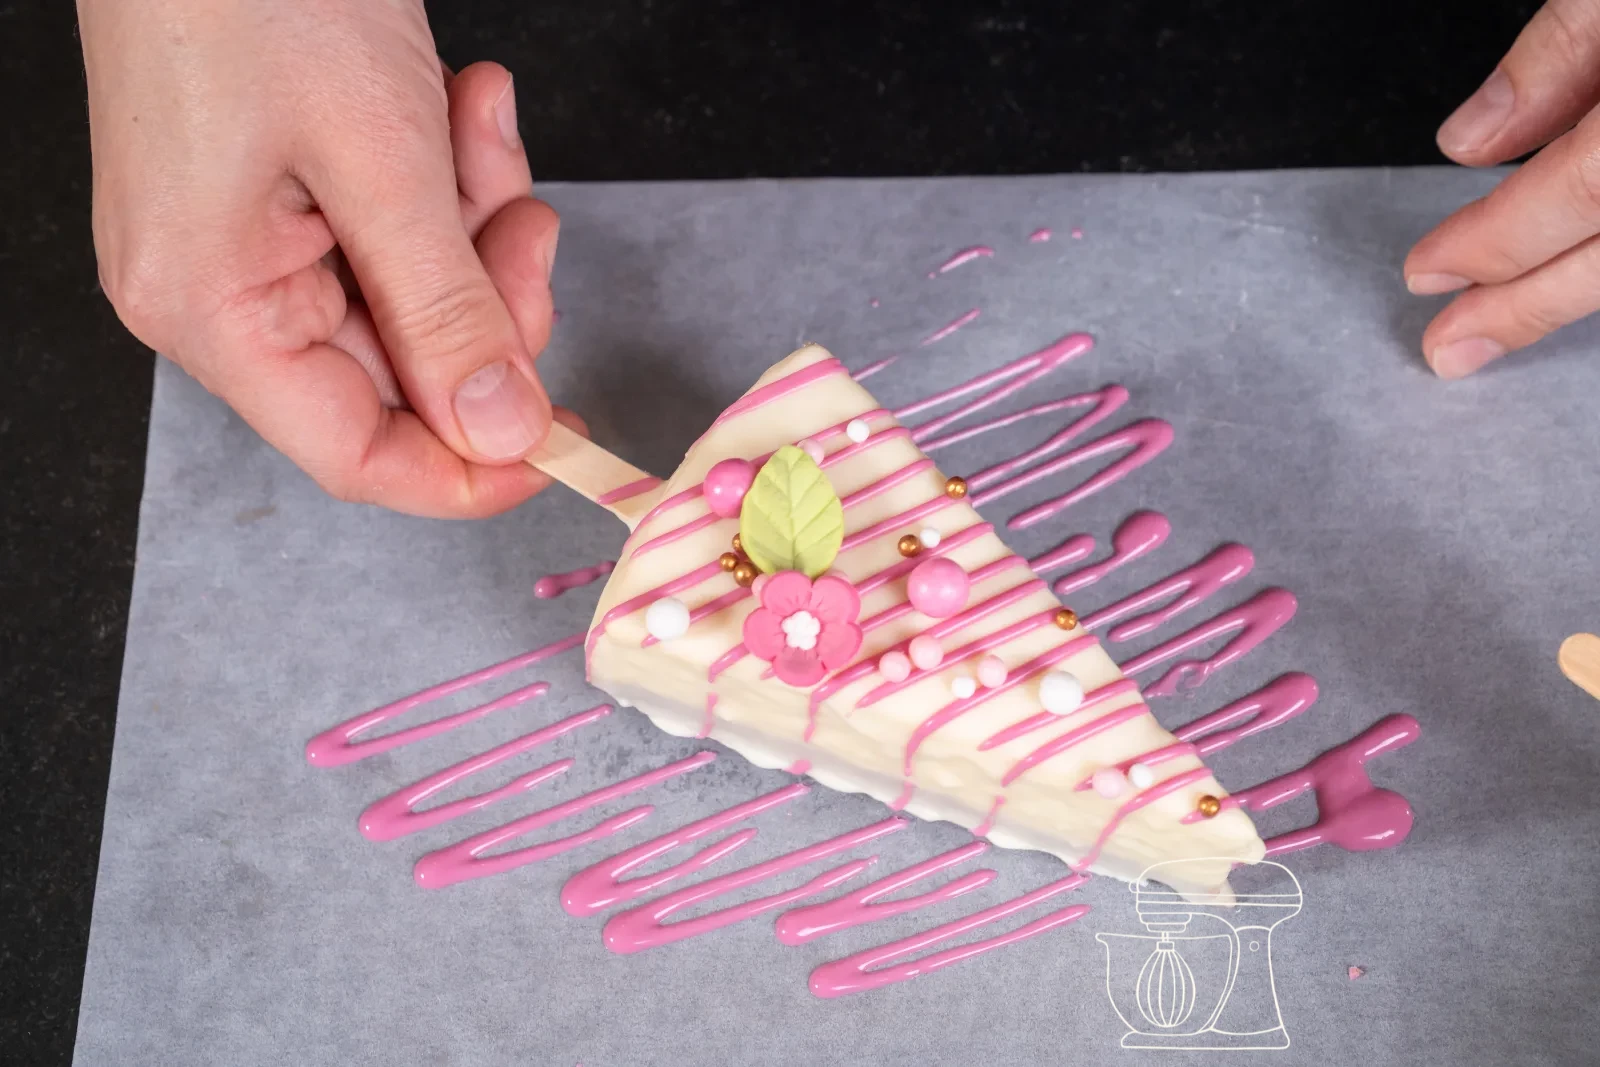
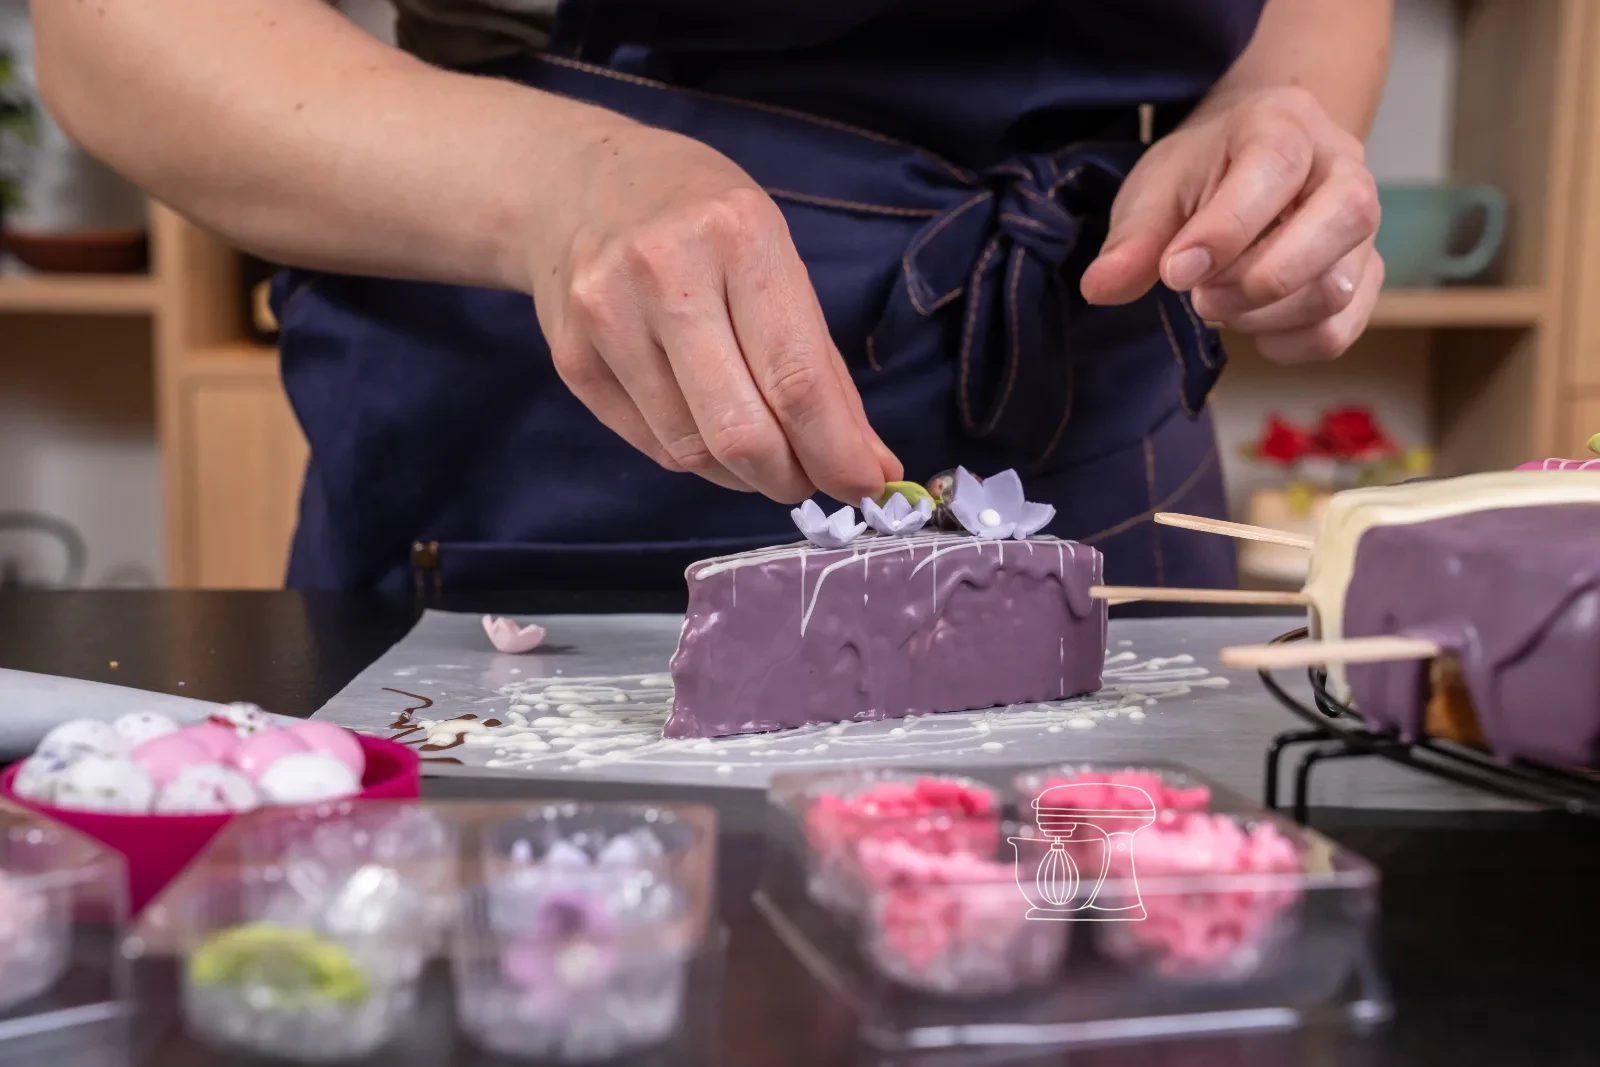
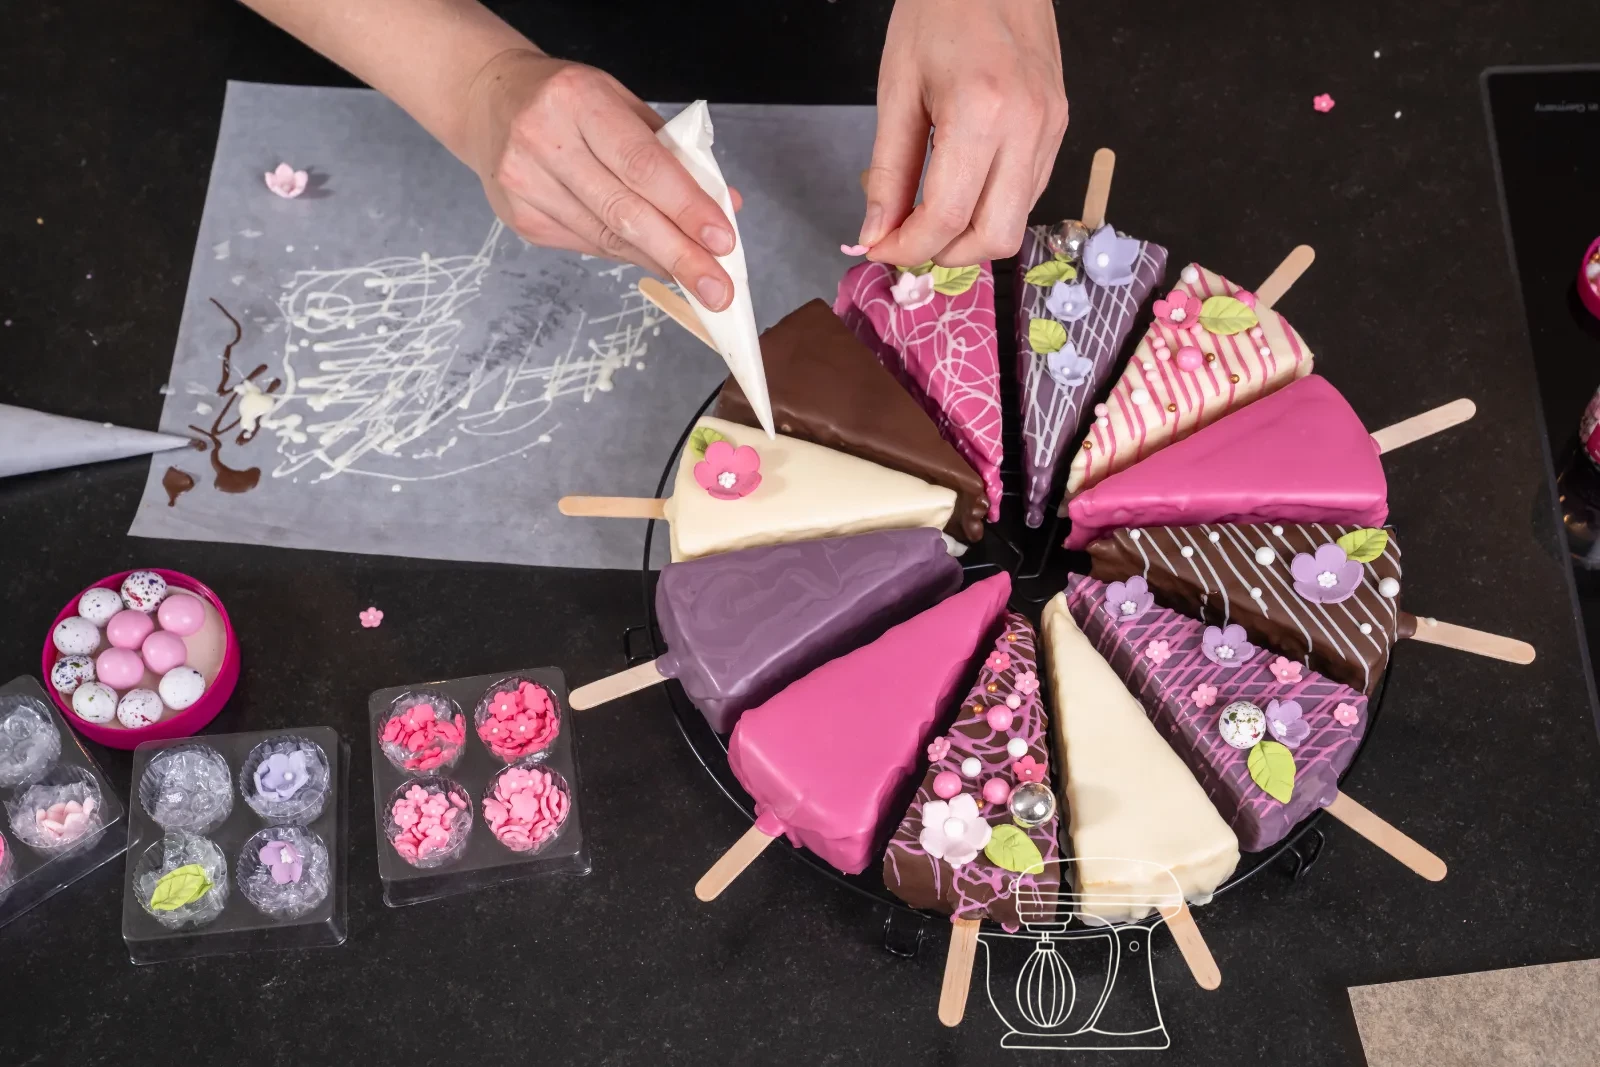
Decorating – here you can do whatever you like
As long as the icing hasn't fully set, everything you place on it will hold. After that you'll need a dab of icing as glue.
We combined three things: fine lines in a second colour, drawn with the icing bottle or a small Piping bag. Sugar flowers in white, violet and pink. And a few Sugar pearls for contrast.
Don't hold back – Sprinkles, edible gold leaf, chopped nuts, anything goes. It looks best when each piece is different and yet they all belong to the same family: stick to two or three colours and repeat them.
Deco melts: Pink
Icing bottles small opening Ø2.8mm - 250 ml
White and violet Sugar flowers
Light pink and dark pink Sugar flowers
Let it set and serve
Let the finished pieces set in the fridge – ten minutes is usually enough. Then take them out about ten minutes before serving: straight from the cold, cheesecake tastes of little, but at a slightly warmed temperature it tastes of everything.
Arranged in a circle on a round platter, with the stems pointing outwards, they look their best. And then you can watch as first the phones come out, and then the hands.
Cheesecake on a stick
Ingredients
BASE
FILLING
ICING AND DECORATION
Preparation
- Base: Crush 200 g of butter biscuits, mix with 100 g of melted butter, press into the silicone mold, pre-bake for 10 min at 175 °C fan.
- Filling: Stir the cream cheese until creamy, fold in the sugar and crème fraîche, sift in the starch, fold in the eggs one at a time – little air.
- Flavouring: Stir in the lemon zest and natural extract, pour the mixture onto the base.
- Water bath: Place the silicone mold in a larger dish, in the oven pour hot water halfway up, bake for 45 min at 175 °C.
- Cooling: Turn off the oven, leave the door slightly ajar, let stand for 1 hr. Then 1 hr at room temperature, after that overnight in the fridge.
- Portioning: Mark with the cake divider, cut into 12 pieces, insert the wooden sticks, 30 min in the freezer.
- Glazing: Melt the Deco melts at about 40 °C and pour over the frozen pieces on the cake rack.
- Decorating: Pipe lines, place the sugar flowers and pearls, let set in the fridge.
Nutritional values per 100 g
Storage & shelf life
Everything for this recipe
Recommended from our bakery — exactly the sizes the recipe was tested with.
Ingredients
Natural vanilla extract
Wooden sticks for ice cream and small cakes, 50 pieces
Deco melts: Purple
Deco melts: Pink
Deco melts - White
Dark cake icing for cakes & biscuits, 250 g
White and purple sugar flowers
Light pink and dark pink sugar flowers
Accessories
Silicone mold - Round - Cake tins diameter: 24cm
Tall square Cake tin - Square shape: 30 x 30
Rolling pin, 28 cm
Cake divider, 12 pieces
Stainless steel Cake rack, Ø 32 cm
Icing bottles small opening Ø2.8mm - 250 ml
Delivery in 1–2 working days · Free shipping from CHF 100
A lovely match
Not needed for the recipe — but it fits.
Deco melts: Green
Deco melts: Brown with caramel flavour
Deco melts: Light blue
Deco melts: Dark blue
Deco melts: Red
Deco melts: Orange
Deco melts - Yellow
Deco melts - Black
Deco melts natural white 1 kg
So they turn out perfectly, guaranteed
Only stir the cream cheese and eggs until they are combined. Every air bubble in the mixture expands during baking – and that's exactly what gives the cheesecake its cracks.
For this recipe you absolutely need a silicone mold: it's the only way to guarantee that no water gets into the cake in the water bath. A springform pan with a clip closure is not watertight here.
That's the difference between "quite nice" and "looks store-bought". A piece straight from the fridge is still soft: the warm icing softens the surface, streaks form and the edges fray. Half an hour in the freezer is enough for the icing to set instantly on contact and form a smooth, sealed shell.
This idea is a template, not a one-off dessert. The cheesecake stays the same, and with the icing and the decoration the whole look changes: orange and black with a spiderweb of dark icing and candy eyes for Halloween. Brown, gold and caramel with leaves and chopped nuts in autumn. Red, white and gold with stars and sugar pearls for Christmas. Pastels with sugar flowers in spring. And for a children's birthday, simply all the colours at once. Once you've made the recipe, you can dress it up anew for every occasion in the year.
Frequently asked questions
Usually too much air was beaten in or the cake cooled down too quickly. Only stir in the eggs until they are combined, and after baking let the cheesecake stand for an hour in the switched-off oven with the door slightly ajar.
Both work, and both look different. When you pour it over, the icing runs over the edges and forms fine drips – livelier, a little handmade. When you dip, you get a completely even, sealed shell, but the pieces really have to be frozen through and you need considerably more icing, because the container has to be deep enough. We poured it over: less icing, more colours, and you can make each piece different.
Yes, if two things are right. The stick has to sit flat and centred, about halfway into the piece, so that it lies in both the biscuit base and the filling. And the piece has to be frozen when you glaze it – the firm icing shell then acts like a coat and holds everything together. At room temperature they soften over time, so only take them out of the fridge shortly before serving.
Print recipe
Choose what should appear on the printout.
Related posts
 Juicy Matcha Muffins with Pecan Nuts & White Chocolate
Matcha Iced Latte & Coconut Variant
Pull-apart bread with fresh wild garlic pesto
Mini Banana Bread with Chocolate Chips
Juicy Matcha Muffins with Pecan Nuts & White Chocolate
Matcha Iced Latte & Coconut Variant
Pull-apart bread with fresh wild garlic pesto
Mini Banana Bread with Chocolate Chips
Leave a comment